DIY Natural Skin Care: Honey and Glycerine Recipes

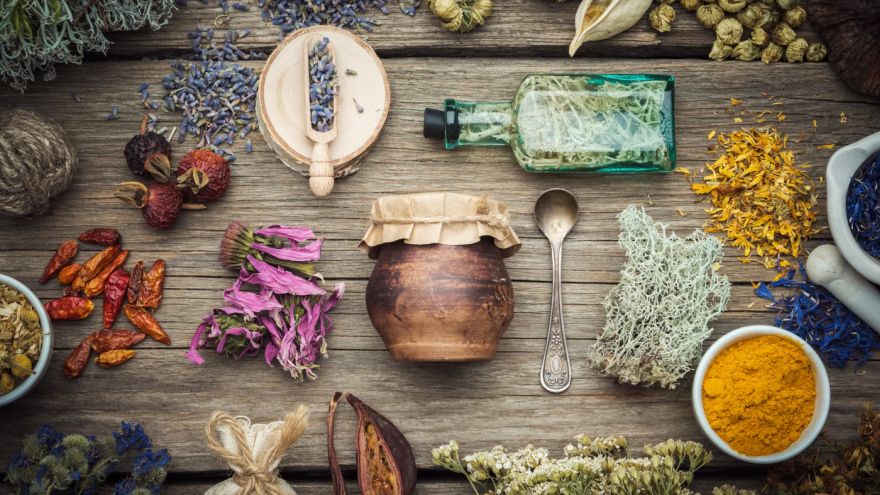
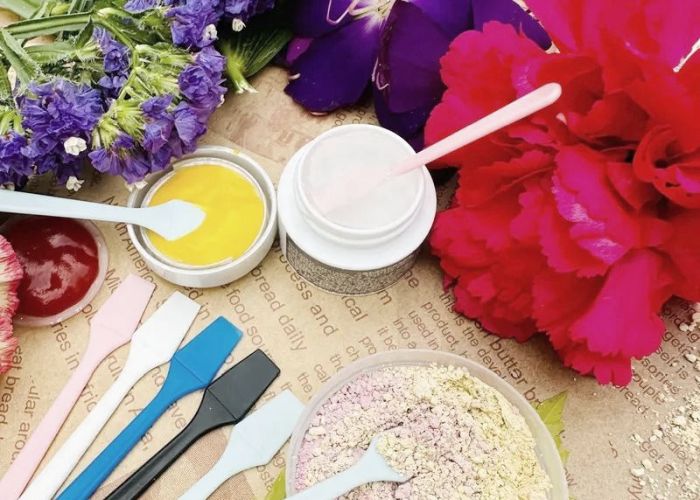
In this blog on natural cosmetics, we aim to provide our readers with enjoyable and informal recipes for natural cosmetics for face and body skin care that are as simple and free of synthetic preservatives as possible.

Today, we know that many migraines, swellings, allergies and atopic dermatitis are often caused by ‘dysbiosis‘ (an imbalance in the microbiota), which can be oral, intestinal and even cutaneous, as we know that microorganisms are everywhere: in our intestines, in our mouth, on our skin, in our mucous membranes… and we know the importance of the “eubiosis” (balance) of all this microbiota that is part of us. This microbiota is responsible for making us feel good after eating, for our skin looking beautiful and free of eczema, and even for us not feeling tired and stressed and for our memory working accurately.

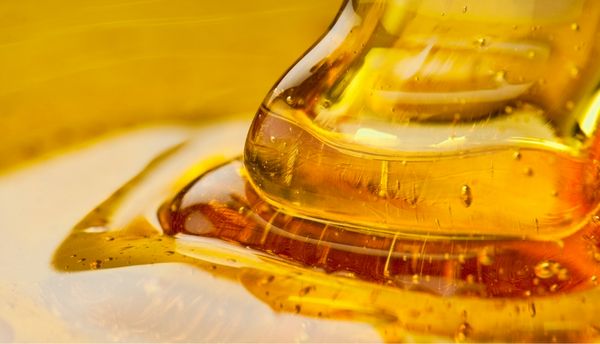
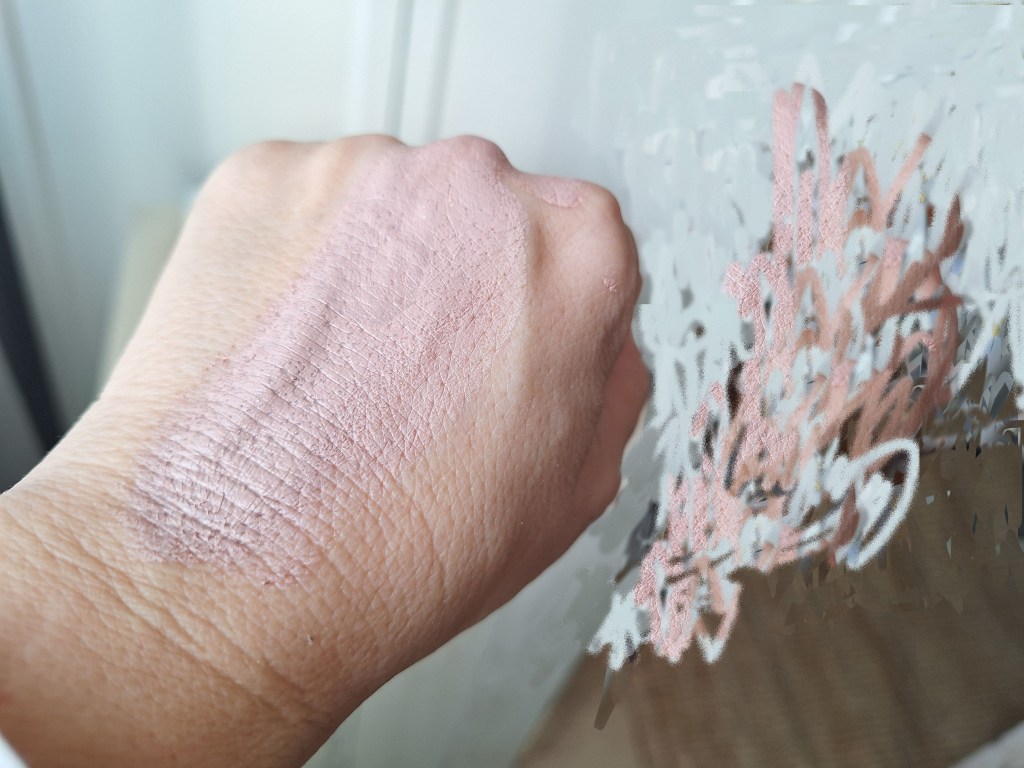
You may have noticed that honey has been grabbing all the attention in natural skin care lately. This is because honey, in addition to being a highly bioavailable natural product, has the ability to regulate our skin microflora , facilitating its natural balance or “eubiosis” as it combats harmful microorganisms by regulating and respecting the eubiotic microflora. This is the opposite of what happens with preservatives and synthetic antibiotics. And that is what it is all about: finding substances with “regulating” rather than biocidal properties to treat health problems in general and skin problems in particular.

Honey has a special place in any skincare routine thanks to its healing properties and its ability to soften, brighten, nourish and regulate the skin’s microflora.

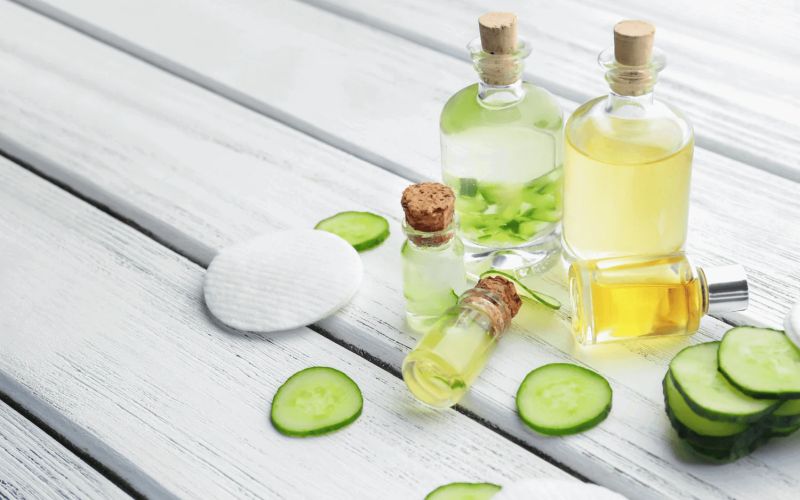
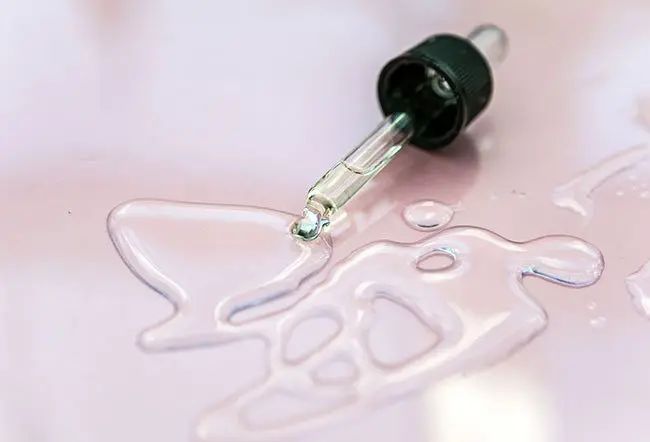
The same is true of vegetable glycerine, another product widely used in natural cosmetics because it allows us to obtain plant extracts that do not degrade, and because when added to a formulation it contributes to the preservation of the whole and has an important moisturising effect on the skin. This organic and bioavailable substance helps to maintain the hydration of the epidermis and mitigate dermatological problems such as acne or dermatitis.

HONEY: A valuable ingredient in homemade natural cosmetics

If you’ve never thought about including honey in your skincare routine, you’re in for a surprise. In this article, we explore why honey is good for the skin, six benefits of honey for the skin that you may not know about, and how to incorporate honey into your daily skincare routine.

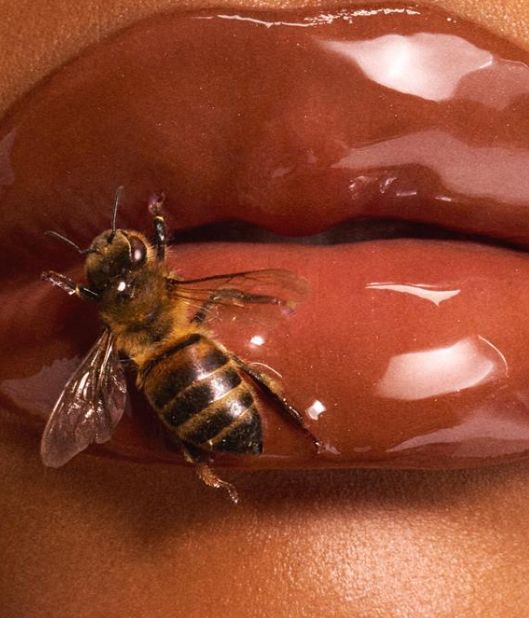
BEES BEAUTIFY OUR LIVES

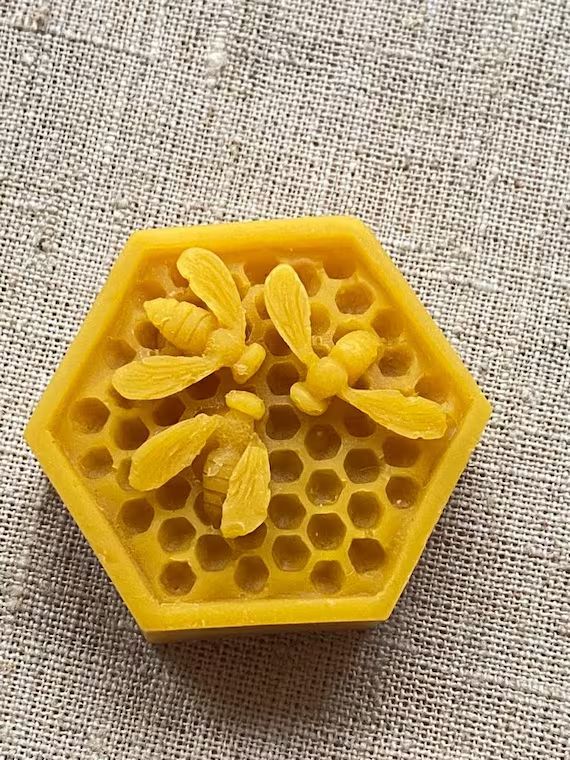
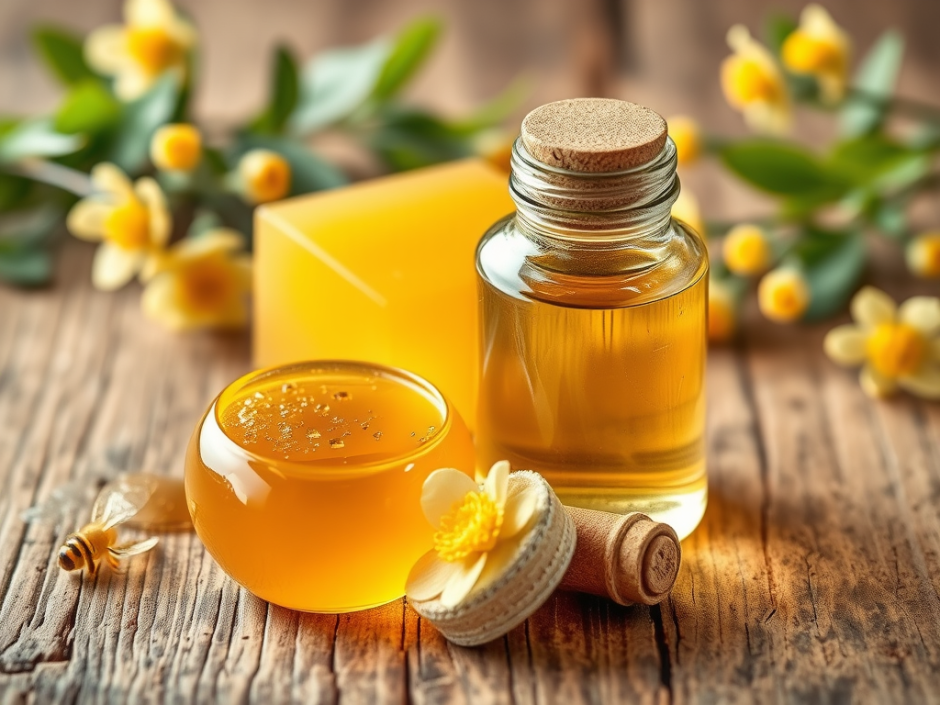
Bees are crucial in natural cosmetics thanks to ingredients such as wax, honey, propolis, and venom, which offer benefits such as hydration, protection, and regeneration. Beeswax forms a protective barrier, honey is a natural moisturiser and antioxidant, propolis has antibacterial properties, and bee venom is used for its Botox-like tightening effect. These ingredients are used in a wide range of products, from creams and balms to shampoos and make-up.

Therefore, from the beeswax we use to emulsify our creams and balms, to the propolis tincture or honey we use in our homemade cosmetic preparations, all these natural active ingredients come from bees.

And why is this so and not otherwise?

It is because honey and its derivatives are organic products with high bioavailability. There is a reason why bees are said to come from the planet Venus. Without them and their products, it would be unthinkable to conceive of homemade cosmetics for moisturising and beautifying.

KEY INGREDIENTS FROM THE HIVE AND THEIR BENEFITS:

  • Beeswax:
    • Protection: Creates a natural barrier that retains moisture and protects the skin from external aggressors such as wind and cold, without clogging the pores.
    • Hydration: It is an excellent moisturiser, leaving the skin supple and soft.
    • Uses: Found in creams, lip balms, lipsticks and hand lotions.
  • Honey:
    • Hydration and shine: A natural moisturiser that hydrates and adds shine to hair and skin.
    • Antioxidant and antibacterial: Protects against free radicals and is useful for treating acne and inflammation.
    • Uses: Found in creams, masks, conditioners, and exfoliants.
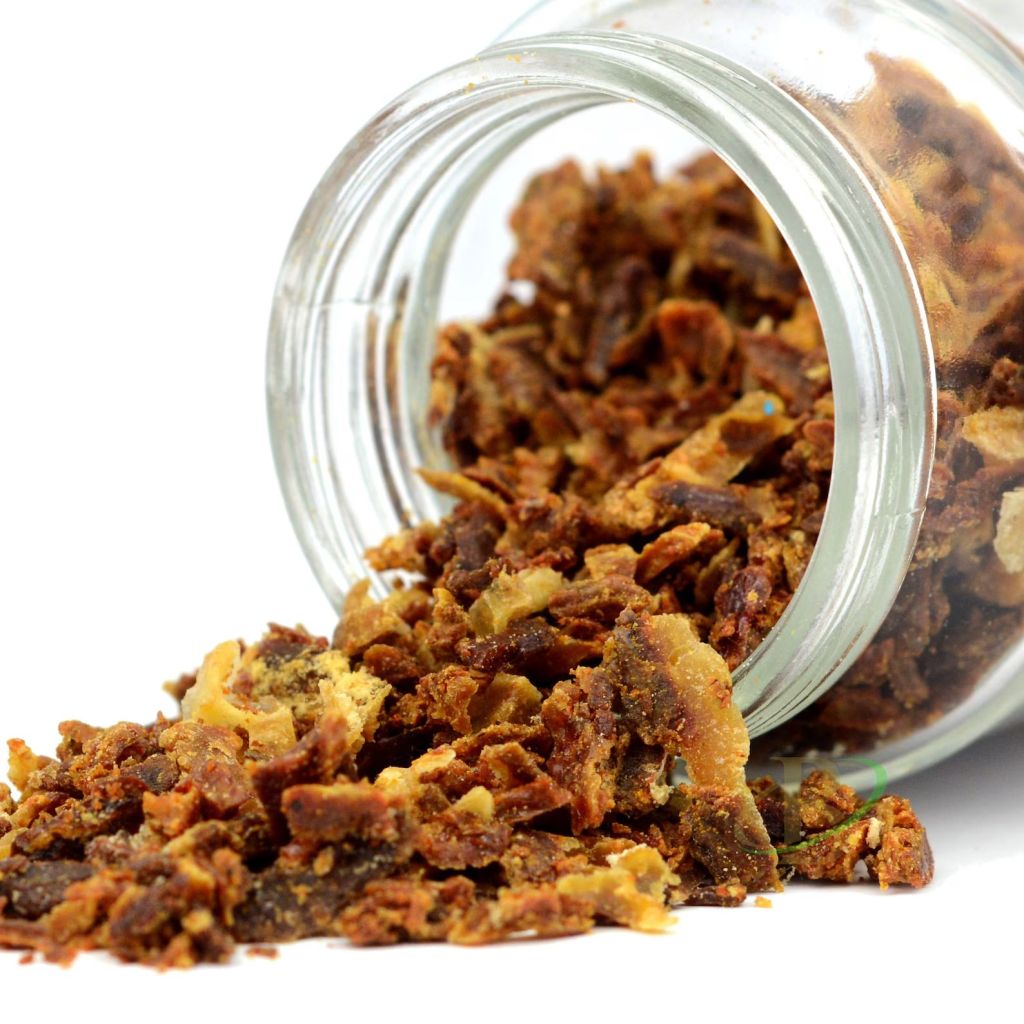
  • Propolis:
    • Antibacterial and antifungal: Helps fight acne and promotes a healthy complexion.
    • Uses: Found in cleansers, serums and spot treatments.
  • Bee venom:
    • Lifting effect: Stimulates collagen and elastin production for firmer skin, with a tightening effect similar to Botox.
    • Uses: Used in anti-ageing creams and treatments.

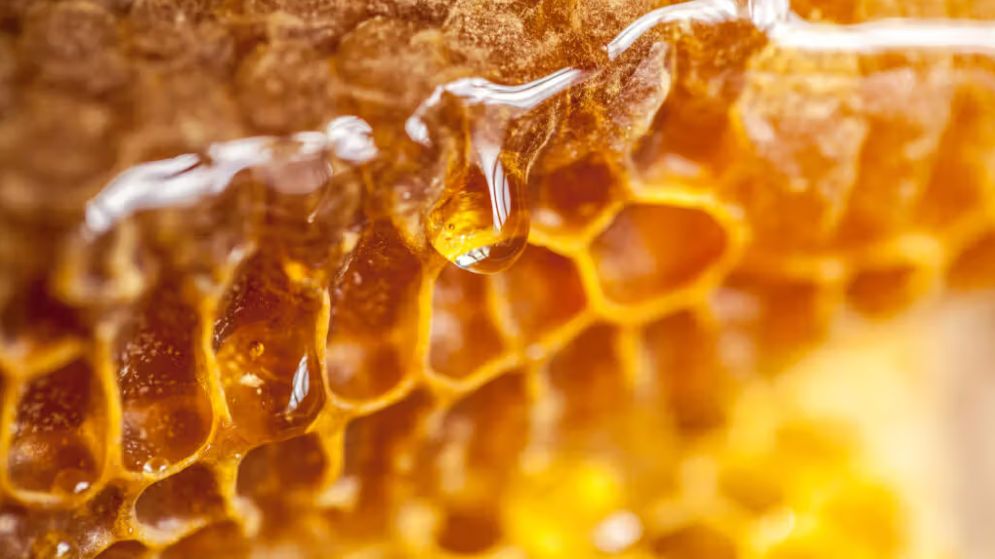
WHY IS HONEY GOOD FOR THE SKIN?

Studies such as this one from the link: https://pubmed.ncbi.nlm.nih.gov/24305429/ confirm that honey has numerous components that promote skin health. Manuka honey in particular. Below is an overview of its therapeutic properties:

Anti-inflammatory properties: Honey has a strong anti-inflammatory effect when applied topically, making it useful for a variety of inflammatory skin conditions, such as eczema, psoriasis, and atopic dermatitis.

Antimicrobial and antibacterial properties: Honey has the ability to fight skin infections thanks to its powerful antimicrobial, antibacterial and antifungal properties.

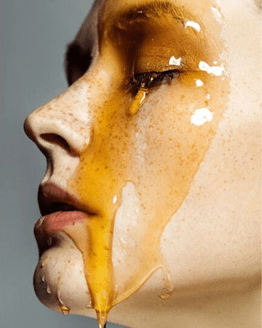
Promotes healing and cell regeneration: Due to Manuka honey’s unique ability to promote healing and cell regeneration, it is widely used by medical professionals for wound and burn care. Honey is also an effective remedy for chapped and dry lips.

Natural moisturiser and hydrator: Honey is a natural moisturiser and hydrator. It draws moisture into the skin, making it useful for treating dry skin and combating ageing.

Beneficial nutrients: Honey contains amino acids, antioxidants, vitamins, and minerals that are beneficial for fighting free radicals and improving overall skin health.

SIX BENEFITS OF HONEY FOR THE SKIN THAT WILL SURPRISE YOU

Now that you know why honey is good for your skin, let’s explore six benefits of honey for your skin that you may not be aware of.

1. Honey deeply hydrates and moisturises the skin.

The natural moisturising properties of honey make it an effective moisturiser. The enzymatic activity of honey allows it to penetrate deep into the skin and provide hydration to the underlying layers. The result is smoother, softer skin with a natural, radiant glow.

2. Honey reduces the signs of premature ageing.

Honey attracts moisture from the air and retains it in the skin. This extra hydration gives the skin a fresh, youthful glow and greater suppleness, making fine lines and wrinkles less visible. Honey also contains natural antioxidants that fight free radicals, one of the main causes of premature ageing.

3. Honey is an effective pore cleanser and gentle exfoliant.

Honey is naturally antibacterial and exfoliating. These properties make it an effective natural pore cleanser to remove deep dirt and debris that can clog pores and contribute to skin problems.

4. Honey lightens scars and hyperpigmentation.

Honey contains a small amount of hydrogen peroxide. This gives it gentle lightening properties, which help reduce acne scars and hyperpigmentation over time. These same properties also make honey an effective choice for brightening a dull complexion.

5. Honey fights acne and breakouts.

The antibacterial and anti-inflammatory effects of honey play an important role in reducing acne and breakouts. These properties reduce the bacteria that cause pimples and blackheads. It also treats the redness and inflammation associated with breakouts.

6. Honey soothes sunburn.

Honey is commonly used in medical settings for the treatment of burns due to its ability to promote healing of damaged tissue and reduce inflammation. These same benefits can be useful for soothing and healing sunburn at home.

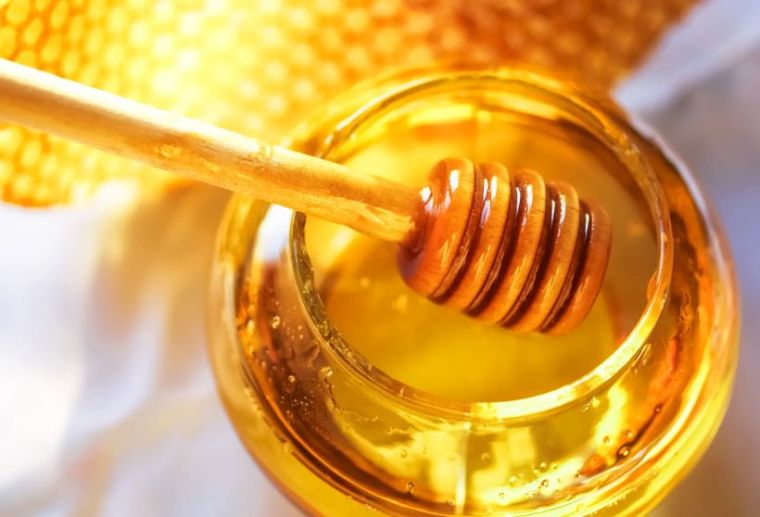
HOW TO USE HONEY FOR YOUR SKIN

There are many ways to reap the benefits of honey for your skin. Here are a few that you can easily incorporate into your daily skincare routine.

OUR HOME RECIPES WITH HONEY

Honey has the unique ability to promote skin cell regeneration and healing, while softening, brightening and lightening the skin. Incorporating honey into our daily routine promotes skin health naturally, making it an essential part of any skincare regimen.

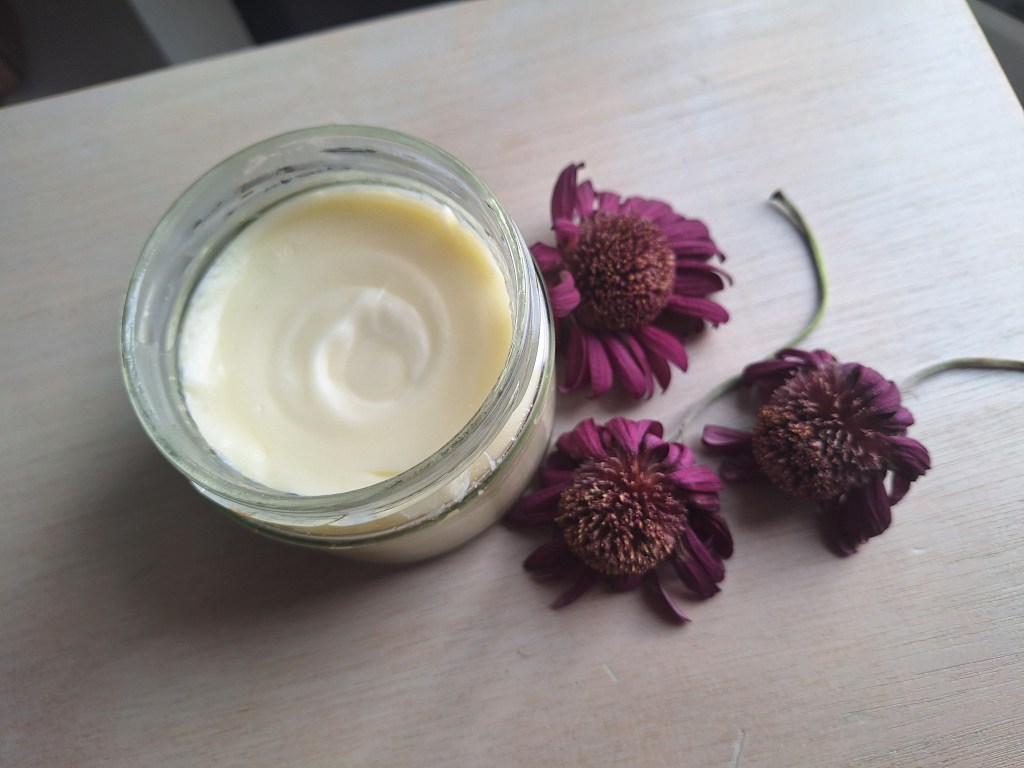
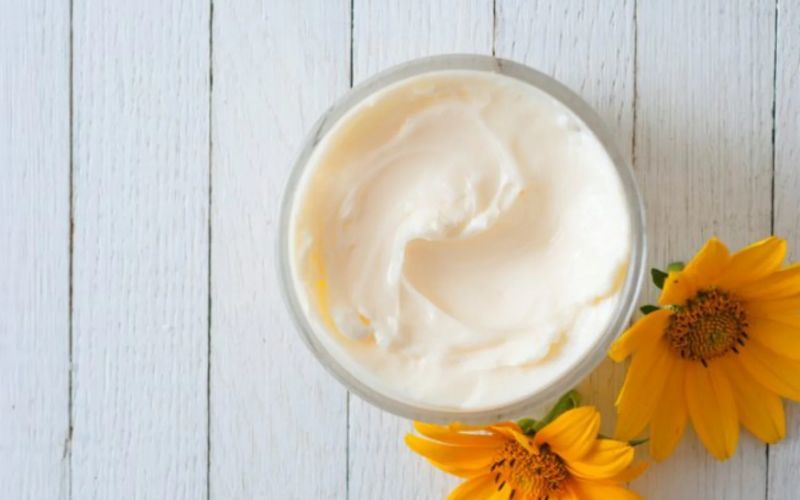
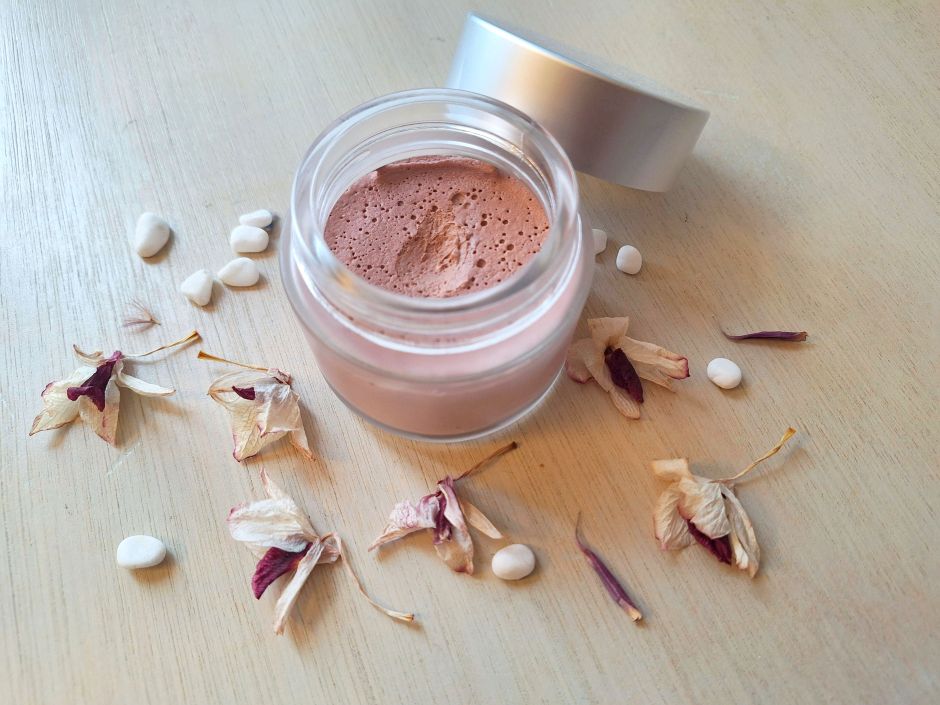
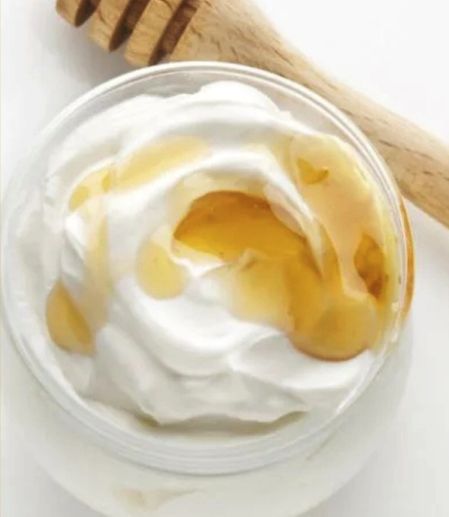
REGENERATING FACE MASK WITH NATURAL HONEY

You won’t find more natural and nourishing ingredients for your skin than honey and yoghurt. This homemade mask consists of a simple mixture of both. A simple formula for a luxurious treatment at home.

You only need two ingredients, preferably organic:

One tablespoon of organic honey, such as orange blossom honey, manuka honey, etc.

One tablespoon of natural yoghurt (unsweetened).

Mix both ingredients in a bowl until you obtain a smooth paste. Apply to a clean face, avoiding the eye area, and leave on for 15-20 minutes. Remove with warm water and feel the results.

You will notice your skin is incredibly soft and radiant. The secret is to use pure honey so that all its nutrients penetrate the skin.

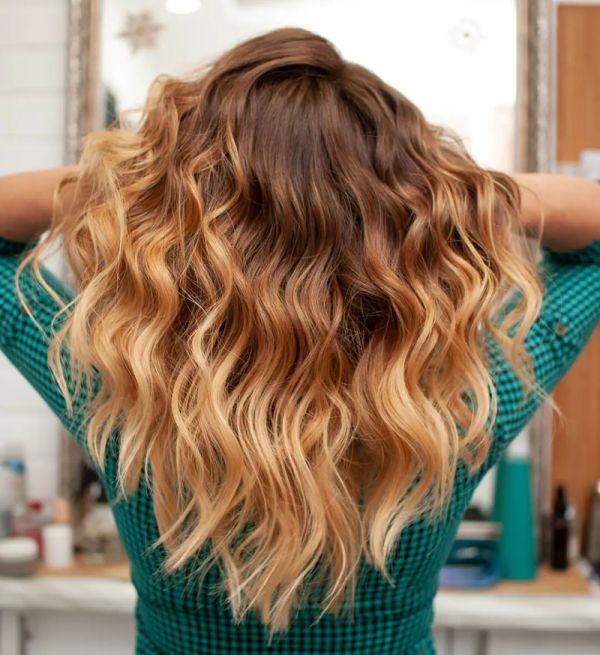
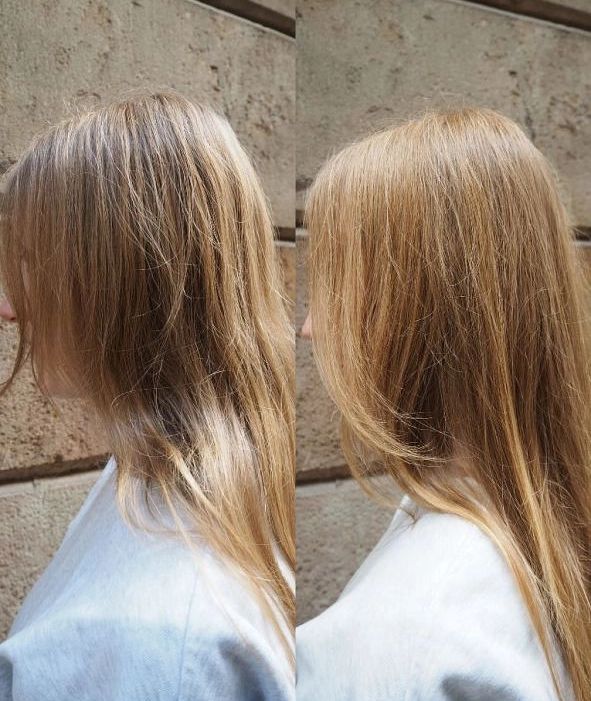
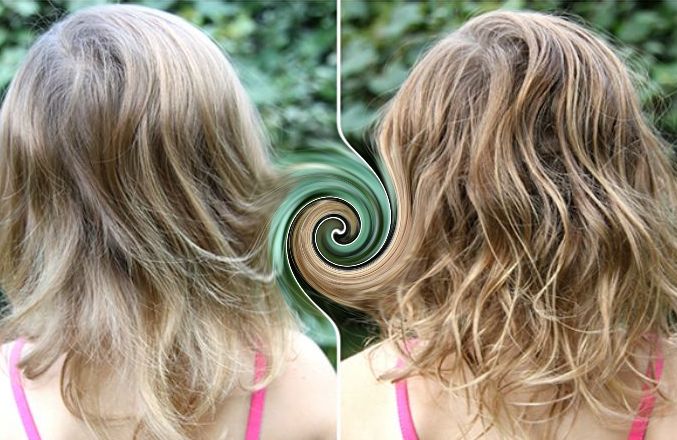
HAIR TREATMENT FOR “Split Ends”

Formulas from the hive are also a gift for your hair. To restore its life and shine, you can prepare this nourishing treatment.

Mix a couple of tablespoons of honey with a few drops of olive oil. Apply the mixture from the middle to the ends, wrap your hair in a warm towel and let the magic work for 30 minutes. Then rinse thoroughly with water.

Your hair will be stronger, shinier and silkier. Honey nourishes the hair follicle and helps seal in moisture, protecting it from external aggressions. For optimal results, the key is to use honey that retains all its properties. For example, raw, unfiltered honey.

Oh, and if you have a little of this mixture left over, don’t hesitate to apply it wherever you notice your skin is dry or tight. You’ll see that it works wonders there too.

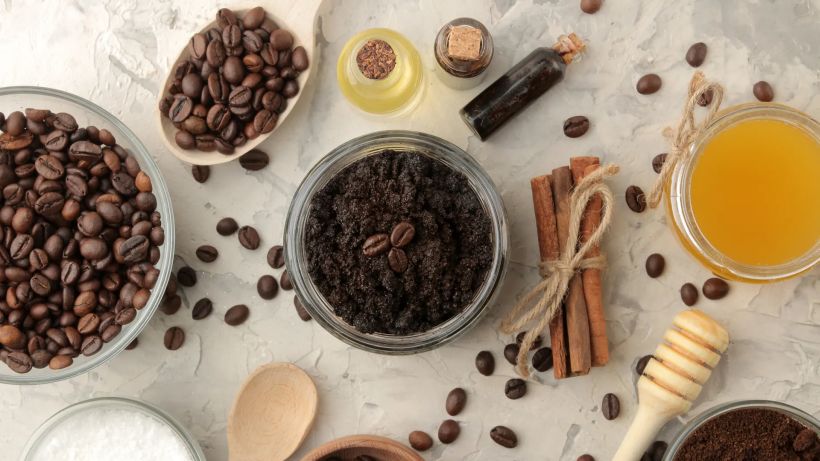
TWO EXPRESS FORMULAS: EXFOLIANT AND LIP BALM

Sometimes the best solutions are the quickest. Here are two ideas for instant care:

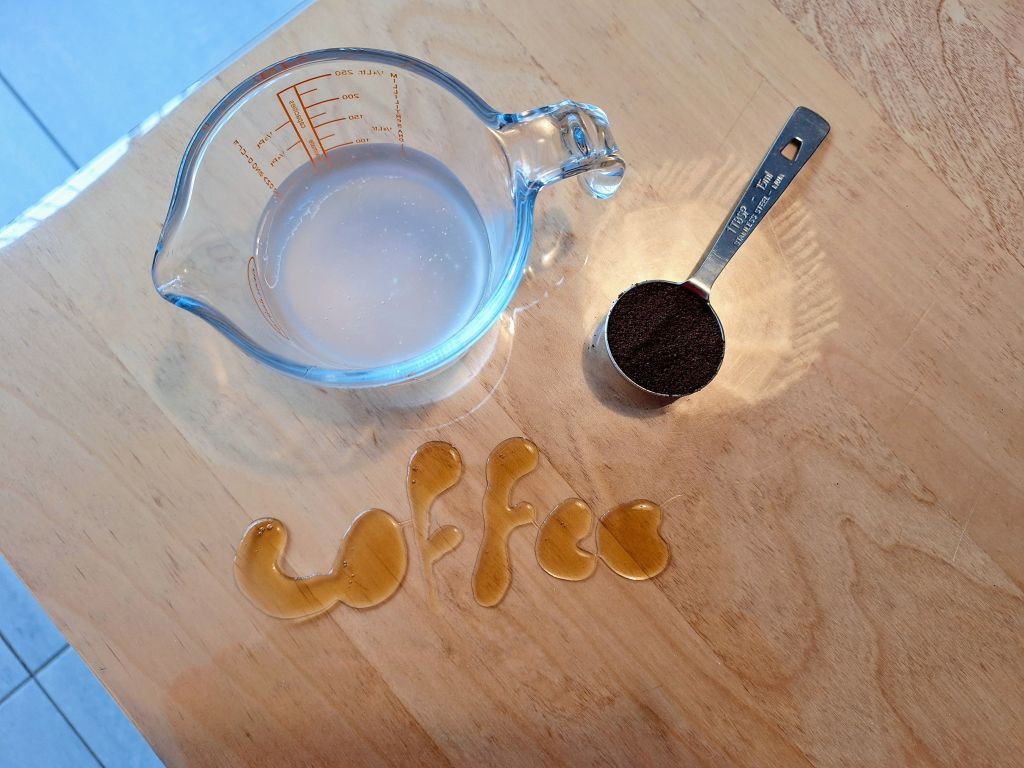
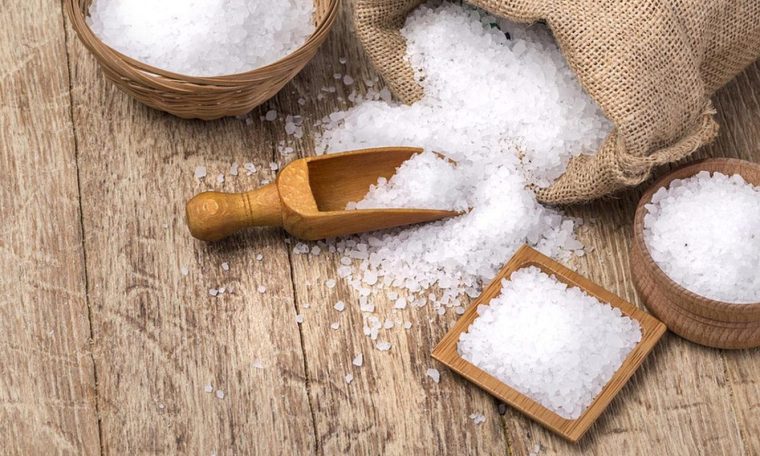
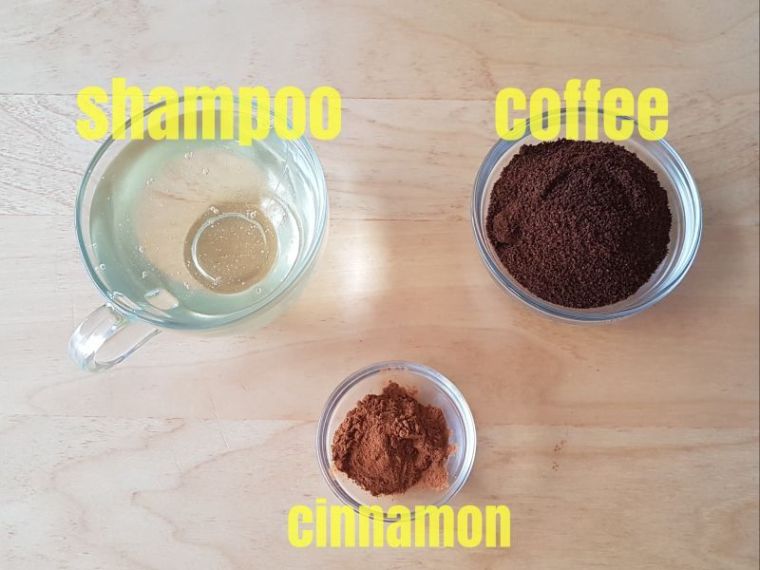
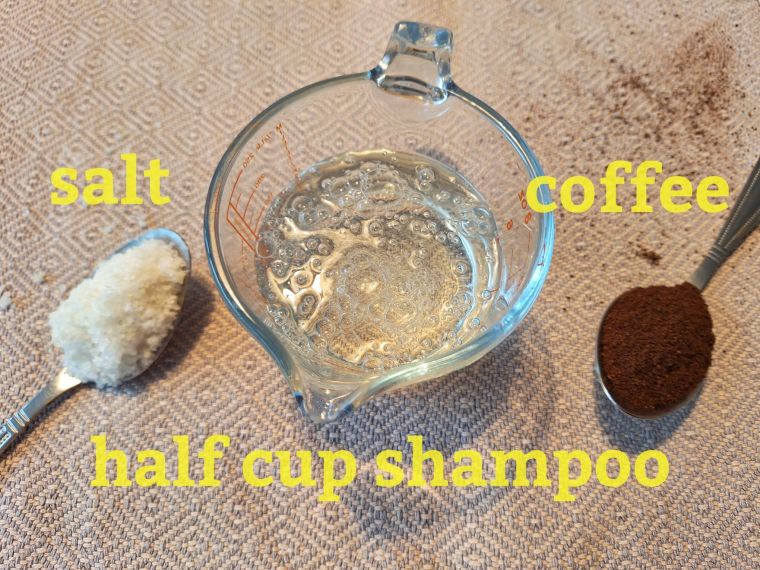
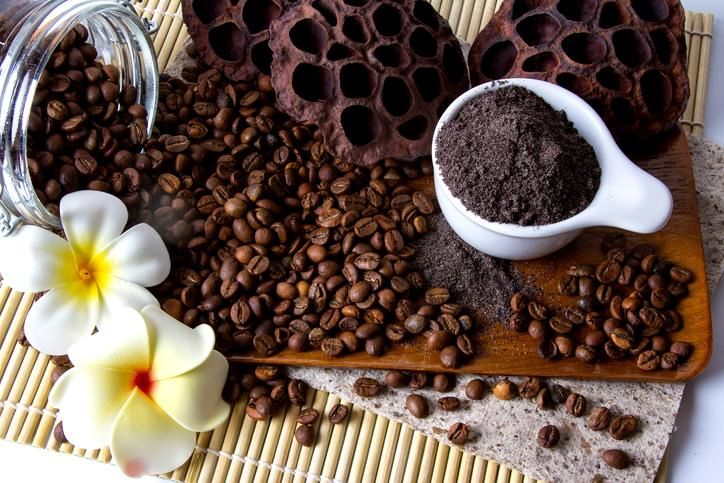
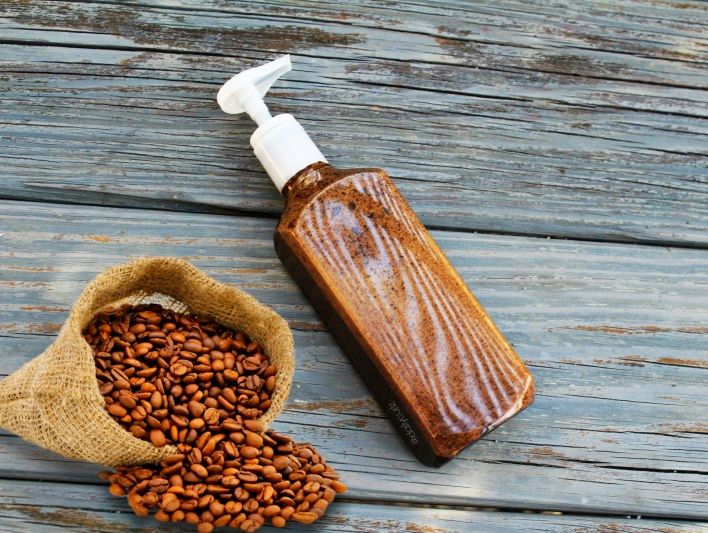
Gentle body and lip scrub: Mix a tablespoon of honey with a little sugar or coffee grounds. Gently massage onto damp skin using circular movements and rinse off. Instantly renewed skin!

Repairing lip balm: If your lips feel dry or chapped, apply a thin layer of honey to them before going to bed. You’ll wake up with soft, repaired lips.

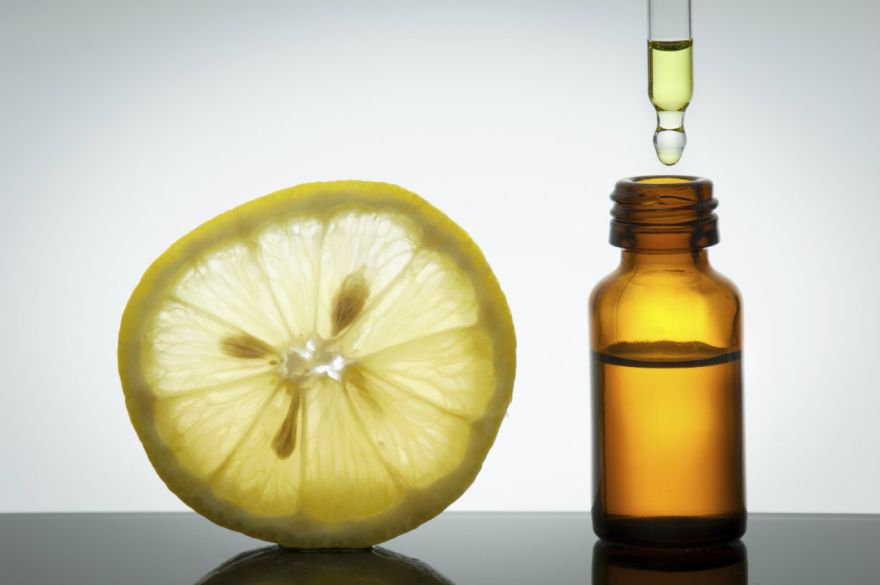
HONEY AND LEMON MASK for winter hands

In cold weather, our hands are constantly exposed to external aggressions that can significantly worsen their appearance. The result? They become rough and . That’s why it’s important to treat yourself to a moisturising mask from time to time.

Ingredients:

Two tablespoons of olive oil to protect and moisturise dry skin

Two tablespoons of honey to soften and nourish the skin

Optional: a few drops of lemon essential oil.

Mix all the ingredients in a bowl. Apply generously to your hands and nails and massage for a few minutes. For greater effectiveness, you can wear latex gloves. Leave the treatment on for 30 minutes before rinsing with warm water.

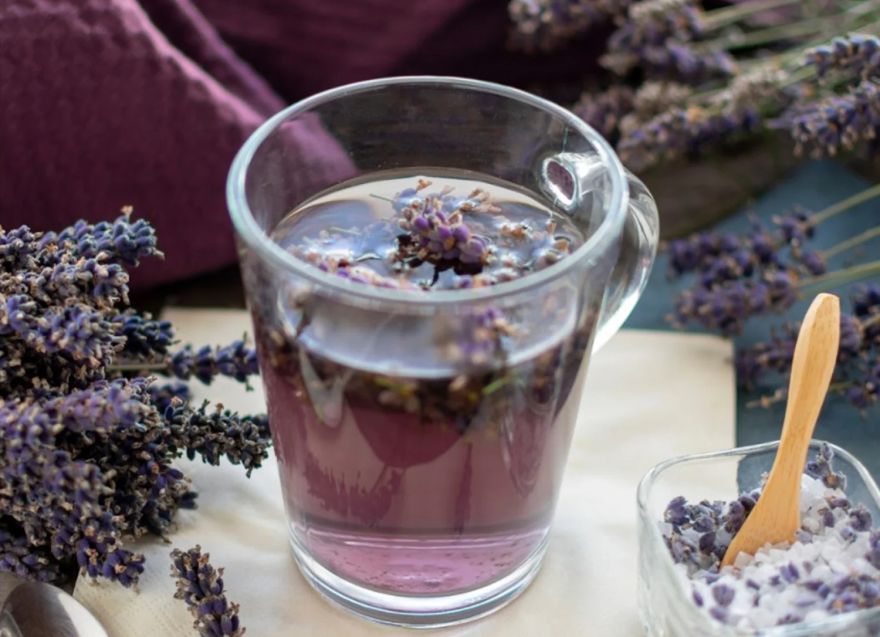
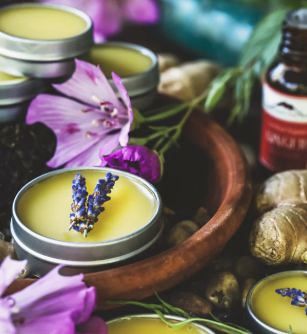
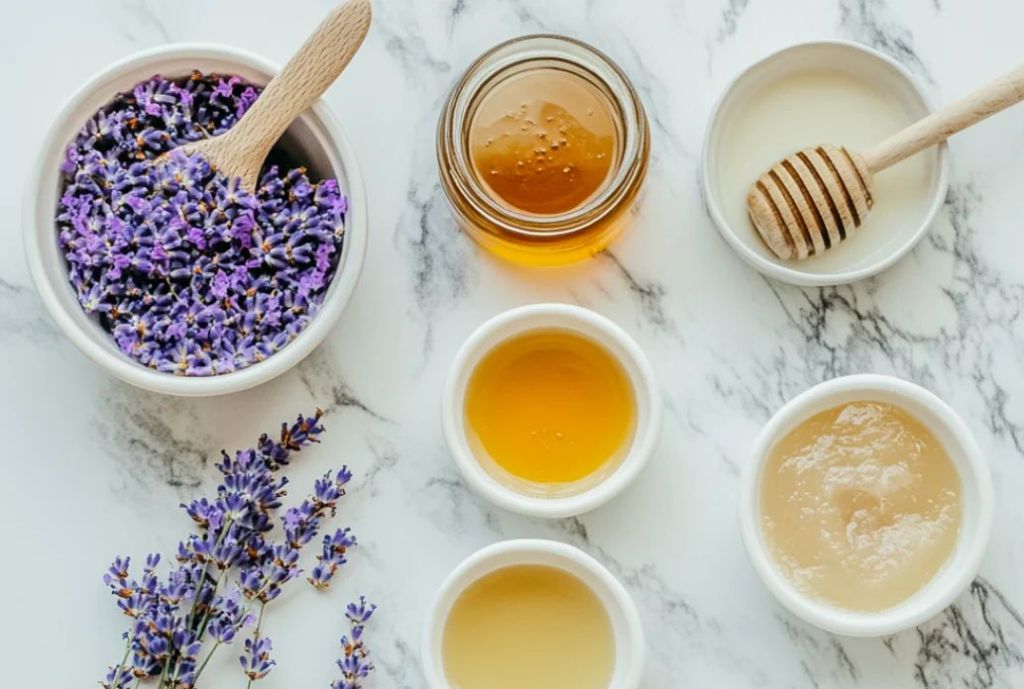
HONEY, COCONUT OIL AND LAVENDER SCRUB

This is a luxurious exfoliant recipe designed to relax you as if you were at a spa, as it not only exfoliates but also leaves your skin pampered and smelling divine.

Ingredients:

½ cup granulated sugar

¼ cup raw honey

¼ cup coconut oil

A few drops of lavender essential oil, which promotes relaxation

How to create this luxurious scrub:

Melt: Gently heat the coconut oil until it melts, then allow it to cool slightly.

Mix: Combine the cooled coconut oil with the honey and sugar in a bowl. Add a few drops of lavender essential oil for a relaxing aroma.

Apply: Use this aromatic mixture to gently exfoliate your body, focusing on rough areas such as elbows and knees.

Rinse: Rinse with warm water and enjoy skin that is not only smooth, but also luxuriously moisturised and delicately scented.

Why you should try it: Coconut oil is a fantastic moisturiser that works in harmony with the soothing properties of honey. Lavender adds a relaxing and therapeutic dimension to the scrub, making your skincare routine a luxurious and serene experience.

ANTI-INFLAMMATORY HONEY AND TURMERIC MASK for acne-prone skin

The anti-inflammatory and antimicrobial properties of turmeric, combined with the soothing effects of honey, make this mask a miracle worker for reducing acne and skin redness.

How to prepare:

Preparation: Mix 1 tablespoon of raw honey with 1 teaspoon of turmeric powder.

Application: Spread the paste evenly over your face.

Wait: Leave on for 20 minutes.

Rinsing: Wash with cold water and use a mild cleanser to remove any colour residue.

Why it works: Raw honey is a natural moisturiser, its antibacterial properties make it an excellent choice for acne-prone skin, while its soothing effect can relieve irritated and sensitive skin. When combined with ingredients such as turmeric, its anti-inflammatory benefits are enhanced.

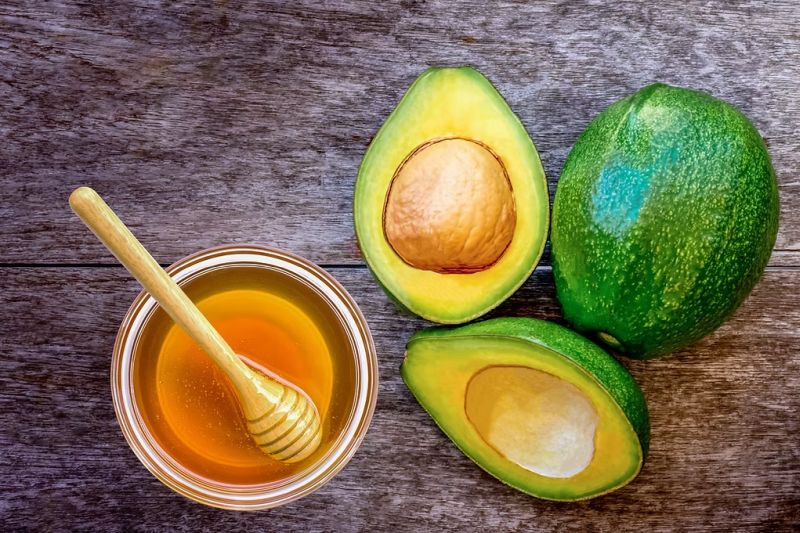
HONEY AND AVOCADO MOISTURISING MASK for dry skin

For an intense dose of hydration, this creamy mask combines the moisturising properties of honey and avocado, leaving the skin soft and supple.

How to make it:

Mash: Mix 1 tablespoon of raw honey with 1/4 of a ripe avocado in a bowl.

Mix: stir until smooth.

Apply: Spread the mixture all over your face.

Relax: wait 20 minutes.

Rinse: Wash off with warm water.

Why it works: Raw honey is a natural moisturiser, its antibacterial properties make it an excellent choice for acne-prone skin, while its soothing effect can relieve irritated and sensitive skin. When combined with ingredients such as turmeric, its anti-inflammatory benefits are enhanced.

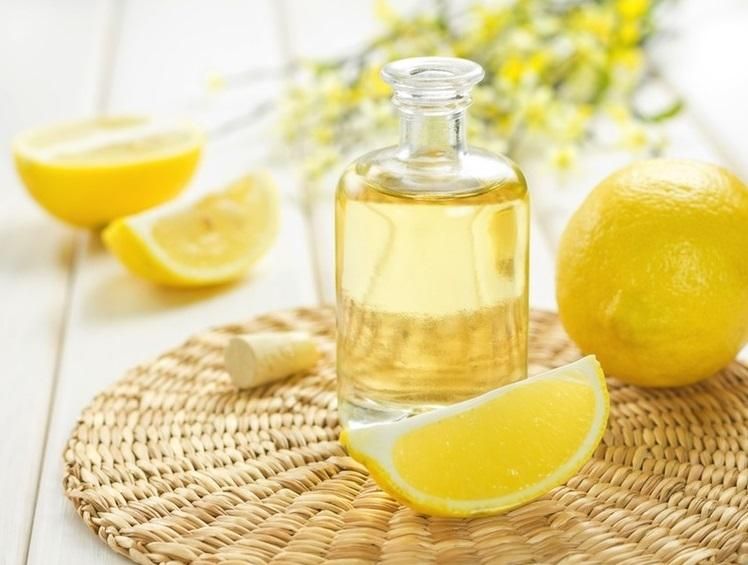
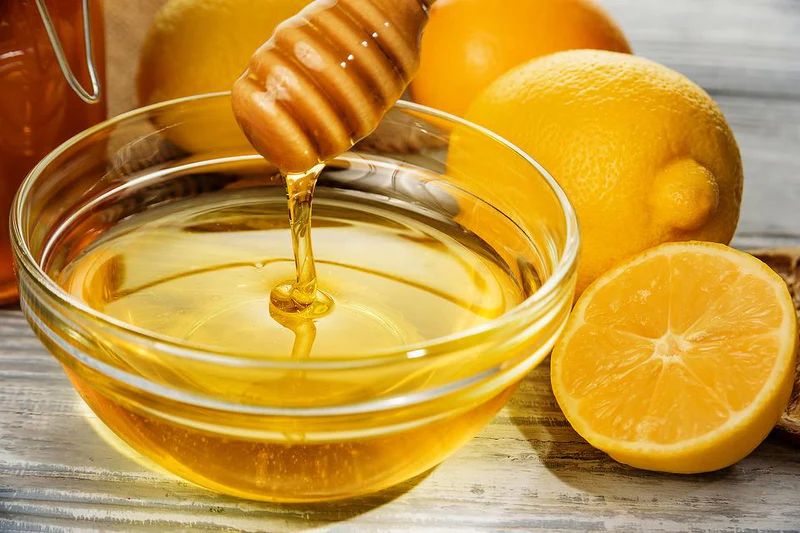
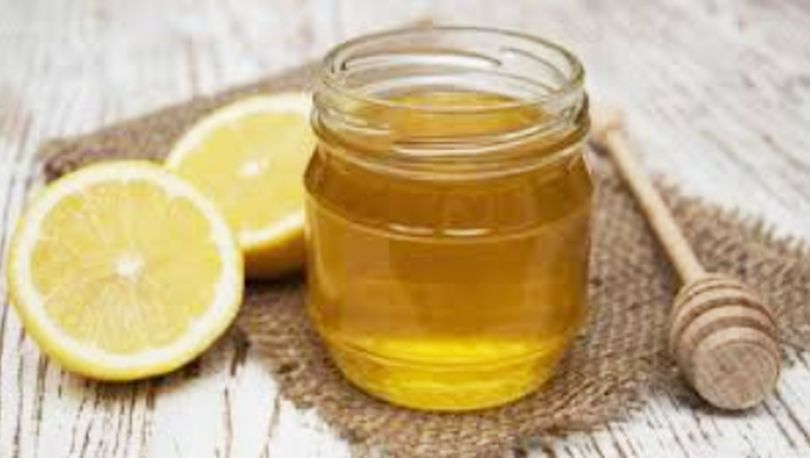
HONEY FACIAL CLEANSER

Incorporate lemon into your skincare routine with this brightening facial cleanser. The astringent properties of lemon complement the moisturising touch of honey for a clean and luminous complexion.

Ingredients:

2 tablespoons of raw honey

1 tablespoon of fresh lemon juice

How to prepare:

Mix: Mix the honey and lemon juice in a bowl until well combined.

Brighten: Gently massage the mixture onto your face, avoiding the eye area.

Rinse: Rinse with cold water to reveal fresh, glowing skin.

Why it works: Lemon juice, rich in vitamin C, works wonders to reduce dark spots and even out skin tone, while honey ensures that skin stays hydrated.

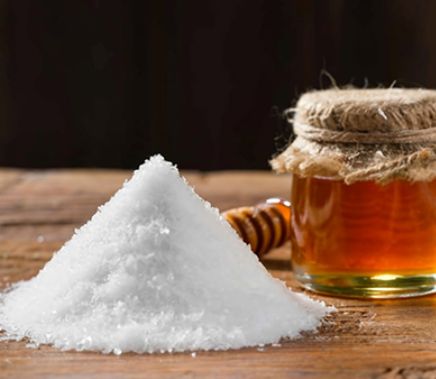
HONEY and SUGAR SCRAB

This exfoliator we have designed combines the natural antibacterial properties of honey with the exfoliating power of granulated sugar to offer a simple yet luxurious skincare treatment.

Sugar is an excellent natural exfoliant that helps remove dead skin cells. Its fine grains allow for gentle yet effective exfoliation. In addition, sugar contains natural glycolic acids that promote cell renewal and help keep skin young and healthy.

Honey has exceptional antibacterial and moisturising properties. It acts as a humectant, helping the skin to retain moisture. It is also rich in antioxidants, which protect the skin from damage caused by free radicals.

Therefore, with this recipe combining honey and sugar, and a squeeze of lemon, mechanical exfoliation occurs thanks to the granulated sugar, as well as chemical exfoliation due to the synergistic combination of the antioxidants in honey, the brightening lemon juice and the natural glycolic acid contained in sugars.

Ingredients:

½ cup granulated sugar (white or brown, whichever you prefer!)

¼ cup raw honey

A splash of fresh lemon juice (optional, for extra shine)

How to prepare it:

Mix: In a bowl, mix the sugar and honey. If you are using lemon juice, add it now. Stir until you have a sticky, golden mixture.

Exfoliate: Apply this sweet mixture to damp skin using gentle circular motions. The sugar granules will remove dead skin cells, while the honey will moisturise and soothe.

Rinse: Rinse with warm water and pat your skin dry.

Why it works so well: This scrub has a triple effect: it exfoliates, brightens and moisturises. Sugar acts as a natural exfoliant, removing dead skin without harsh chemicals, while honey is a humectant that draws moisture to the skin and ensures it stays hydrated and supple.

OUR MINIMALIST RECIPES WITH HONEY AND GLYCERINE

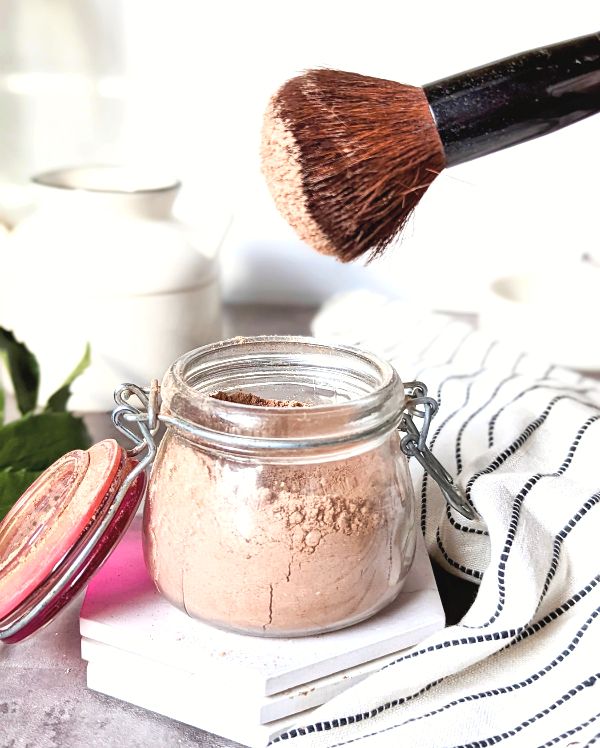
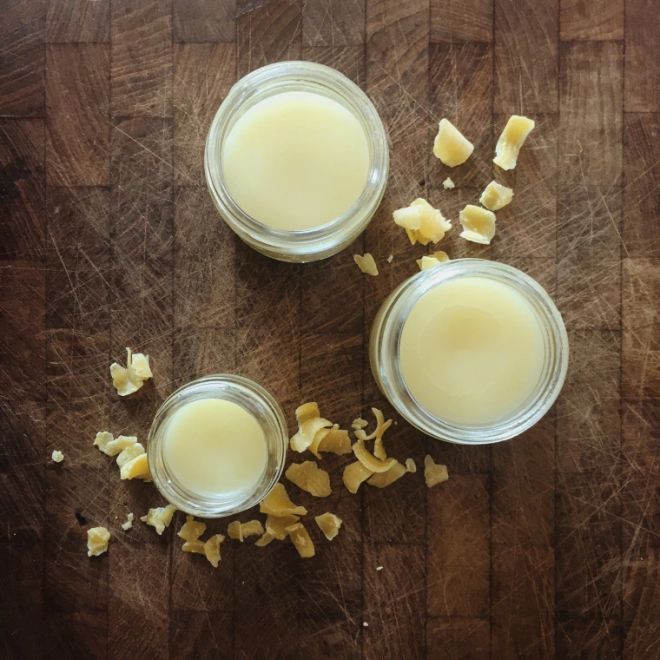
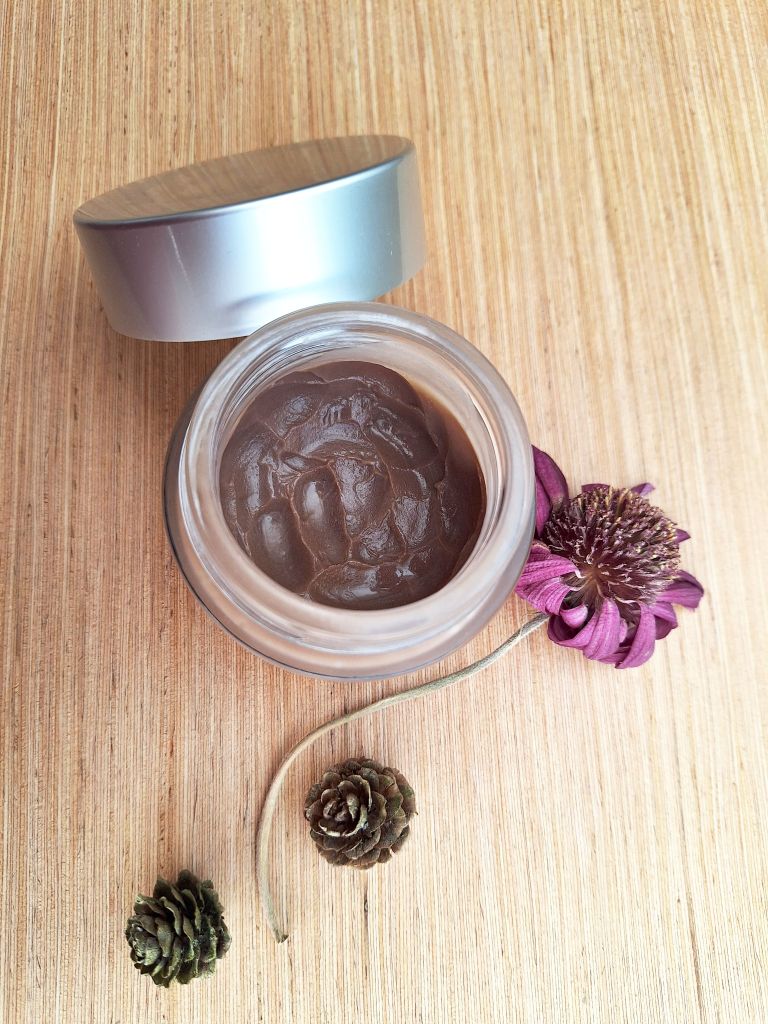
DAY CREAM WITH SPF AND HONEY to prevent pigmentation spots

In this cream, the amount of zinc oxide we add will determine its ability to protect us from solar radiation. We must consider that zinc oxide has an SPF of approximately 15. Therefore, if you do the math, you will see how much you should add according to your needs. We have added 2 grams as standard.

Ingredients for a container of approximately 100 grams of cream:

70 g copal oil or bakuchiol oil*

6 g beeswax

1 teaspoon of zinc oxide and 1 teaspoon of cocoa powder, which we will mix and pulverise beforehand in a ceramic mortar.

1 teaspoon of honey

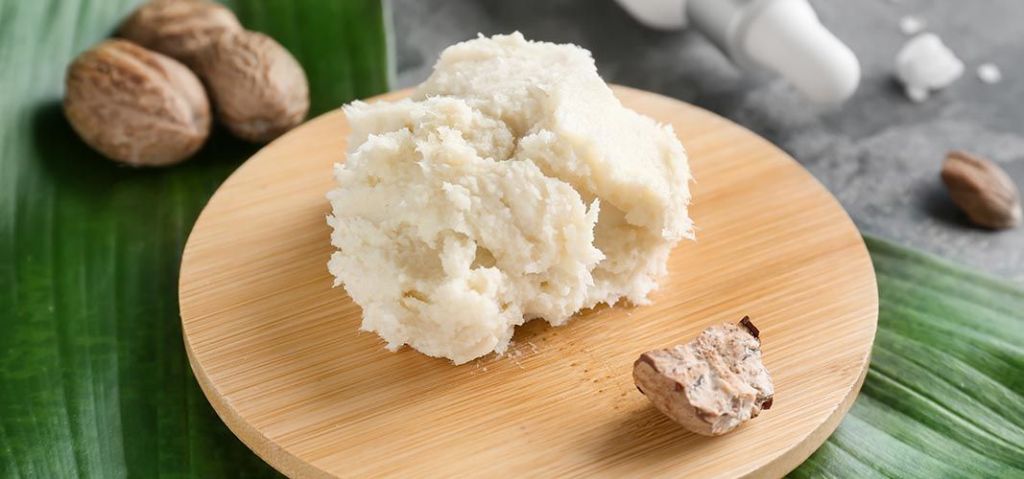
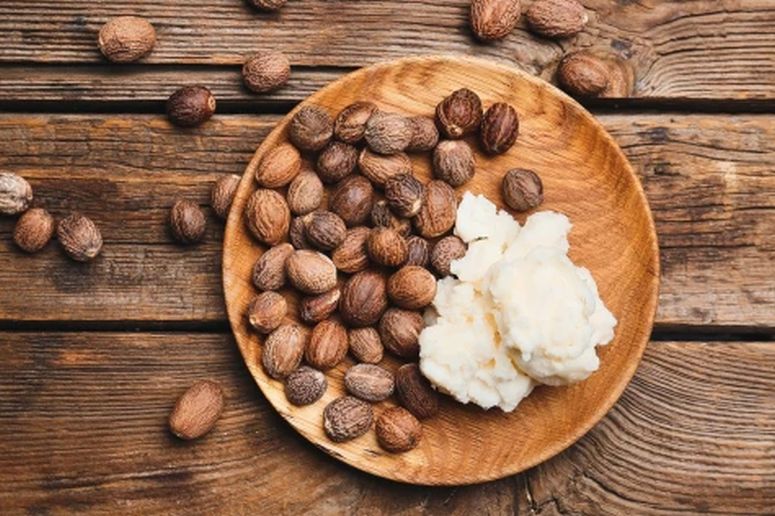
1 tablespoon of shea butter and

2 vitamin E capsules*

*Vitamin E makes the skin less prone to sunburn by limiting the cellular damage caused by the sun.

*Both balsamic resin oils (copal, frankincense, myrrh, etc.) and bakuchiol oil have a similar effect on the skin to retinol or vitamin A.

Bakuchiol, in particular, is a natural alternative to retinol that offers similar benefits for the skin, but with less irritation. It stimulates collagen production, reduces fine lines and wrinkles, improves elasticity and firmness, and protects against environmental damage. It is also a powerful antioxidant and can help soothe sensitive skin.

Resins, whether copal, frankincense, myrrh, etc., provide so many natural antioxidants that they prevent the fats with which they are macerated from oxidising easily. Similarly, the antioxidants they provide to the skin stimulate collagen production and protect against environmental damage.

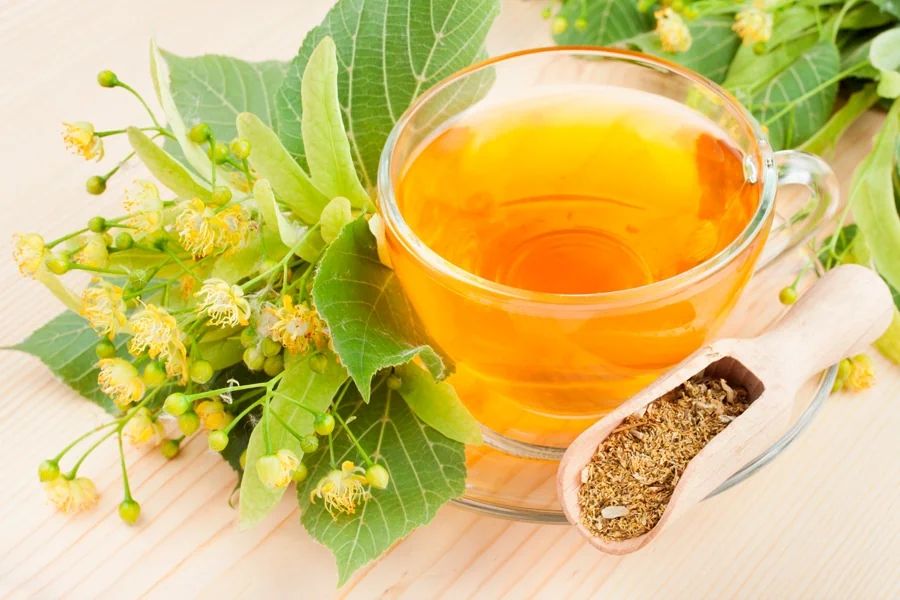
Other oils to consider for stimulating collagen production, promoting skin regeneration and preventing the appearance of spots and sun lentigines are: ginseng, turmeric, liquorice, arbutin or uva ursi, cranberries, chamomile + green tea, etc.

PREPARATION:

As mentioned above, first pulverise and mix the zinc oxide and cocoa powder in a ceramic mortar so that both can be fully incorporated into the mixture with the oils.

Next, place the beeswax and copal oil in a double boiler and, once melted, add the shea butter and the zinc oxide and cocoa mixture.

Stirring continuously, finally add the honey and vitamin E capsules, which are heat-sensitive substances. Remove from the heat.

We will store it in a small glass jar so that it is preserved in the best possible way. As this cream does not contain any water, it does not need any preservatives, only vitamin E to prevent oxidation. This means that it has a fairly long shelf life.

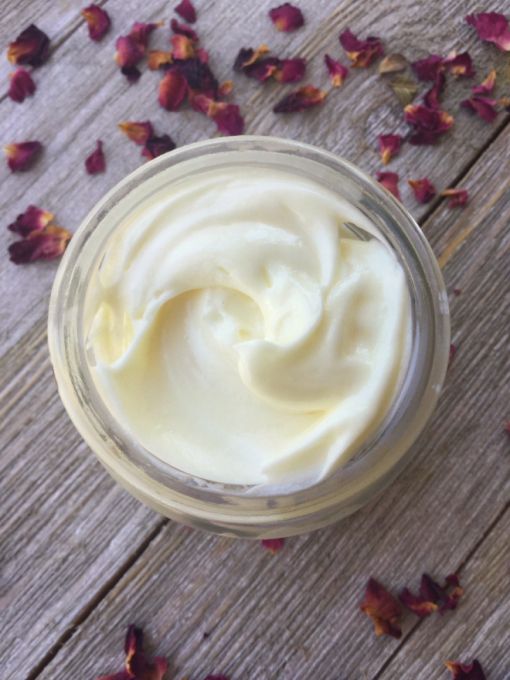
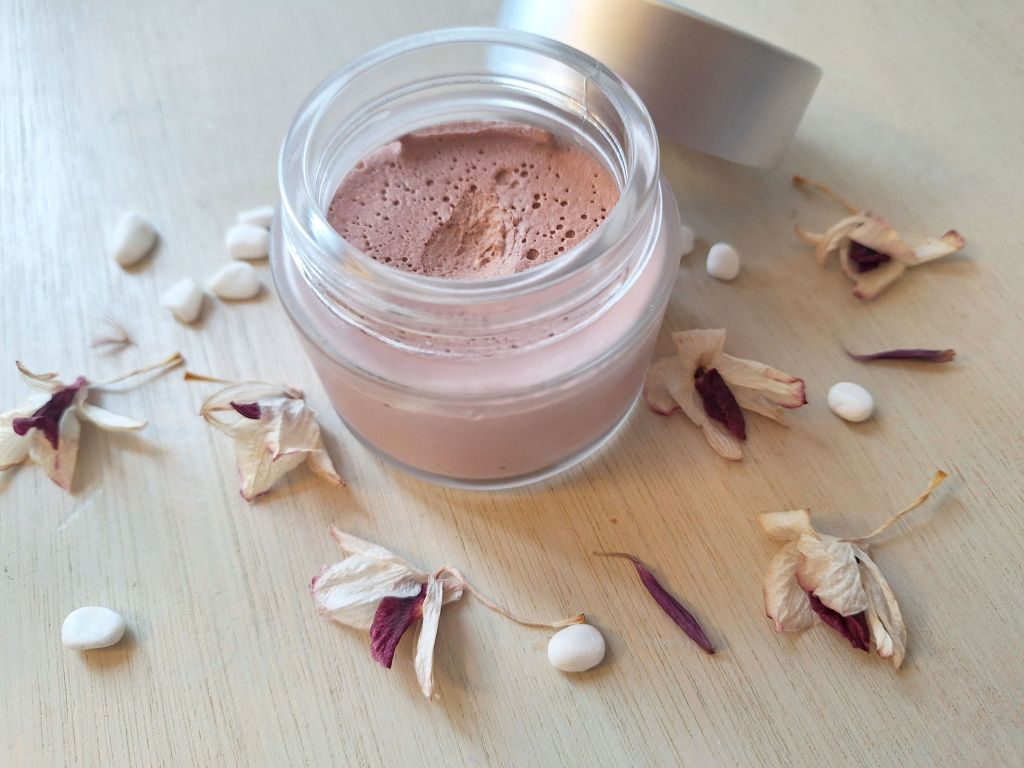
The addition of honey gives this cream a unique moisturising sensation when applied to the skin. The effect is such that we will not miss a cream with an aqueous phase. However, we will avoid having to add synthetic preservatives.

STORAGE: We will undoubtedly finish it long before any of its components can go rancid. In any case, this type of cream without an aqueous phase does not, in principle, have an expiry date. This is even more so with the addition of honey, which, due to its intrinsic slightly antimicrobial nature, keeps it in perfect condition.

In addition, we would like to add that we have used a copal oil, that is, copal resin infused in olive oil, and this type of oil does not even go rancid. Virgin olive oil is also slightly antimicrobial in itself, and this, combined with the antioxidant properties of the resin, makes it a very durable oil/macerate.

THE OPTION with SPF 15: If you really want to protect your skin from the sun on a daily basis, this option will provide you with a stronger protective screen. To do this, we will add 2 g of zinc oxide + 1 g of cocoa powder, which we will mix and pulverise beforehand in the ceramic mortar.

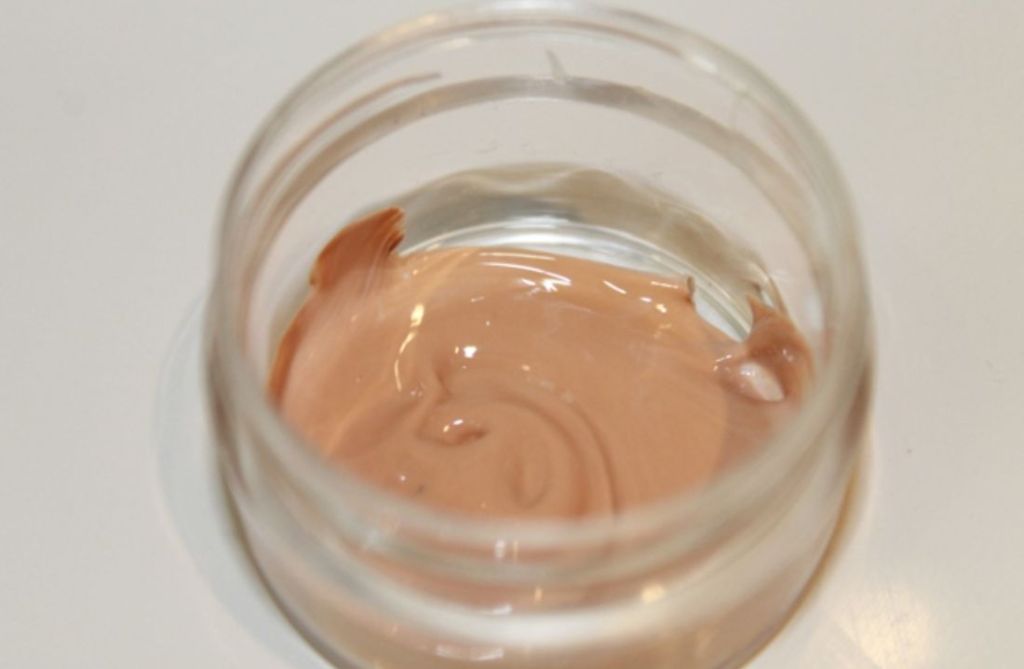
THE BLEMISH BALM SUNSCREEN OPTION

As zinc oxide has a covering effect on the skin, leaving a white veil without the addition of cocoa powder, another idea is to add a “skin-coloured” mica instead of cocoa powder to create a blemish balm-type cream with sun protection factor. This cream would serve not only as a sunscreen but also as a mattifying base cream to cover skin imperfections.

BATH GEL for intimate areas

This simple and easy-to-prepare recipe is, however, indispensable for use as: a wash gel for intimate areas, a very gentle shower gel for problem skin, and a wonderful bath gel for babies’ sensitive skin.

Ingredients:

Two parts coconut betaine surfactant

One part honey

Or, if you prefer, for a 100 ml container, you will need:

Approximately 60 g of coconut betaine x

Approximately 40 g of honey

We have already discussed HONEY and its properties at length.

We would just like to add that COCONUT BETAINE is the mildest and most natural surfactant we can use on our skin. Betaine is a natural amino acid and osmolite, commonly derived from sugar beet, which plays a crucial role in maintaining skin hydration.

The gentle cleansing properties of betaine make it an excellent choice for sensitive skin, effectively removing impurities without stripping the skin of its natural moisture.

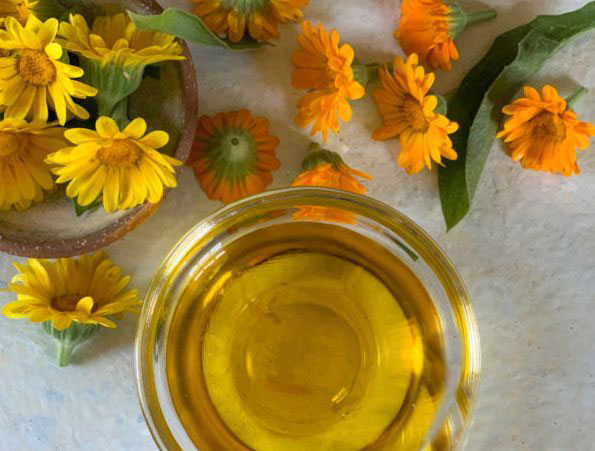
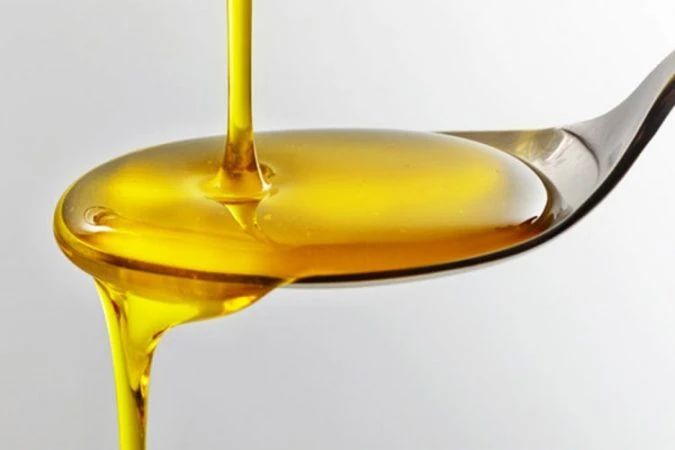
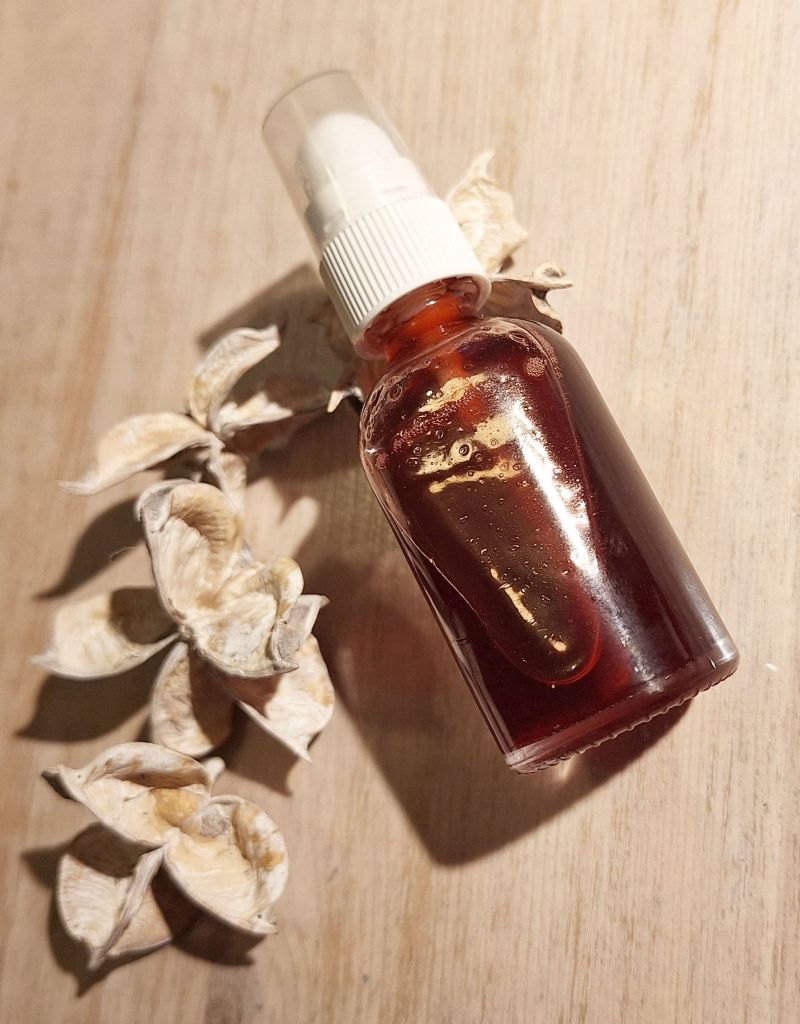
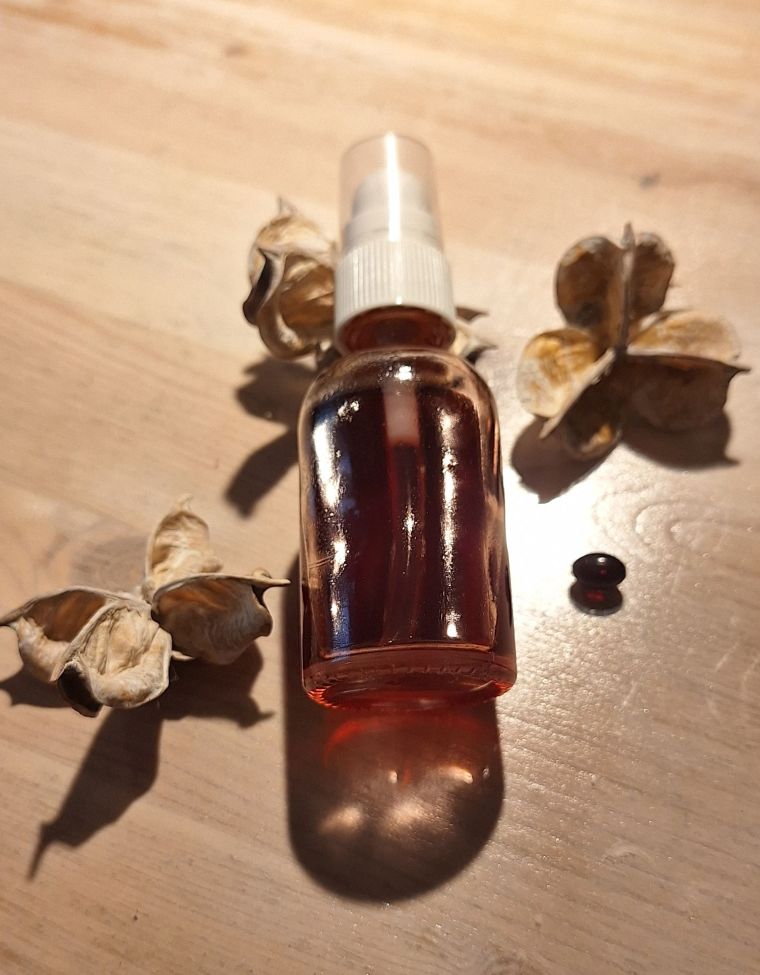
OLIVE OIL AND HONEY-BASED BATH OIL

35 g Turkey Red oil*, i.e. sulphated castor oil

30 g olive oil (pomace oil)

One tablespoon of honey (between 10-15 g)

One tablespoon of glycerine

Optionally, a mixture of geranium, lemon and petitgrain essential oils.

PREPARATION PROCEDURE:

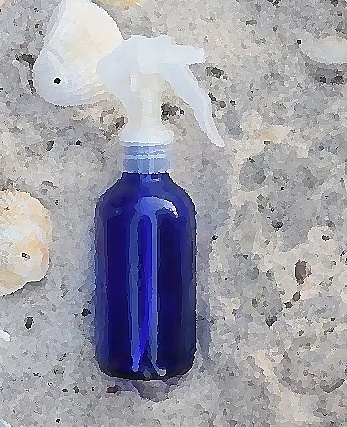
Mix all the ingredients in a bottle and shake well to combine.

USE: Prepare a hot bath and add a few tablespoons of oil while the tap is still running. Due to the lemon essential oil, be sure to rinse thoroughly if you are going to be outdoors a few hours after your bath to avoid getting sunburned. However, if you are going to bed, don’t worry.

*Turkey Red Oil is also known as Sulphated Castor Oil. A process known as sulphation is used to manufacture Turkey Red Oil in which pure castor oil is exposed to sulphuric acid. This process has been known for more than a hundred years. Through this process, castor oil becomes miscible with water while still retaining its moisturising properties. Turkey Red Oil dissolves easily in water. This is especially suitable for the production of water-dispersible bath oils and personal care products. Other lipids and essential oils are also soluble in Turkey Red Oil.

SHOWER GEL FOR ATOPIC SKIN based on honey and coconut oil

Adding raw honey to the bath is known to moisturise and cleanse the skin at the same time. With the addition of coconut oil, it becomes a shower gel.

That is why we have created this recipe for homemade honey-based shower gel, which is suitable for all skin types, even the most sensitive, such as babies’ skin or skin affected by dermatitis.

Ingredients for approximately 150 ml of product:

50 g coconut oil

50 g liquid honey

50 ml of coconut betaine

A few drops of your favourite essential oil, such as grapefruit, orange or even rosemary…

STORAGE: It will keep for about 3 months in optimal conditions, although the idea is that you use it up before then. Naturally!

PREPARATION:

Slowly heat the coconut oil in a bain-marie until it becomes liquid.

Add the honey and mix well.

Gradually add the liquid soap. Mix carefully to prevent foaming.

Finally, add the essential oils.

Stir well and pour into a pretty jar.

You may notice that the cleansing gel tends to separate, simply shake it before each use.

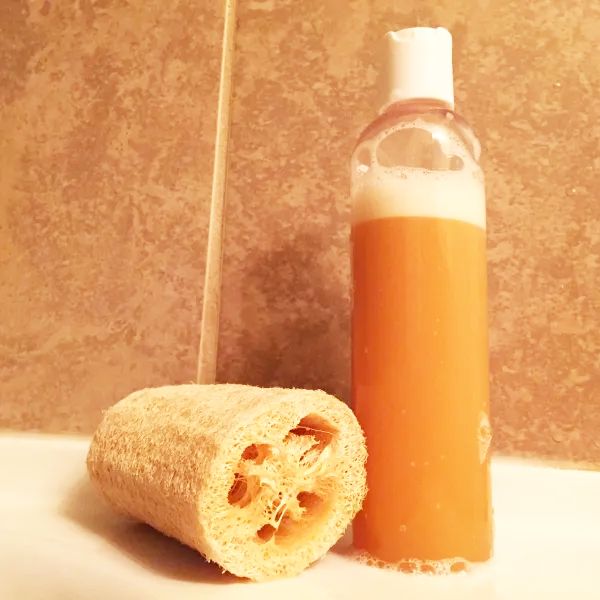
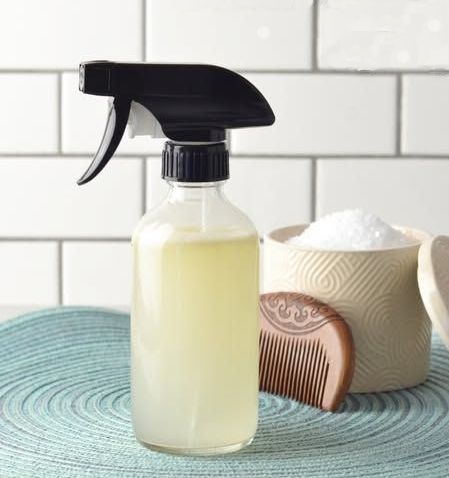
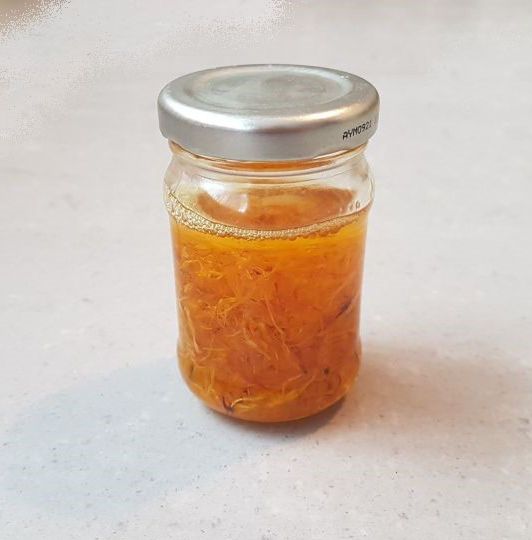
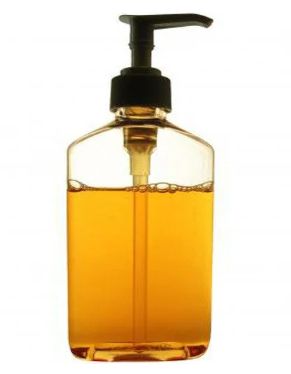
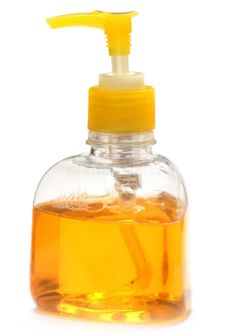
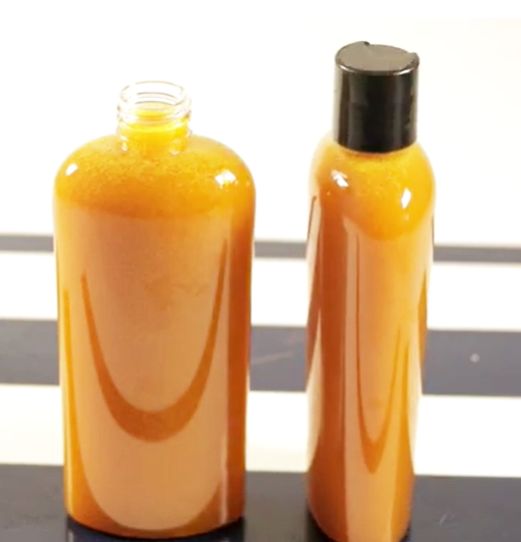
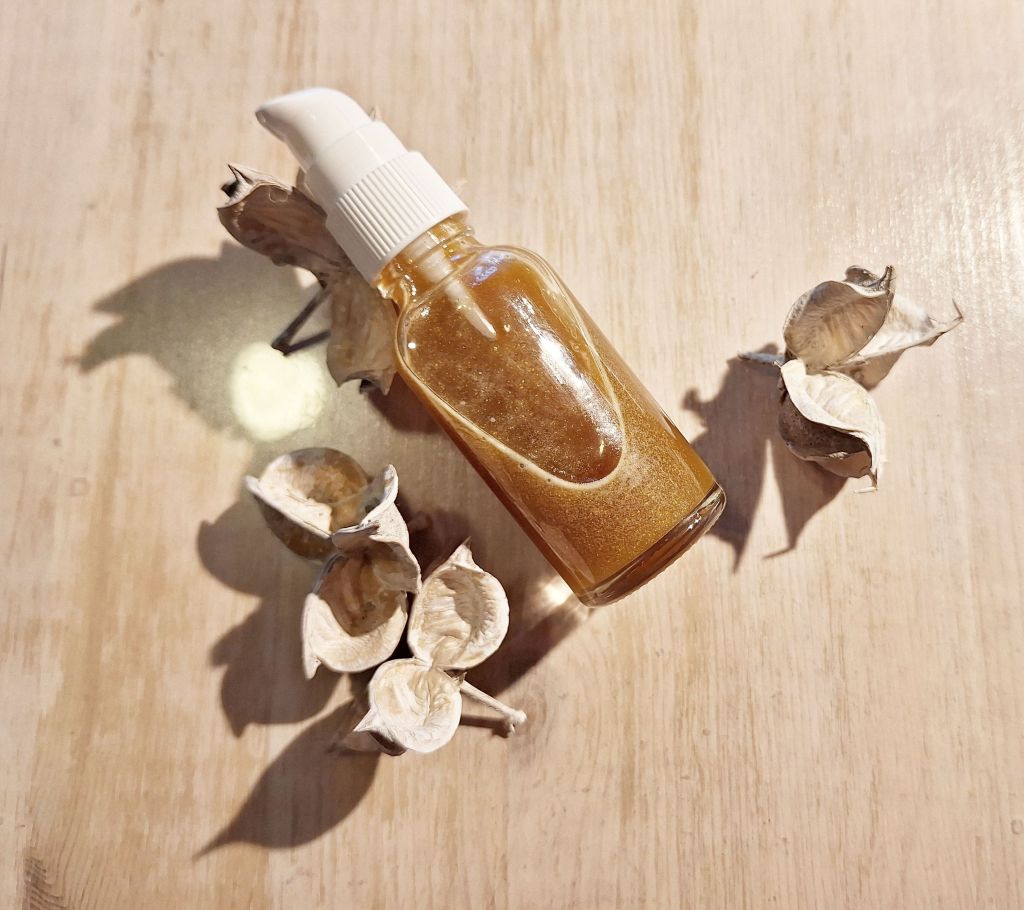
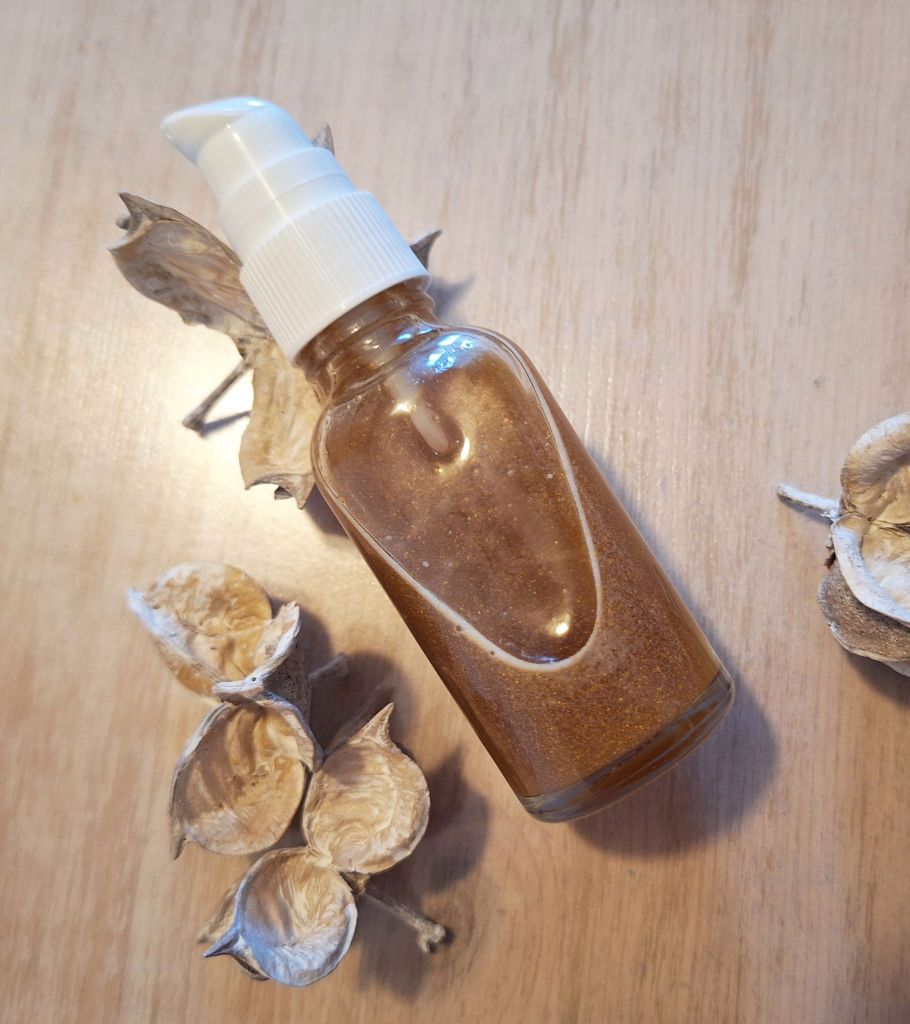
HONEY-BASED SHOWER GEL FOR ATOPIC SKIN

Adding raw honey to your bath is known to moisturise and cleanse the skin at the same time. That’s why we’ve created this homemade honey-based shower gel recipe, which is suitable for all skin types, even the most sensitive, such as babies’ skin or skin affected by dermatitis.

Ingredients for approximately 100 grams of product:

25 g distilled water

5 g SCS surfactant

9.5 g liquid surfactant, such as coco glucoside (creates more lather) or simply coconut betaine, which is gentler on the skin.

3.5 g vegetable glycerine

50 g honey

About 10 drops of lactic acid, to compensate for the alkaline pH produced by the surfactants.

Optionally, if you want to achieve the orange colour of the shower gel in our photo, add a tablespoon of turmeric at the end, which is also excellent for detoxifying the skin.

PREPARATION:

Start by heating the distilled water, then begin to dissolve the SCS powdered surfactant in it, stirring gently until it is completely dissolved and integrated. If you see too many bubbles forming, you can spray a little alcohol on them to reduce them.

Add the liquid surfactant to the mixture, followed by the vegetable glycerine.

Finally, add the honey, stirring well, and the drops of lactic acid.

In the end, it’s just between us and the bees. 😊
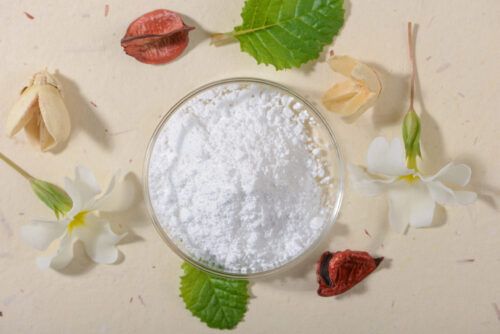
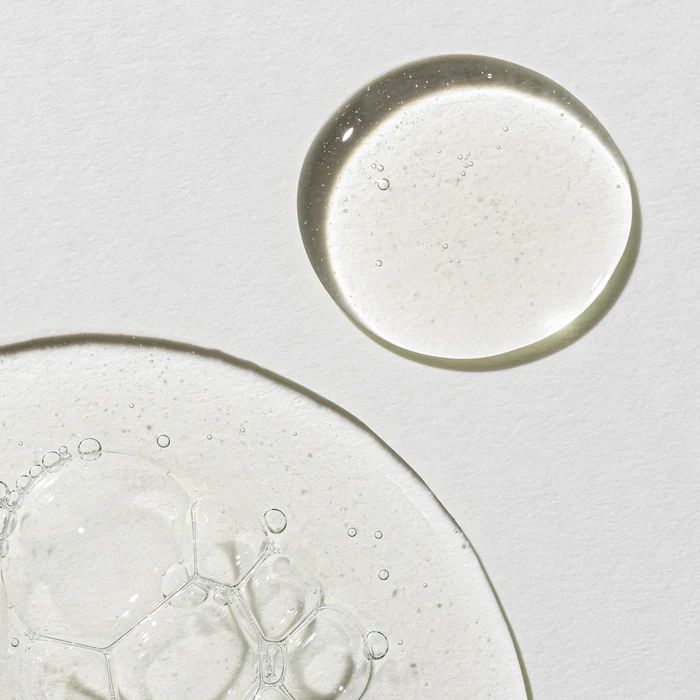
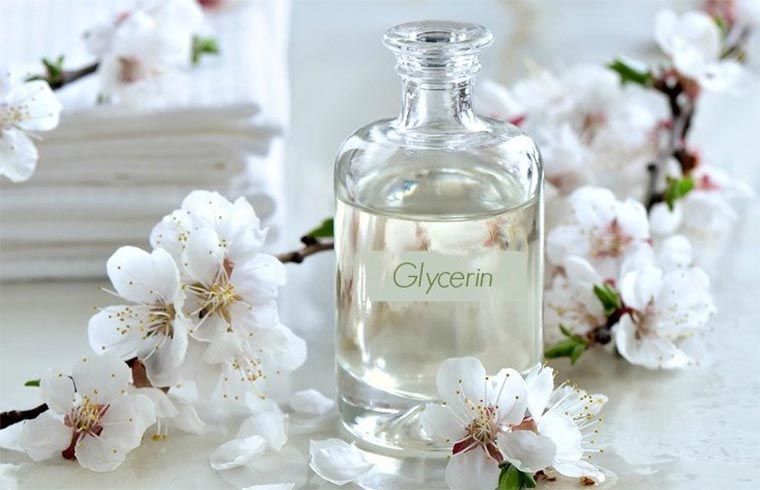
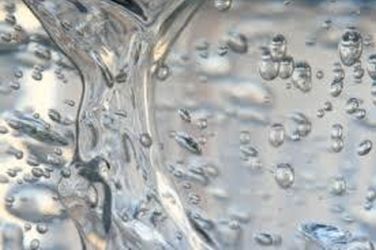
VEGETABLE GLYCERINE

Glycerine is a clear, viscous liquid which, as we said, has moisturising and skin-protecting properties. It is an organic compound based on sugar alcohol with a viscous consistency and no colour, which is present in all natural fats, whether of animal or vegetable origin. This substance has the peculiarity that it must always be used diluted in water or mixed with other ingredients and oils, as this softens the skin. On the other hand, if we use it in its pure form, it dehydrates the epidermis.

Glycerine appears in the INCI of many commercial cosmetic formulations under the name “glycerol”. The word “glycerol” comes from the Greek Glykos (meaning sweet) and dates back to the 6th century BC, as the Phoenicians are credited with the alchemical knowledge of making glycerine soap.

GLYCERINE IS HIGHLY BIOAVAILABLE

Glycerine is even found in our own skin, which is why this ingredient is bioavailable, meaning it is compatible with the skin and easily absorbed by it. It is a substance that the skin needs when it is deficient. For all these reasons, it is very common to find it in the formulation of many cosmetic products, including soaps and emollient products.

Liquid glycerine of vegetable origin is a highly emollient (prevents water loss or dehydration) and hygroscopic product, therefore moisturising for the skin and hair, making it a staple in homemade cosmetics.

It is a powerful moisturiser that absorbs and retains moisture, making it ideal for all skin types, especially dry and dehydrated skin.

Finally, it is an excellent solvent for integrating both organic and mineral ingredients into preparations, as well as an extractor of active ingredients in herbal macerations.

APPLICATIONS IN HOME-MADE NATURAL COSMETICS

One of the main qualities of vegetable glycerine is that it helps to restructure the lipids found in the stratum corneum. This results in an improvement and increase in skin elasticity.

This ingredient also helps to reduce the time it takes for wounds to heal. In fact, it has been proven to reduce this time by up to 25%. Therefore, it is a perfect ally for helping the skin recover more quickly. That is why many products for dry and damaged skin include it. As we said, glycerine is a great moisturiser. In other words, it is able to retain moisture in our skin. In this way, it can become the best remedy for dry skin in need of emollient compounds.

*A cream with emollient properties softens, smoothes and protects the skin by creating a barrier that prevents moisture loss. Emollients help keep the skin hydrated, supple and healthy, and are used to treat or prevent dryness, roughness, flaking, itching and conditions such as atopic dermatitis.

These moisturising and emollient qualities of glycerine give it anti-ageing and anti-sagging properties that are used in cream recipes for mature skin.

In addition, glycerine defends the skin from environmental aggressions by helping to create a protective layer, thereby accelerating wound healing and even soothing sunburn. For this reason, it has also earned a place in the formulation of many sunscreen products.

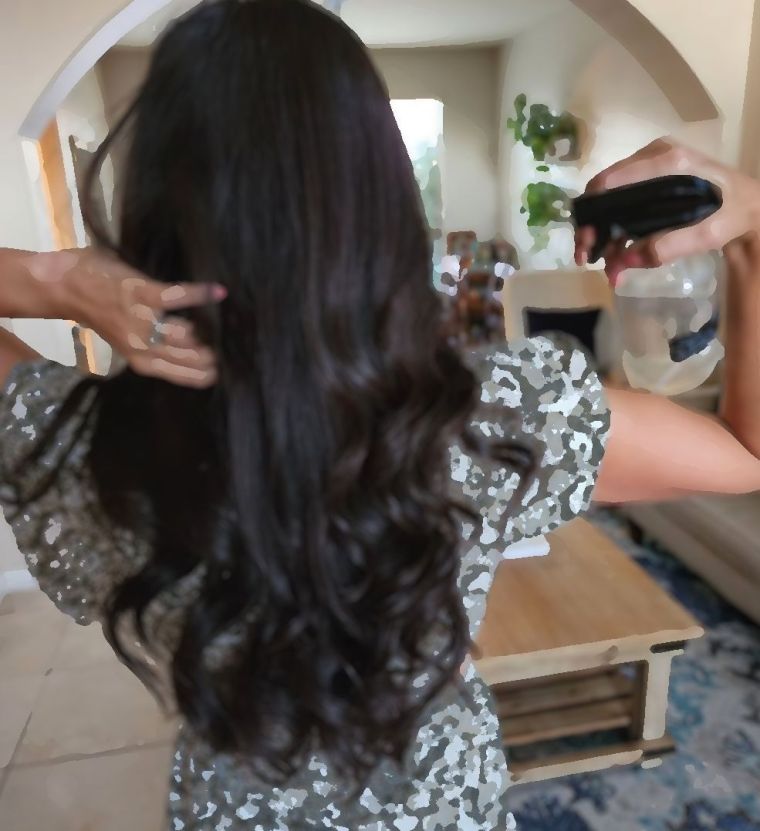
It is even used in hair care products to treat dry, brittle hair. Glycerine moisturises the hair from the inside out, stimulating growth and preventing dandruff.

It is a key ingredient in products used for the well-known curly method. This is due to its ability to soften, protect and define the hair fibre. It makes curls more hydrated, less frizzy and healthier.

IN GENERAL: in all types of recipes for making body and facial creams and lotions.

In recipes for natural serums, such as those provided below.

In recipes for natural shampoos and hair masks…

It will add a touch of softness when added to emulsions, shower gels, and solid and liquid soaps. In soaps, it is recommended not to use more than one teaspoon per kilo of soap, as too much will soften it considerably.

CAUTION: The only precaution with glycerine is that, as it is hygroscopic and tends to absorb moisture from its surroundings, it is important that the product we design contains enough water to retain the glycerine; otherwise, it would not moisturise, but could cause some dehydration.

How is glycerine obtained?

The method used to obtain this natural component consists of the saponification of fatty acids, which make up its triglyceride. This saponification is carried out through a reaction with an alkali, causing the glycerine to be released.

GLYCERINE AS AN EXTRACTOR OF PRINCIPLES

Glycerine is good for the skin, but it is also used in countless areas that have little to do with cosmetics. In fact, it also has certain properties that make it particularly suitable for use as a preservative and thickening agent in the food industry.

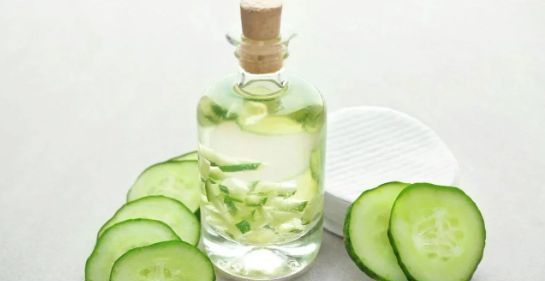
One of the main uses of glycerine in natural cosmetics is as an excellent solvent, which means we can also use it to create hydroglycerine extracts (water and glycerine) for any cosmetic recipe.

Personally, we prefer glycerites to hydroglycerinated extracts because they greatly facilitate preservation. A dry plant extract in glycerine has a very long shelf life, whereas if we add water, we may have to add some kind of preservative.

Furthermore, when combining glycerine extract or glycerine in any of our formulations (serum, cream, etc.), we can always add an aqueous phase if necessary. This means that we can have prepared our extract two months in advance and it will still be fine.

*According to the IA: The main difference between a hydroglycerine extract and a glycerite is that a hydroglycerine extract is obtained by macerating a plant in a mixture of water and glycerine, while a glycerite is a type of extract that uses only glycerine as a solvent. Both extract the active ingredients from plants, but they use different solvents, which affects their properties and applications.

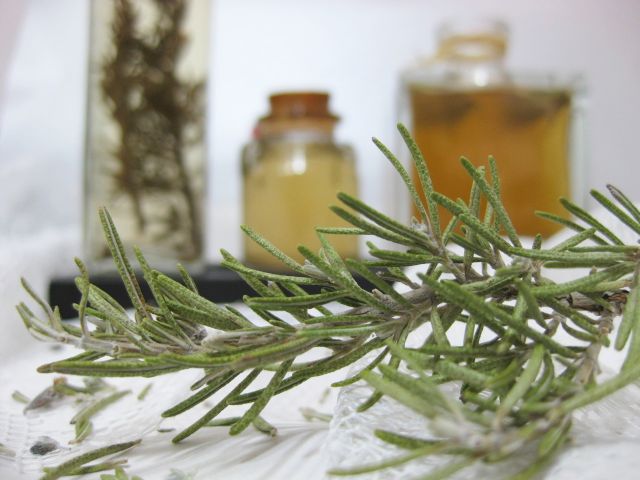
MACERATIONS IN VEGETABLE GLYCERINE

It is important to know that vegetable glycerine (or glycerol) is a colourless, odourless alcohol, viscous at room temperature, which is soluble in both water and ethanol, although it is insoluble in oils.

As mentioned above, one of the most common uses of glycerine is in macerations with plants to extract their active ingredients and produce hydroglycerine extracts.

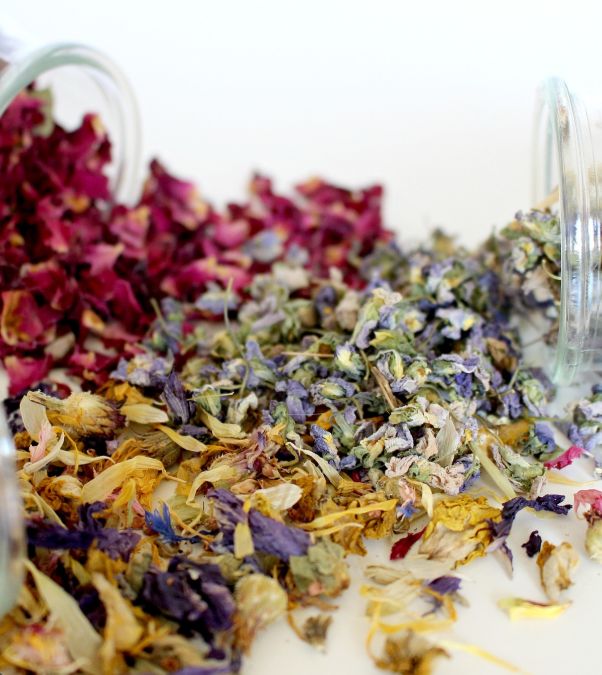
CONVENTIONAL PROCEDURE: Fill about 3/4 of the jar with dried plant material, then pour in a 50/50 solution of liquid glycerine and distilled water until most of the jar is covered. As we said, we never do it this way because we prefer not to use water, which forces us to use a preservative and limits the shelf life of our extract.

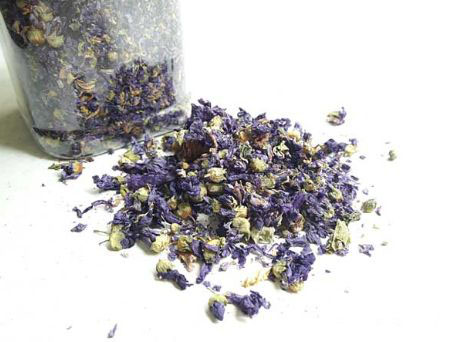
What we do is grind the dried plant beforehand, so that it becomes a fine powder, making it very easy to extract its qualities in the glycerine.

Next, we put our dried plant powder into a glass jar with glycerine, in a ratio of one part powder to 3-5 parts glycerine, so that the plant is well covered. In a few weeks, our extract will be ready. It is advisable to stir it every other day to facilitate extraction.

HOW TO PREPARE A GLYCERIN EXTRACT WITH HERBAL ACTIVE INGREDIENTS?

To prepare a glycerine herbal extract (a glycerite), it is advisable to ensure that the plant we are going to use is completely dry, thus avoiding the added problems of mould and bacteria. Once dry, it is advisable to grind it into a fine powder.

You can use a ceramic mortar, but a coffee grinder is quicker and works very well.

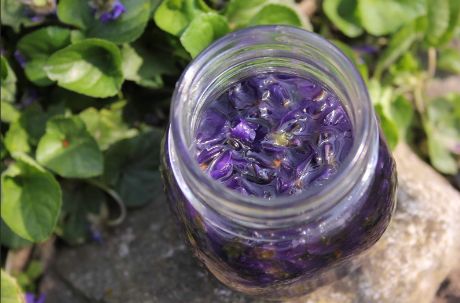
We will use a glass jar, which we will have previously sterilised with alcohol, to macerate the plant in natural vegetable glycerine and thus obtain our extract.

In general, use 1 part powdered plant to 3 to 5 parts glycerine, depending on the size of the jar and the amount of extract you want to obtain. The plant must always be well covered by the glycerine.

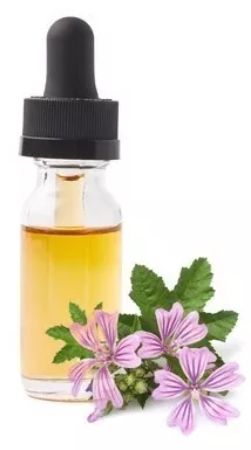
HOW TO PREPARE glycerine extract of geranium

You will need:

2 grams of powdered geranium petals

And between 40 and 60 grams of vegetable glycerine

PREPARATION:

Place 2 grams of geranium powder in an airtight glass container and add about 50 grams of vegetable glycerine.

Close the container and store it in a place with a stable temperature. Stir it daily.

After approximately one week, the extract will be ready.

We will then filter it with gauze or a fine mesh sieve and we can now pour it into the glass container we have chosen for this purpose.

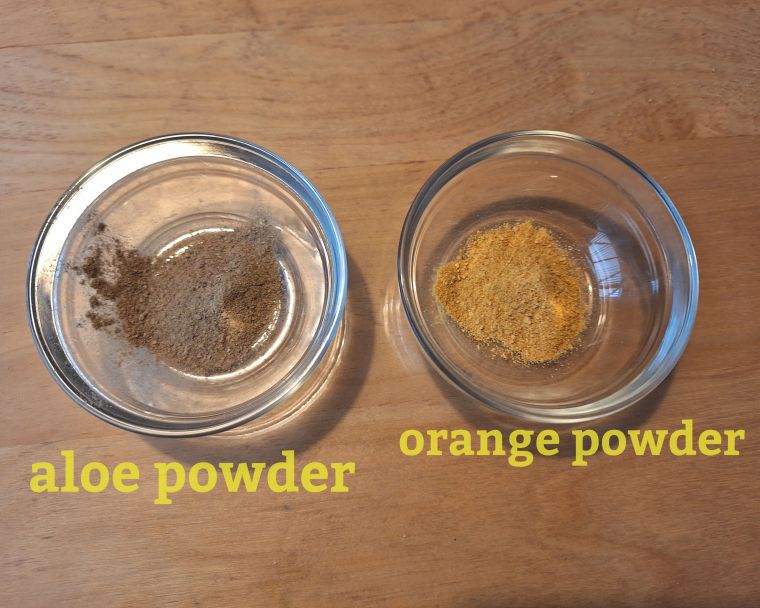
With AMLA, which usually comes in powder form, follow exactly the same procedure.

We then filter our extract through a paper coffee filter or a fine stainless steel sieve.

With the coffee filter, it takes all day, but with the sieve, we can obtain our filtered extract in less time.

We then store it in an airtight glass container and label it with the date of manufacture.

STORAGE: Once prepared, we can leave it for a year, protected from heat and direct light, and it will remain in perfect condition.

And, of course, we will take it out of the jar to add our extract to our natural cosmetic formulations.

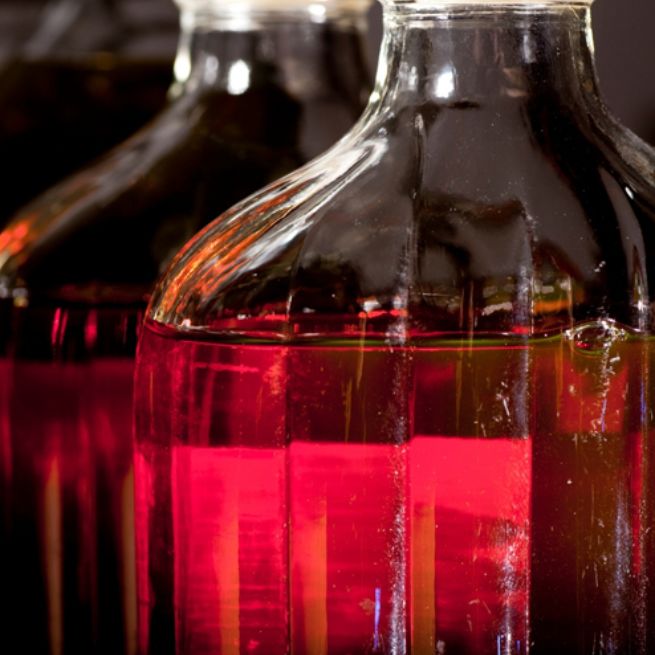
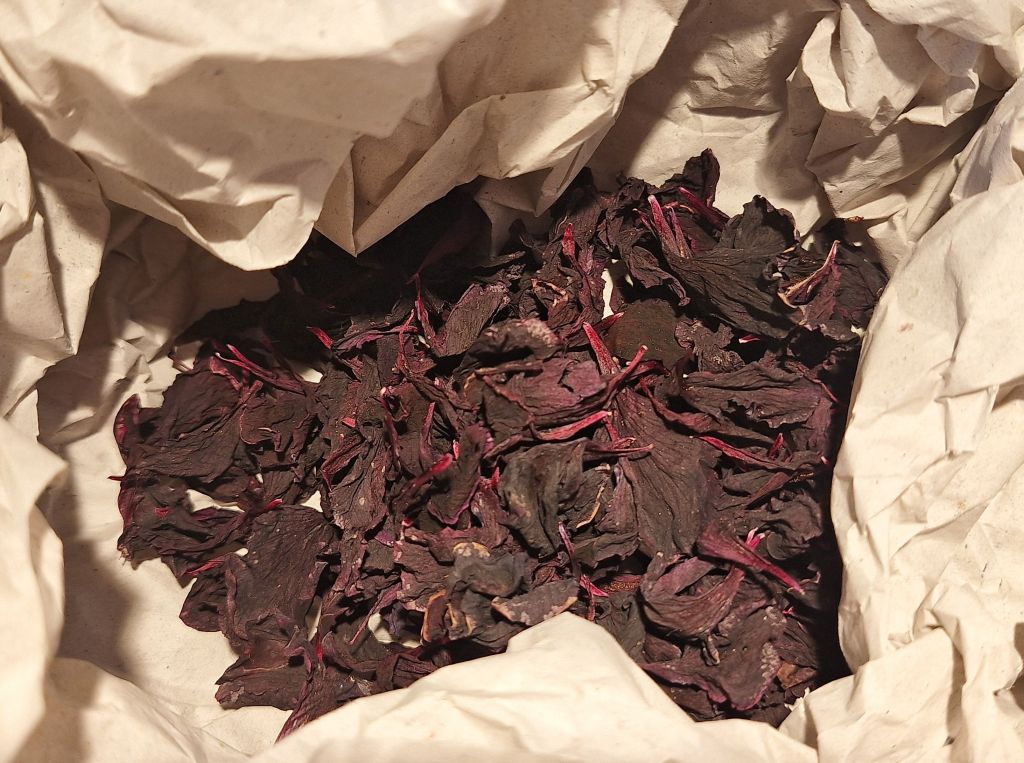
Below is a video example of the process of extracting glycerine extracts according to Cecil Vig. This video clearly shows the process to follow to prepare all types of extracts. In this case, she uses beetroot powder, but the same applies to any other plant or herb, such as geranium powder, amla powder, etc.

1. The first step is to obtain a powdered herbal extract from the chosen plant. To do this, first dry it, then grind it in an electric coffee grinder until you obtain a fine powder.

2. The second step is to add 3 to 5 times the amount of glycerine needed to cover this powdered extract. It is best to do this in a sterile glass container with an airtight lid, which we can stir daily for a few days until we obtain our glycerine extract.

3. The third step is to filter it through a very fine sieve or gauze cloth to remove the plant debris and leave us with the glycerine macerate. This macerated extract can now be used directly in our cosmetic preparations, as shown in the photograph.

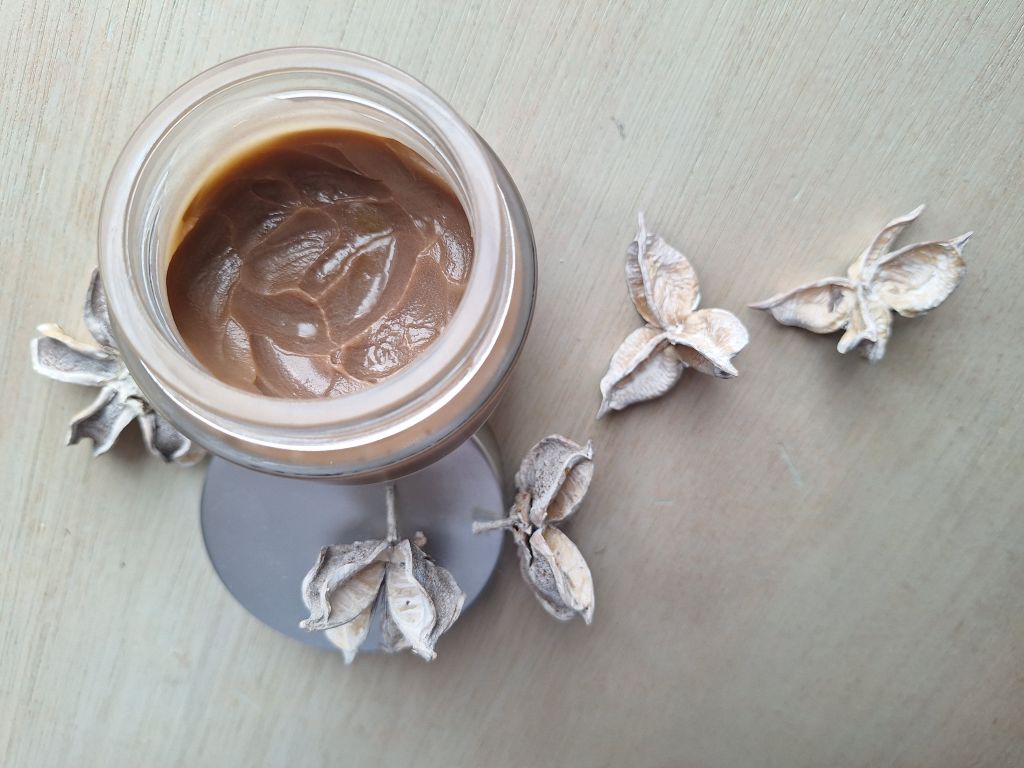
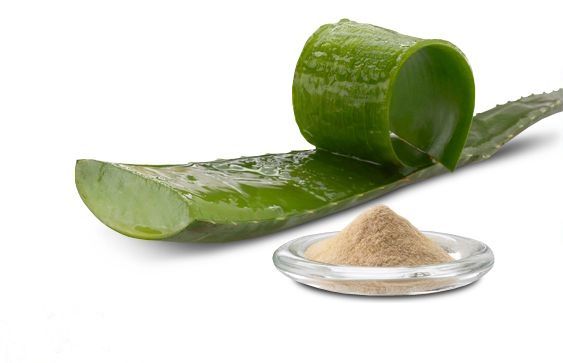
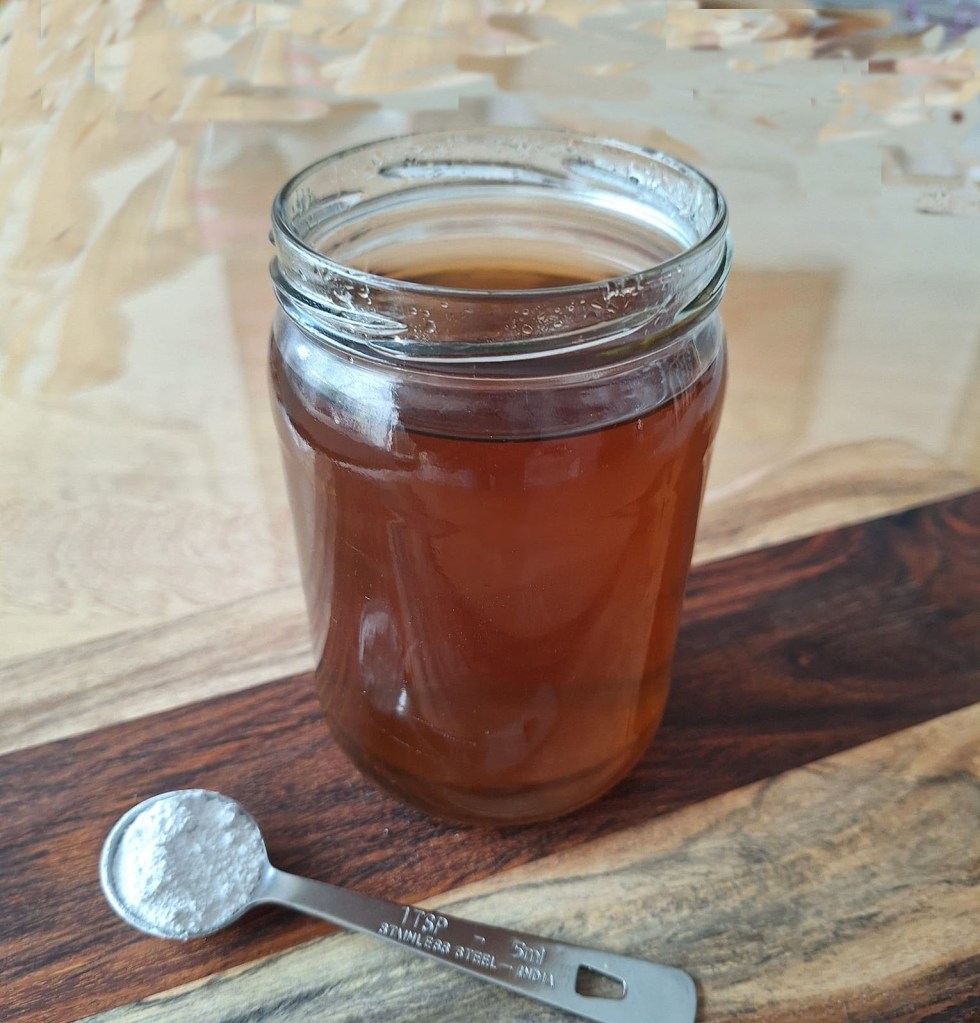
AMLA GLYCERINE EXTRACT

Although extraction in distilled water is more common, it is possible to extract the components of amla powder using glycerine. Glycerine can act as a solvent for many of the beneficial properties of amla. Personally, we really like the final result which, once filtered, can be applied directly to the skin to appreciate the fantastic moisturising properties it provides.

How to perform glycerine extraction (basic method)

Mix: Combine the amla powder with vegetable glycerine in a container. You can use a ratio of 1 part powder to 5 parts glycerine, adjusting according to the desired consistency. Our advice is not to use too much amla powder because it expands and thickens a lot when glycerine is added.

Resting: Leave the mixture to rest for a while, at least a couple of days, so that the compounds in the amla are transferred to the glycerine.

Filtering: Pass the mixture through a fine filter or gauze to separate the liquid from the solids.

Additional considerations:

Solvents: Glycerine is a solvent, but water can also be used to extract nutrients from amla, as the powder is water-soluble.

Use of glycerine: Glycerine is a thick liquid, so the result will be a more concentrated mixture with a different texture than a simple water infusion.

Applications:

This glycerine extract can be used in many different homemade cosmetic preparations. For example, it is very useful in the production of creams for mature skin due to its richness in natural polyphenols and stable vitamin C.

Yes, you read that right, the vitamin C in amla is more stable and degrades much less than ascorbic acid (a synthetic active ingredient isolated from plants that contain it), which also requires complex formulations to ensure its stability.

VITAMIN C IN AMLA:

Like any vitamin C, the high vitamin C content in AMLA degrades with prolonged exposure to air, light, and heat. However, it is known that: “The vitamin C in amla is significantly more stable than isolated ascorbic acid, as it is bound to polyphenols and tannins, a class of antioxidants. Stability also depends on the drying method, as freeze-dried powder retains more vitamin C, and proper packaging is essential to maintaining quality.”

Therefore, although some vitamin C loss during processing is inevitable, amla powder is considered a good and relatively stable source of vitamin C, as the vitamin is naturally protected by its other components. For maximum benefits, choose a well-packaged amla powder.

In addition to anti-ageing creams and serums, it is used in anti-acne cosmetic preparations, face and hair masks, anti-hair loss shampoo recipes, toothpastes, massage oils and natural soaps.

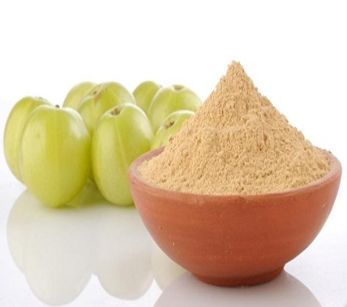
PROPERTIES OF AYURVEDIC AMLA POWDER

Amla powder is rich in vitamin C and polyphenols and has antibacterial, anti-inflammatory, tonic and skin regenerating properties.

Its high vitamin C and polyphenol content makes it an excellent antioxidant and regenerator for the skin and hair. It is highly recommended for dull, devitalised skin prone to acne.

OTHER AYURVEDIC PLANTS WITH REGENERATIVE PROPERTIES for the skin

In addition to amla powder , which have antibacterial and anti-inflammatory properties, neem powder is also worth considering. Although its bactericidal and fungicidal effects are well known for the ecological treatment of pests, its beneficial effects in other areas, such as skin care, are less well known. Neem is particularly beneficial for skin affected by acne, dermatitis, eczema or psoriasis. It is also a powerful natural anti-inflammatory and moisturiser that soothes dry skin, helps heal wounds and burns, and has anti-ageing properties. In addition, it can improve pigmentation, relieve sunburn and irritation, and act as an insect repellent.

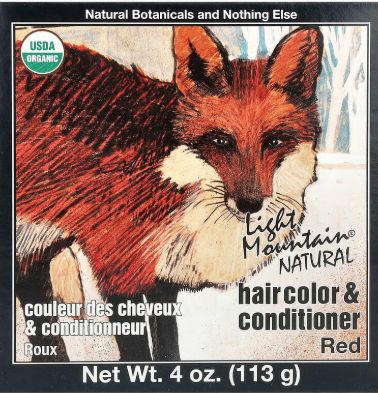
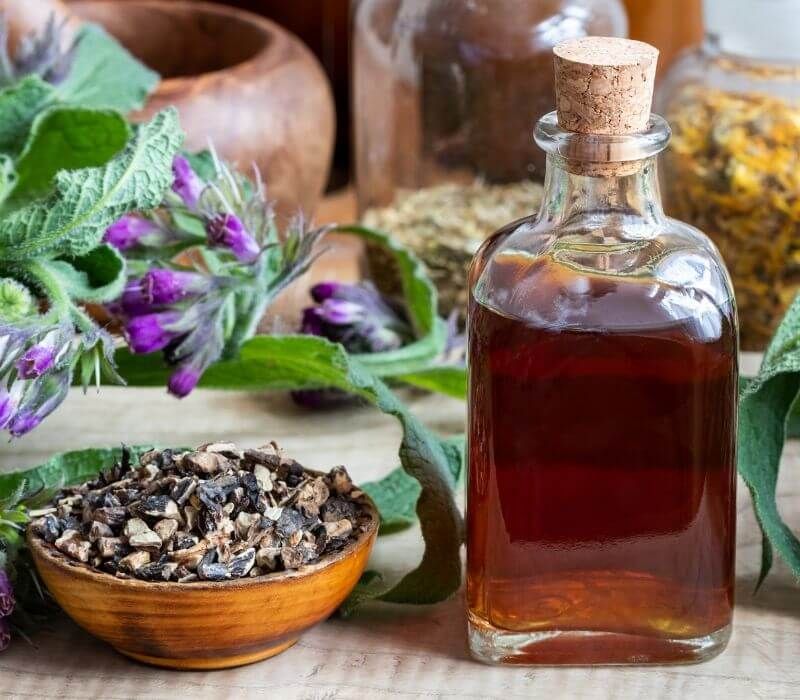
Alkanet root is used for hair growth or on the skin to heal wounds and nourish it. This root is insoluble in water, so it is prepared in oil. A popular recipe: Soak the alkanet root in warm coconut or sesame oil for a few hours until the oil turns a deep red colour. Use: Apply to the scalp to en te hair growth or to the skin to heal wounds and nourish it. It is even said that by using ratanjot powder regularly, grey hair will naturally darken, restoring its original colour over time.

Walnut extract powder. Walnut tincture is known to be antifungal and antibacterial, hence its use in natural medicine. Walnut extract powder also has antioxidant, anti-inflammatory, astringent and healing properties that benefit the skin. It is useful for reducing acne and excess oil, soothing irritations such as eczema, exfoliating the skin, and combating signs of ageing by protecting cells. It also aids wound healing and lightens blemishes. This powder can be macerated in either glycerine or a high-quality oil. In both cases, it is a valuable addition to our homemade cosmetic preparations.

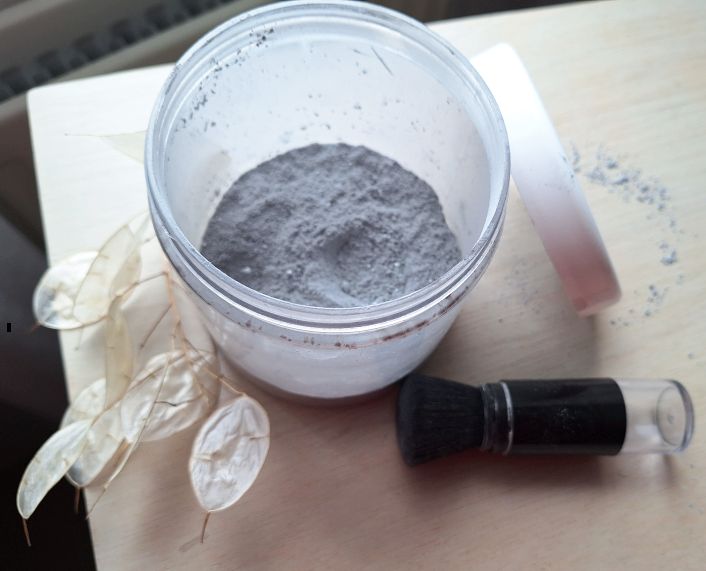
Black clay is also regenerating, healing, nourishing, and toning

Ashgawandha powder is another plant with antioxidant and regenerative properties, making it an excellent product for pro-ageing and healing cosmetics.

Rosehip powder keeps the skin healthy and promotes the healing of wounds and burns. It is rich in vitamins such as A, C, E and D.

NIACINAMIDE SERUM with 3 INGREDIENTS

This facial serum recipe is particularly suitable for sensitive skin affected by pigmentation spots because it evens out skin tone and moisturises the skin, as glycerine is a great moisturiser. Geranium also has interesting regenerative properties.
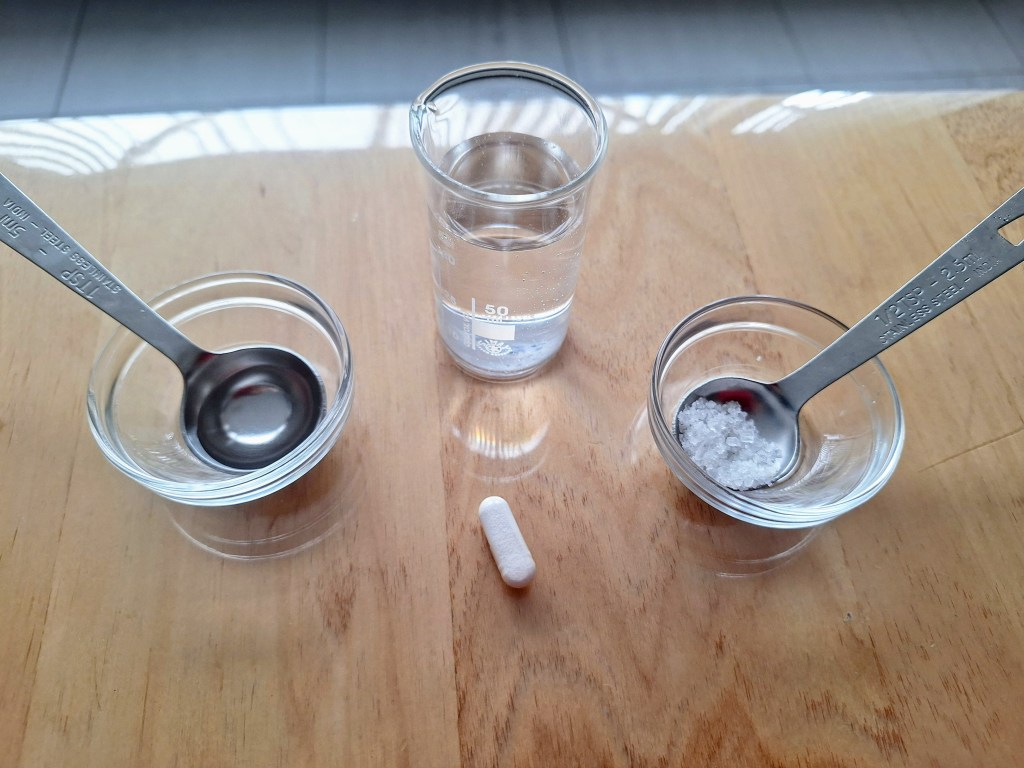
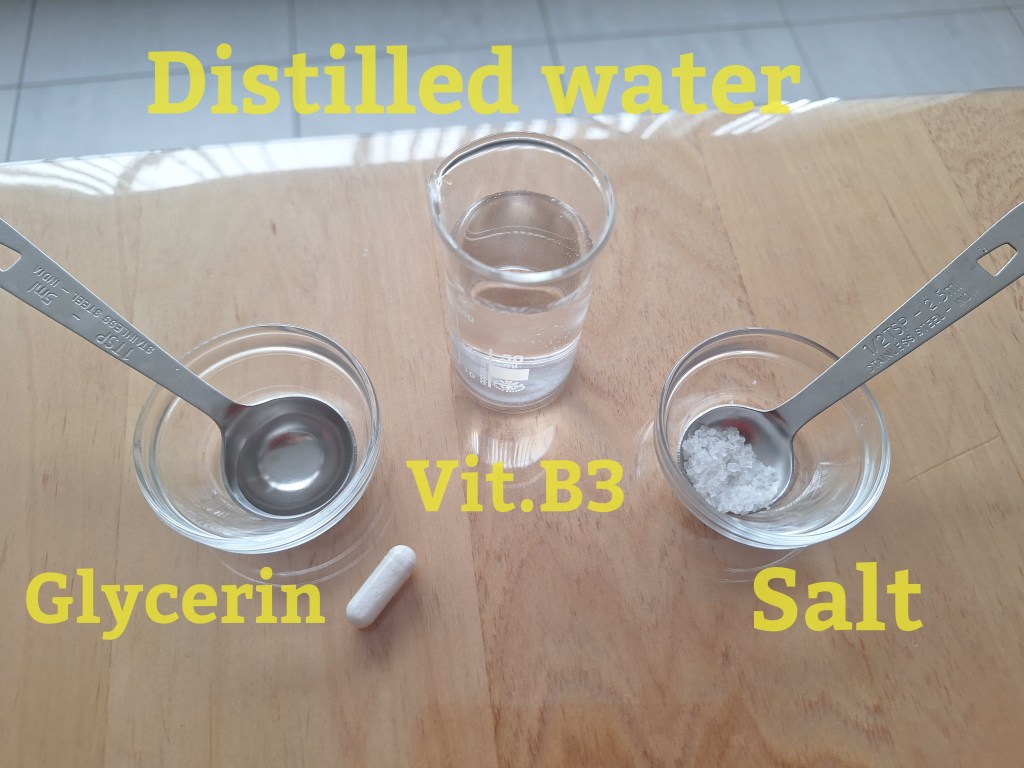
INGREDIENTS:

Geranium extract macerated in glycerine.

One capsule* of niacinamide for a 30 ml dropper bottle.

A hydrolate or mineral salt water or ozonated distilled water or simply distilled water.

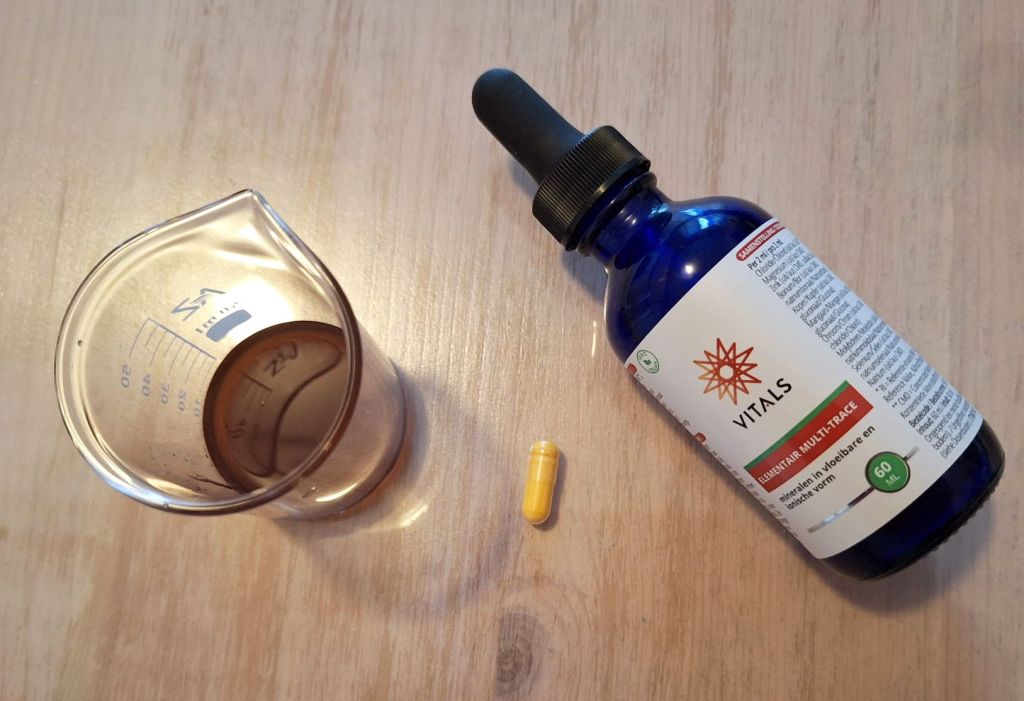
*Personally, we usually use water with trace elements from VITAL, which is intrinsically preserved and contains trace elements that are very beneficial for the skin, such as zinc and copper.

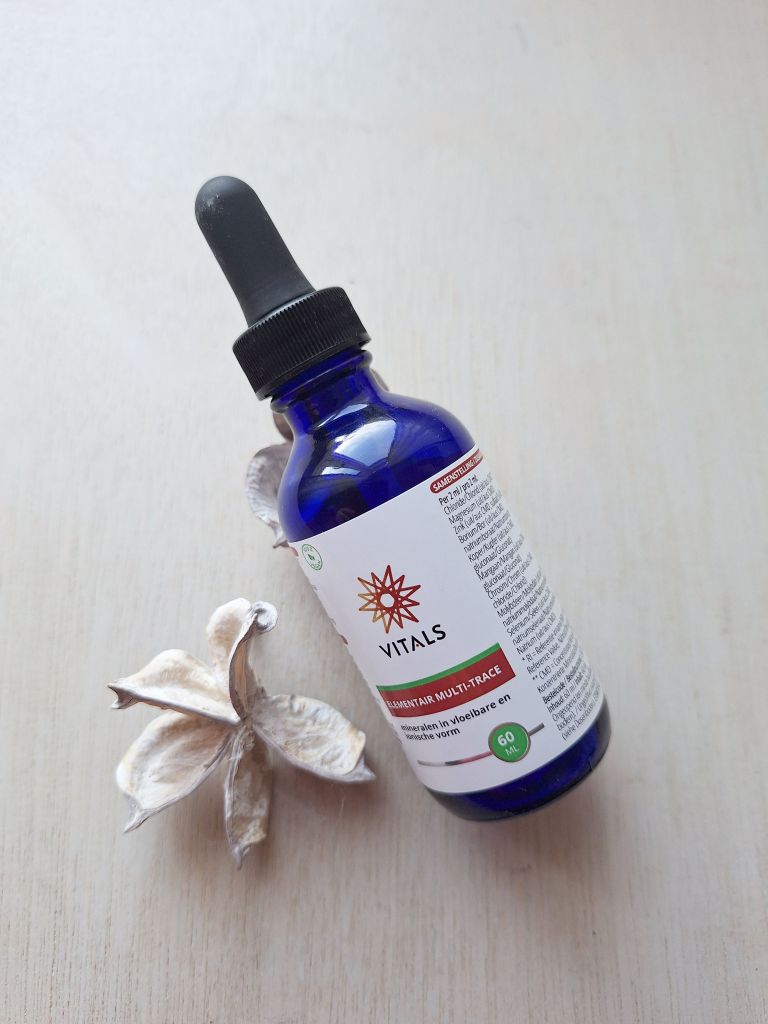
*This water with trace elements is marketed, in principle, as an ionic mineral supplement based on “Concentrated Mineral Drops” (CMD) from the Great Salt Lake, Utah (USA). It contains a full spectrum of minerals and trace elements with additional additions of zinc, copper, boron, selenium, chromium, manganese and molybdenum, which are very easy to absorb thanks to their dissolved ionic form.

It is not that we are dedicated to promoting certain supplements in this blog, we only recommend them sometimes if, after trying them, we find them useful for our readers interested in cosmetics and natural medicine.

In any case, as we said, it is possible to simply use distilled water, ozonated distilled water or a hydrolate of your choice.

PREPARATION:

First, macerate the powdered geranium petals in a small glass jar with 3 parts glycerine to 1 part geranium powder. Leave it closed for a couple of weeks, stirring frequently.

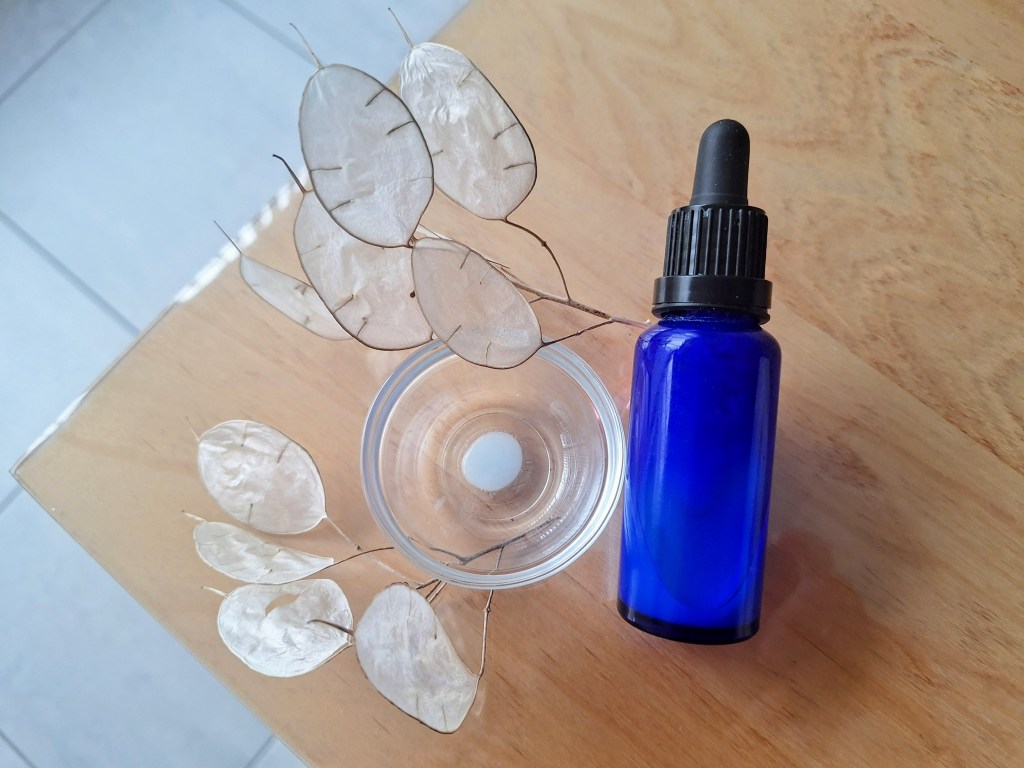
Now extract about 15 ml of this macerate and mix it with about 15 ml of hydrolate. Add the niacinamide capsule (food grade is always best) to the mixture, stirring continuously. Once the 3 components are well mixed, pour into a small glass dispenser bottle for easy application.

USE: The facial serum recipes we have designed on this page can be used daily without any problems, as they do not alter the skin on our face. However, it is always a good idea to combine them with other serums or creams to enhance the effects of the treatments.

Both the niacinamide capsule and the coenzyme Q10/hyaluronic acid and astaxanthin capsule that we will use in the following facial serum recipes are all “food grade”, which can be found in natural medicine shops. This is because, although it is possible to find these components in cosmetic supply shops, we personally believe that the more bioavailable an ingredient is, the more effective it will be in our product.

We believe that bioavailability equals effectiveness.

* If we are going to make more serum, we will need to add more niacinamide, but this is never a good idea with this type of totally natural, preservative-free product, as you know. The idea is to consume them quickly and frequently.

We cannot guarantee this product because we do not sell it, hehehe, but we do guarantee the recipe. If you want to have skin like a baby’s bottom, use this serum 2 to 3 times a week, preferably at night.

Oh, and don’t add any preservatives because this serum doesn’t need them. Preservatives, in general, even the mild ones (otherwise they wouldn’t be effective), alter our skin microbiome. The famous microbiota that everyone is talking about nowadays, so the results you get will not be the same, I’m sorry to say. ☹

WHY A NIACINAMIDE SERUM?

Simply because it is a vitamin (vitamin B3) that cares for our skin and is suitable for all skin types: dry, oily or sensitive…

It has numerous properties, such as:

Reduces blemishes (even melasma*) and evens out skin tone

It regulates sebum in oily or combination skin and improves the texture of this type of skin by helping to close pores.

It soothes inflammation and improves redness and sensitivity in sensitive, dry or damaged skin.

It strengthens the skin barrier, which is important for skin affected by rosacea or even acne scars.

And, in general, it boosts hydration when combined with other active ingredients, such as panthenol (pro-vitamin B5)*, aloe vera or hyaluronic acid…

*Melasma is a specific type of hyperpigmentation characterised by dark, symmetrical patches, mainly on the face, and is strongly influenced by hormonal factors and sun exposure. In contrast, “pigment spots” is a general term for any darkening of the skin, which can be caused by a variety of factors such as sun exposure (solar lentigines), acne (post-inflammatory hyperpigmentation) or ageing, and can appear anywhere on the body.

*Panthenol is a stable form of vitamin B5 (pantothenic acid) that converts to vitamin B5 when it penetrates the skin. It is used in skin, hair and nail care products for its moisturising, soothing and repairing properties.

WHY USE AN OZONATED OIL OR AN OZONATED WATER BASE in our homemade serum?

As we know, ozonated oils help prevent skin blemishes by reducing existing hyperpigmentation and promoting cell renewal. Their action is based on their antioxidant and regenerative properties and their ability to remove dead cells and treat infections that can cause blemishes.

Ozonated water also helps prevent skin blemishes. Its action is due to the removal of dead cells, the disinfection of pores, cell revitalisation and improved blood circulation, which contributes to a more luminous and even skin tone. In addition, the antioxidant properties of ozone help protect the skin.

AMLA SERUM with 3 INGREDIENTS

This facial serum recipe is particularly suitable for mature and dull skin that needs vitality and hydration, as glycerine is a great moisturiser. Amla extract provides organic, bioavailable vitamin C and coenzyme Q10, which stimulates collagen and elastin production, reducing wrinkles and combating the negative effects of exposure to solar radiation, which is otherwise unavoidable. The use of hyaluronic acid, instead of coenzyme Q10, also has a moisturising, tightening and regenerating effect on this type of skin.

VITAMIN C IN AMLA:

Like any vitamin C, the high vitamin C content of AMLA degrades with prolonged exposure to air, light and heat. However, it is known that: “Vitamin C from amla is significantly more stable than isolated ascorbic acid, as it is bound to polyphenols and tannins, a class of antioxidants. Stability also depends on the drying method, as freeze-dried powder retains more vitamin C, and proper packaging is essential to maintain quality.”

Therefore, although some vitamin C loss during processing is inevitable, amla powder is considered a good and relatively stable source of vitamin C, as the vitamin is naturally protected by its other components. For maximum benefits, choose a well-packaged amla powder.

COENZYME Q10 has multiple beneficial effects, such as:

-Antioxidant protection: It acts as a powerful antioxidant that neutralises free radicals, protecting the skin from damage caused by the sun (UVA and UVB radiation) and pollution, helping to prevent premature ageing.

-Stimulates collagen and elastin: By stimulating the production of these proteins, it helps maintain skin elasticity and firmness, resulting in a younger, firmer complexion. This makes it particularly suitable for mature or sun-damaged skin.

-Reduces wrinkles and improves hydration: The combination of its antioxidant properties and its ability to increase collagen helps smooth existing fine lines and wrinkles by contributing to the formation of a natural moisture barrier in the skin that helps it look smoother and softer.

-Provides luminosity, just like the vitamin C in amla: This means that both act synergistically. The skin looks brighter, revitalised and more even-toned. And the skin’s lipid barrier is strengthened, protecting it from external and internal aggressions.

THE BENEFICIAL EFFECTS OF HYALURONIC ACID:

Hyaluronic acid is taken orally and is available in tablets and nutritional supplements. There is even a liquid form available, which can be mixed with water and consumed. In our case, we can easily add it to our serum, although it is also possible to do so with the powder version that comes in capsules, as hyaluronic acid is water-soluble. Oral administration also has many advantages, including reducing the discomfort caused by arthritis and improving skin health, as it is a powerful moisturising agent that strengthens the skin barrier.

Basically, it provides intense hydration to the tissues (when taken orally) and to the skin when applied topically. Its filling effect (it increases volume by retaining water) makes the skin look smoother and firmer. As it strengthens the skin’s lipid barrier, the skin looks more elastic and hydrated.

INGREDIENTS:

Amla macerated extract in glycerine.

One capsule* of coenzyme Q10 or hyaluronic acid for a 30 ml dropper bottle.

A hydrolate or mineral salt water or ozonated distilled water or simply distilled water.

PREPARATION:

First, macerate the amla powder in a small glass jar with 5 parts glycerine to 1 part amla, because amla expands considerably. Leave it closed for a couple of weeks, stirring frequently.

Now extract about 15 ml of this macerate and mix it with about 15 ml of hydrolate. Add the capsule of coenzyme Q10 or hyaluronic acid, according to your preference, to the mixture, stirring continuously. Once the three components are well mixed, pour into a small glass dispenser bottle for easy application.

USE: The facial serum recipes we have designed on this page can be used daily without any problems, as they do not alter the skin on our face. However, it is always a good idea to combine them with other serums or creams to enhance the effects of the treatment.

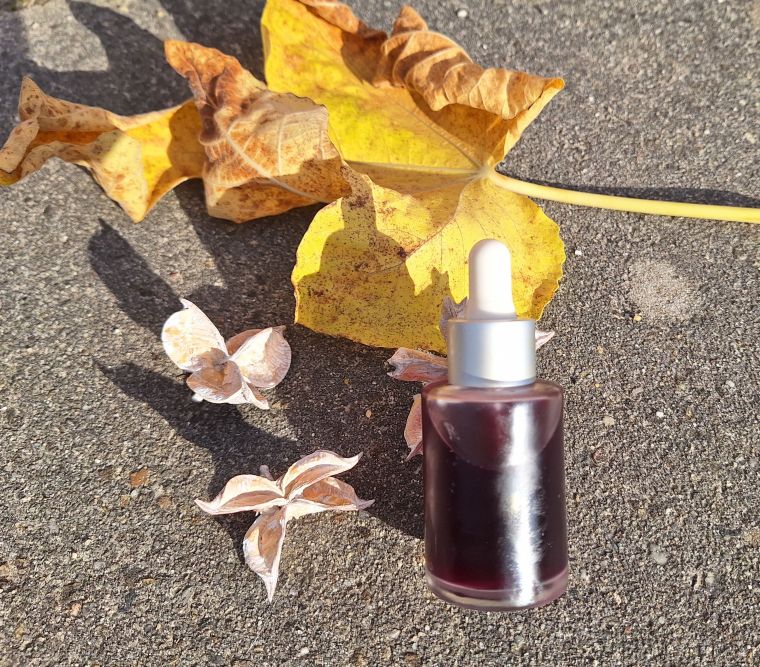
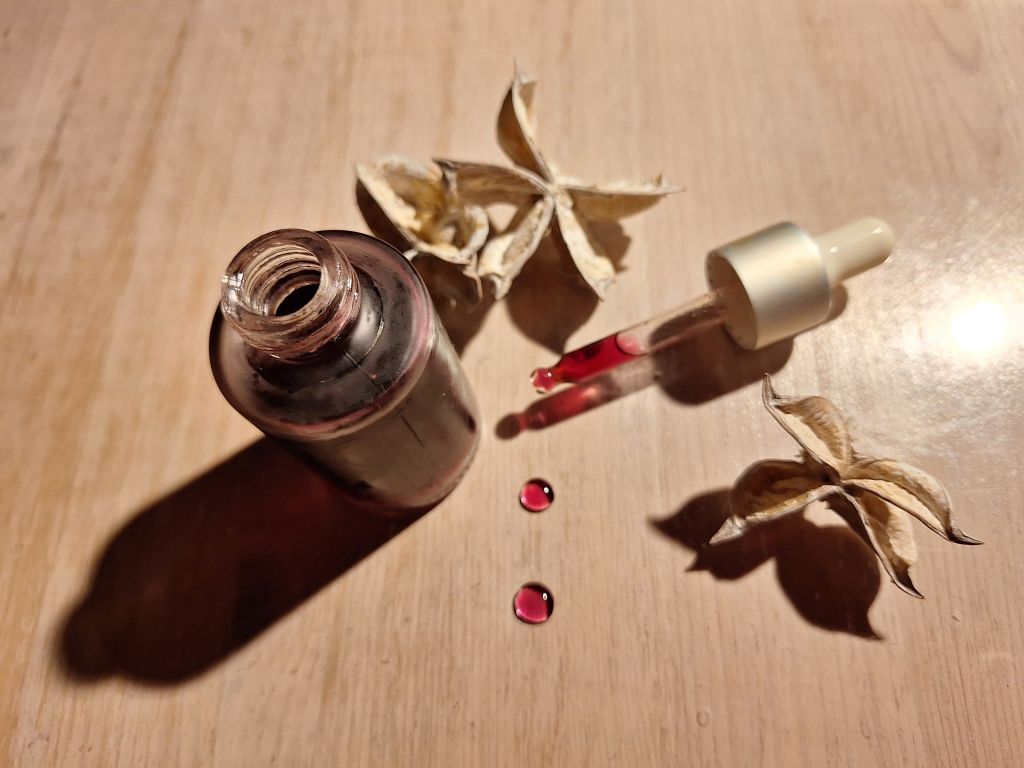
ALKANET+AMLA SERUM with 3 INGREDIENTS

This serum is particularly useful for soothing itching, irritation and redness, regenerating and accelerating wound healing and, in general, softening and nourishing the skin.

INGREDIENTS:

One part macerated alkanet root extract together with amla in glycerine.

Two parts of a quality virgin oil, such as sea buckthorn oil, or a combination of several oils.

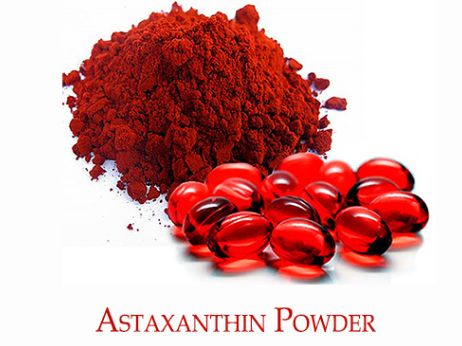
Optional: add a capsule of astaxanthin, which is also fat-soluble.

*This serum cannot be prepared with water or hydrolates because alkanet root is fat-soluble and does not mix with water, only with oil or glycerine, of course.

*Sea buckthorn oil is obtained from sea buckthorn berries. It is a very interesting oil for skin care because it is rich in unsaturated fatty acids that have a stabilising and regenerating effect on the skin barrier. It is known to be a natural source of antioxidants, essential fatty acids (omega 3, 6, 7 and 9), carotenoids, vitamins (A, C, E) and minerals. All these nutrients combine to deeply nourish the skin, stimulate cell regeneration and maintain its elasticity.

PREPARATION:

First, macerate equal parts of powdered alkanet root and powdered amla in a small glass jar with 3 parts glycerine for every 1 part of the powder mixture. Leave it closed for a couple of weeks, stirring frequently.

Now extract about 10 ml of this macerated mixture and mix it with about 20 ml of high-quality cold-pressed oil. If you are going to add the astaxanthin capsule, now is the time to do so, stirring continuously so that all the ingredients are thoroughly mixed. Once the ingredients are well mixed, pour the mixture into a small glass dispenser bottle for easy application.

USE: The facial serum recipes we have designed on this page can be used daily without any problems, as they do not alter the skin on our face. However, it is always a good idea to combine them with other serums or creams to enhance the effects of the treatment.

THE ASTAXANTHIN OPTION

Astaxanthin is known as the most powerful antioxidant in the world, much more so than vitamin C, beta-carotene or vitamin E. According to comparative studies, astaxanthin is (for example) 6,000 times more powerful than vitamin C, 770 times more powerful than coenzyme Q10 and 100 times more powerful than vitamin E.

Today we also know that it prevents collagen degradation.

It is produced by microalgae that form the basis of the diet of salmon, prawns, flamingos, etc. This is why these animals have a reddish colour (their pigment is fat-soluble and settles in the cell membranes). However, it has been shown that, in addition to its well-known antioxidant power and ability to protect the skin from sun damage, it even protects the eyes from cataracts.

In summer, the skin loses collagen due to the action of solar radiation, which accelerates its loss of firmness. The study we mentioned has shown that astaxanthin inhibits the action of the enzymes that degrade this collagen, protecting the skin from within. We could summarise the benefits of astaxanthin intake as follows:

–A powerful antioxidant, it inhibits the formation of free radicals, accelerated by the sun’s action, preserving collagen from degradation.

–Due to its ability to protect the skin from sun damage, it softens wrinkles and fades skin blemishes while also promoting hydration.

–It is considered a natural anti-inflammatory that, internally, improves immune function and cardiovascular health.

For all these reasons, it is particularly beneficial to use it in a serum to treat the skin during the summer. And, without a doubt, it is best to apply it at night, which is when the skin prepares and repairs itself for the day ahead.

PROPERTIES OF ALKANET ROOT FOR THE SKIN

This root, which is insoluble in water, can be infused in oils to extract its properties and colour. In fact, alkanet root has cosmetic properties and benefits for the skin, such as its use as a natural colourant (red and purple- ), its antioxidant capacity that helps fight free radicals and premature ageing, and its soothing and healing effects. It is useful for soothing itching, accelerating wound healing, and softening the skin.

Skin properties

  • Antioxidant: It contains antioxidants that help protect cells from damage caused by free radicals, which can delay premature ageing of the skin.
  • Heals wounds: Traditionally used to aid wound healing and relieve itching and inflammation of the skin.
  • Emollient: It helps to soothe and soften the skin, acting as a natural emollient.
  • Natural colouring: Its main use is as a natural dye for cosmetic products such as soaps, lip balms, lotions and ointments, giving them a reddish colour.
  • Detoxification and general health: It is considered to support skin health and aid in detoxification.
  • Potential for skin conditions: It has been used to help with conditions such as dermatitis, eczema and warts, although this should be discussed with a professional.

MOISTURISING ACTIVE INGREDIENTS IN NATURAL COSMETICS

Moisturising is the quality of an active ingredient that is capable of absorbing and retaining moisture in both the skin and hair; in other words, it hydrates and retains hydration. Ingredients such as glycerine, sorbitol (sugar alcohol), butylene glycol and, of course, hyaluronic acid are examples of moisturisers used in skin care products.

That said, other moisturising active ingredients, apart from glycerine extracts, that we can consider for our natural cosmetic preparations are:

  • Honey, which we discussed at length at the beginning of the article. There is no more natural and simple way to add moisturising properties to our cream or natural product than by adding a teaspoon of organic honey. Honey attracts moisture into the skin, making it useful for treating dry skin and combating ageing.
  • Betaine is valued in skincare for its ability to help the skin retain moisture, making it a popular ingredient in moisturising and soothing formulas. Also as a surfactant, betaine cleanses and moisturises the skin by drawing moisture from the environment and retaining it, helping to maintain a healthy and smooth complexion. In addition, betaine works synergistically with other ingredients such as niacinamide and hyaluronic acid, improving the overall effectiveness of skin care.
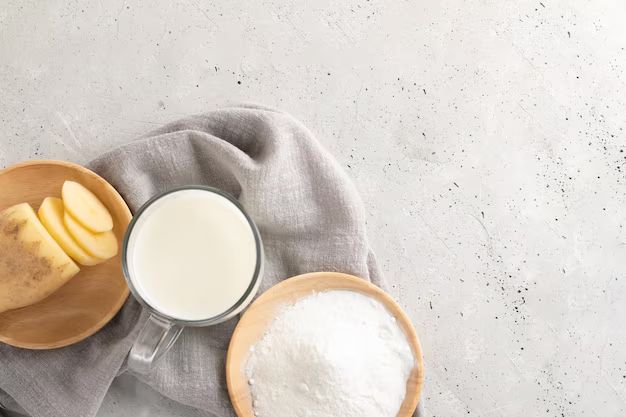
  • Hyaluronic acid is a type of sugar (polysaccharide) that we all have naturally in our skin. When obtained from plant sources, its properties seem magical. Plant-based hyaluronic acid is obtained from the fermentation of starchy vegetables (such as corn or potatoes) and has a unique ability to retain water up to 1,000 times its weight. Well-formulated, plant-based hyaluronic acid is one of the most effective ingredients available for moisturising, smoothing and protecting the skin. It has the ability to fill in wrinkles and rejuvenate the appearance. Furthermore, as hyaluronic acid is already naturally present, our skin tolerates it very well.
  • Panthenol or pro-vitamin B5, which moisturises and hydrates. This is another very special vitamin that deeply hydrates without saturating, while also repairing and soothing. As it is a natural vitamin, it is highly bioavailable and is not perceived as something external, only its amazing results. It increases the skin’s ability to retain water and strengthens the skin barrier. It also promotes the regeneration of damaged areas by reducing redness, itching and sensitivity, as it is anti-inflammatory.
  • Lactic acid: Lactic acid is a type of alpha hydroxy acid (AHA) that occurs naturally in fermented dairy products and is also produced in the human body during metabolism. It is therefore an active ingredient with high bioavailability. It is used to adjust the pH of creams and natural cosmetic products, but above all, it is mainly used as a gentle exfoliant and moisturising agent. Unlike other exfoliants that can leave the skin dry and tight, lactic acid has moisturising properties and acts as a humectant that attracts moisture to the outer layer of the skin, leaving it softer, smoother and more hydrated. This can help improve skin texture, reduce the appearance of enlarged pores and smooth fine lines and wrinkles. In addition to its ability to exfoliate and moisturise, it can also improve the appearance of hyperpigmentation and dark spots, leading to a more even skin tone. Its high bioavailability and moisturising capacity make it an excellent choice for people with sensitive skin.
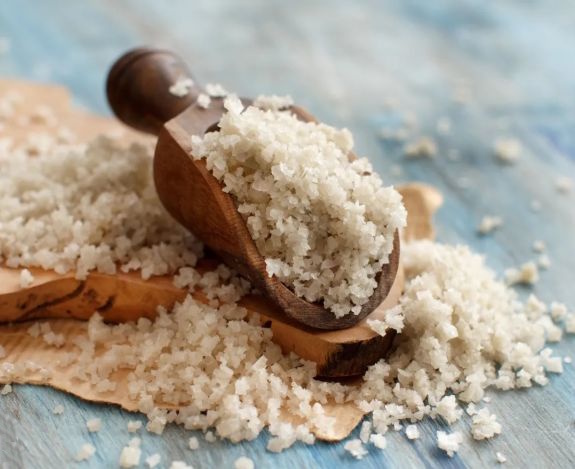
  • Sodium lactate is the sodium salt of lactic acid. It is a bioavailable active ingredient, as it is a salt of lactic acid that occurs naturally in the human body and is produced by the fermentation of sugars. It belongs to the group of moisturising/humectant substances produced by the skin to maintain its own moisture content and the slightly acidic physiological pH of the skin. In natural cosmetics, sodium lactate is used in combination with lactic acid as an effective, physiological and skin-tolerable moisturiser. Sodium lactate is highly soluble in water. As it prevents the proliferation of fungi and yeasts, it is also sometimes used as a food preservative and, in natural cosmetics, we can also benefit from its ability to extend the shelf life of our products. In handmade soap making, it is used to help soaps cure faster and to give them greater hardness. This active ingredient is a favourite for dry skin due to its great moisturising capacity, which is only surpassed by hyaluronic acid.
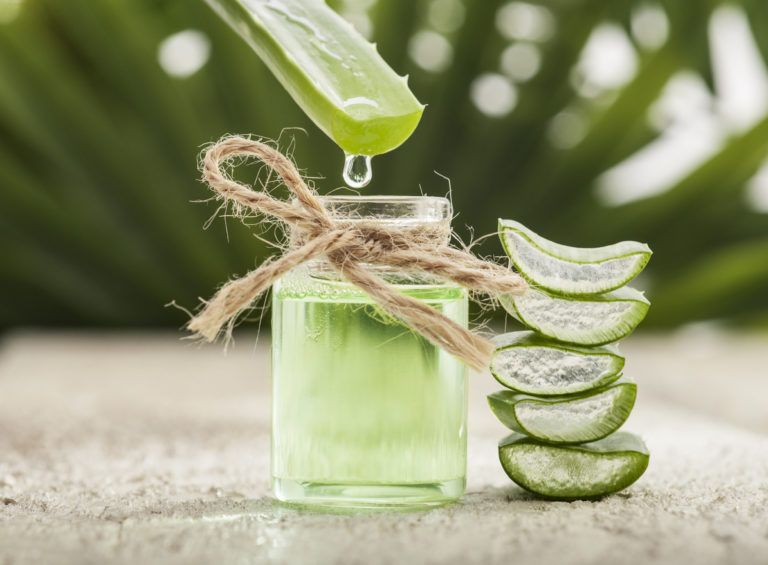
  • Aloe vera, which moisturises and regenerates. Its natural pulp is rich in water, anti-inflammatory and provides intense hydration, restoring the skin’s moisture levels.
  • Goat’s milk powder. Milk serum stimulates natural collagen production, bioproteins help retain moisture, and biotin acts as a protector against external aggressions.
  • And, of course, shea butter, which moisturises, nourishes and heals. It is also a natural source of vitamins A, D, E and F, making it one of the most complete natural products we can use to protect ourselves against external aggressions. Shea butter has powerful regenerative and healing properties for wounds and burns. It is worth mentioning its effect on improving skin elasticity, effectively smoothing wrinkles in the dermis.

BIBLIOGRAPHY:

McLoone, P., Oluwadun, A., Warnock, M., & Fyfe, L. (2016). Honey: A Therapeutic Agent for Disorders of the Skin. Central Asian Journal Of Global Health, 5(1). https://doi.org/10.5195/cajgh.2016.241

Click to access VILLERS%20Agathe.pdf

Tashkandi, H. (2021). Honey in wound healing: An updated review. Open Life Sciences, 16(1), 1091–1100. https://doi.org/10.1515/biol-2021-0084

McLoone, P., Oluwadun, A., Warnock, M., & Fyfe, L. (2016b). Honey: A Therapeutic Agent for Disorders of the Skin. Central Asian Journal Of Global Health, 5(1). https://doi.org/10.5195/cajgh.2016.241

Jungermann, E., & Sonntag, N. O. V. (1991). Glycerin: A Key Cosmetic Ingredient.

This is a comprehensive book that covers the properties, manufacturing, and use of glycerine in cosmetics and other industries.

Baumann, L. (2015). Cosmeceuticals and Cosmetic Ingredients.

A chapter in this book discusses glycerine in the context of cosmeceuticals and cosmetic ingredients.

Sage Journals: “Safety Assessment of Glycerine as Used in Cosmetics” by Rothe et al. (2019). This article details the frequency of use, concentration ranges, and safety profile of glycerine in cosmetic products based on a 2014 survey.

ResearchGate: “Functions of Glycerine in Cosmetics” by Filipe Smith Buarque, Silas Arandas Monteiro E Silva, and Bernardo Dias Ribeiro (2025). This paper delves into the functional properties of glycerine in skincare, such as its effects on moisturisation and skin desquamation.

Other journals: Articles from Cosmetics & Toiletries and SpecialChem often cover the properties and uses of ingredients like glycerine.

Natural Hair Care: Homemade Recipes

In this blog post, we provide you with a series of recipes and hair beauty routines that will keep your hair beautiful and healthy-looking, regardless of whether it is short, long, oily, curly or straight. We hope you like it and give us a like! 😊

EASY HOMEMADE DRY SHAMPOO

Has your hair been greasy in the morning and you need a quick fix? Do you want a more natural alternative to commercial dry shampoo?

The use of dry shampoo sprays has become increasingly popular in recent times as an alternative to frequent washing. This is because it is becoming increasingly obvious to all consumers that frequent hair washing ends up making it greasy or dry. In any case, it damages it in one way or another, depending on our constitution.

That is why in this blog post we want to give you the recipe for the dry shampoo that we use, which can be easily prepared with three simple ingredients:

-A base of talcum powder, which is what really does the job of absorbing grease without leaving the hair sticky.

Anti-grease silica powder, which helps to leave our hair loose and degreased. Silica is also a mineral that naturally repairs the keratin in our hair fibres.

We will also add 1/2 teaspoon of activated charcoal for colour. Or just a tablespoon of coffee powder if we have light-coloured hair roots.

OUR EASY RECIPE FOR DRY SHAMPOO FOR HAIR

As we said before, we only use three ingredients: a base of commercial talcum powder, a percentage of silica powder (fluffy silica, about half the amount of talcum powder used) to act as an anti-caking agent, and activated charcoal or coffee powder to add colour.

We usually add half a teaspoon of activated charcoal to give the mixture colour and prevent it from leaving our hair white when applied, or a tablespoon of natural coffee powder if we have light-coloured roots.

AN EXPLANATION OF THE INGREDIENTS USED

As we said, we use a talcum powder base to make our homemade dry shampoo. Commercial talcum powder is usually made from ground talc. Talc is a naturally occurring substance that absorbs moisture, reduces friction and has a cooling effect.

TALC POWDER: Talc powder comes from the mineral talc, also known as steatite. Talc, a magnesium silicate containing hydrogen, is extracted from the earth’s crust and, once pulverised, is able to absorb moisture and reduce friction. In this way, it keeps the body dry and prevents skin rashes.

Cosmetic talc is sometimes negatively labelled due to confusion about the difference between talc and asbestos. It is true that both are hydrated magnesium silicates, but diamonds and barbecue charcoal briquettes are made of carbon, and no one would say they are the same thing.

A very important difference between talc and asbestos is their crystalline structure. While talc is made up of small flat sheets, asbestos is formed as fine fibres. It is the specific fibrous structure of asbestos that contributes to its potentially harmful effects. Talc particles do not share this characteristic.

What does commercial talcum powder contain?

In addition to talc, manufacturers often add oils, zinc oxide or petroleum jelly. Oils, zinc oxide and petroleum jelly soften the skin. And, as we know, most things that are good for the skin are also good for the hair or, in any case, for the scalp.

Is talcum powder safe?

Talcum powder is safe as long as it is sprinkled on the skin and not inhaled. Therefore, our only precaution is to apply it to the scalp with a make-up brush. A little goes a long way, and avoid inhaling it.

It is also advisable to avoid sprinkling talcum powder on open wounds or severely damaged skin, as it might penetrate the body through the skin.

SILICA: Silica strengthens the hair and prevents hair loss. It contributes to the production of keratin, which is very important for hair health and for preventing hair loss. Thus, combined with coffee powder, it has a synergistic effect that enhances and prevents hair loss.

Silica also helps absorb oil from the hair without weighing it down and adds volume. So it’s not a bad alternative to coffee powder, although it’s also possible to use both. In fact, as we mentioned in the previous paragraph, they have a synergistic effect.

Coffee makes your hair shinier. Silica gives it more volume. Combined, they enhance each other’s effects.

If your hair is oily and also straight and lacking in body, silica is the best alternative. It can be found at a good price in spice and culinary preparation shops as an anti-caking agent under the name E-551 or SAS (Synthetisch Amorf Silica).

This type of silica is found in various foods, such as coffee creams and soups, sauces and spice mixes, and is composed of silica nanoparticles. This gives it a very fluffy and light consistency that is perfect for our dry shampoo as it absorbs grease without leaving any residue in our hair. On the other hand, it does add a lot of volume and prevents hair loss, making it an ideal silica for this type of cosmetic product.

WHY THESE INGREDIENTS AND NOT OTHERS?

We have found many blogs online that promote various ingredients for making homemade dry shampoos, such as tapioca flour, cornflour, baking soda, etc.

We have tried them and they are not a good idea. In general, they do not do the job. Bear in mind that they are food flours, so they cannot really absorb the oil from the hair and leave it loose at the same time.

In the case of bicarbonate of soda, in particular, we have found that it is a better degreaser, but it leaves the hair looking frizzy and damaged. 

We have also seen that cocoa powder, another food product, is used to colour it brown. This is not a good idea either, because cocoa does not absorb grease, but rather tends to promote the opposite.

Cocoa* is a very good idea in face creams, to add colour and promote skin hydration. Especially when formulated with sun protection factors, such as zinc oxide, which would otherwise leave a white film on the skin.

*Cocoa, especially in the form of butter or extract, offers several benefits for the skin. Its antioxidant properties help protect the skin against damage from free radicals, which are responsible for premature ageing, and improve elasticity and firmness. In addition, cocoa deeply moisturises, soothes irritated skin, reduces redness and can improve the appearance of superficial blemishes.

Activated charcoal, on the other hand, works synergistically with talc and silica to absorb hair oil and leave hair loose and tangle-free.

We hope you find our recipe as interesting and effective as we do. There is no need to use commercial sprays, which dry out the hair and damage it in the long run. Especially if you have dyed hair, you will really notice the difference!

At this link, you can read all about what I was talking about and what you should not use in your homemade shampoo if you do not want to make your hair greasier.

https://www.hollandandbarrett.com/the-health-hub/natural-beauty/haircare/how-to-make-your-own-dry-shampoo-at-home/

ALTERNATIVE RECIPE FOR THOSE WHO HAVE DIFFICULT ACCESS TO TALC

There are countries where talcum powder is frowned upon and difficult to find. In this case, we suggest replacing it with calcium carbonate. However, talcum powder is undoubtedly the best option.

What is calcium carbonate?

Calcium carbonate is a natural calcium salt. It is found in 4% of the Earth’s crust in the form of limestone, marble and chalk.

It is a white, odourless substance (CaCO3) found in various forms in nature, such as limestone, marble and chalk. Traditional chalk is simply a variety of calcium carbonate with specific properties that make it suitable for writing on blackboards and other similar surfaces.

The biocompatibility of this natural mineral substance makes it suitable for various cosmetic uses. It is used, for example, as a base for make-up and also as a base for toothpaste.

In dry shampoo, the interesting thing about calcium carbonate is that it has a very alkaline pH that lifts the keratin scales of the hair, making it feel cleaner and adding volume, as well as absorbing oil.

OTHER POSSIBILITIES:

A bentonite clay base: Calcium bentonite clay is a natural absorbent clay composed mainly of hydrated aluminium silicate. It is formed when volcanic ash ages and is known for its ability to absorb toxins, making it a popular ingredient in detoxifying and skincare products.

A magnesium carbonate base: Hydrated magnesium carbonate (MgCO3·H2O) is found in nature as a mineral and is used in various applications, such as: acidity regulator, anti-caking agent, absorbent agent, opacifier, and to adjust the pH in personal care products.

It is a white, slightly alkaline powder that is generally insoluble in water, although it dissolves in the presence of acids. Magnesium is an essential mineral for the human body, and magnesium carbonate is a source of this mineral, with benefits such as relieving heartburn and regulating intestinal transit.

In cosmetics, it is found in products such as antacids, nutritional supplements, talcum powder, deodorants and other personal care products.

The above recipe for dry shampoo based on talcum powder and silica is very practical and easy to prepare because we only need to mix a couple of ingredients and add 1/2 teaspoon of activated charcoal to give it colour. Or just a tablespoon of coffee powder if we have light roots.

However, for those who prefer something more elaborate, we have a recipe for salt shampoo paste which, although not a dry shampoo, is a treatment shampoo paste that will save us from having to use other tricks as it keeps hair conditioned and with natural volume.

It is another way to break the wash-grease cycle.

SEA SALT PASTE SHAMPOO with a “beach waves” effect

Ingredients:

Preparation

50 g Celtic sea salt*

15 g warm distilled water

Phase 2

5 g SCI Sodium Cocoyl Isethionate surfactant

7.5 g Sodium coco-sulfate SCS surfactant

5 g of coco glucoside surfactant

7.5 g glycerine

3.5 g of Tahitian Monoï oil or scented coconut oil

3.5 g castor oil

Thermolabile phase:

0.5 g lemon essential oil

STEP-BY-STEP PREPARATION OF SEA SALT SHAMPOO WITH “Beachwaves” EFFECT

First, weigh the Celtic salt* and set it aside.

In another bowl, weigh out 15 g of warm distilled water.

Add the powdered surfactants to this bowl of hot distilled water: 7.5 grams of SCS and 5 grams of SCI. Mix well and leave to hydrate, as this will not form a solution as such, but rather a paste.

In the other bowl containing the salt, add the liquid surfactant (5 g) of Coco Glucoside and 7.5 g of Vegetable Glycerine together with the Monoï and Castor oils.

Add the paste formed with the powdered surfactants and water to the bowl with the salt paste and oil and stir well to obtain a homogeneous mixture.

Finally, add 0.5 g of Lemon Essential Oil.

Mix well again to combine all the ingredients and pour into a small glass jar so that you can easily take out a little salt paste at a time to wash your hair.

*The term “Celtic salt” refers to unrefined sea salt, traditionally harvested by hand in the salt marshes on the coast of Brittany, France. Its name comes from the Atlantic waters where it is produced, which were formerly under the rule of the Celtic peoples. It is characterised by its grey colour, moist texture and salty taste with mineral notes. This salt is much richer than ordinary sea salt because its artisanal processing preserves a wealth of minerals, hence its greyish appearance.

Key ingredients in Homemade Sea Salt Shampoo

SCI + SCS + Coco Glucoside: a combination of three natural surfactants that guarantee gentle cleansing.

Sea Salt: sea salt not only acts as an exfoliant, but also softens the cleansing power of the surfactants, making the mixture gentler to use.

Monoi and Castor Vegetable Oils: these oils in the formula help to soften and add shine to the hair, complementing the volumising and exfoliating effects of the salt.

DYEING WITH HENNA

And the most important thing for maintaining healthy hair, especially if your hair tends to be oily and lifeless/lacking in volume, is to dye your hair with henna.

Henna gently dries the hair, giving it strength and volume, thus breaking the frequent cycle of washing and greasing.

Properties of henna: Henna has properties that condition, dye and strengthen the hair, while maintaining the health of the scalp. It improves shine and texture by sealing the hair cuticle and provides a natural, long-lasting colour. The antifungal and antibacterial properties of henna help reduce dandruff and itching and promote scalp health by balancing sebum production and stimulating blood circulation.

HENNA STRENGTHENS THE HAIR AND GIVES IT VOLUME

And if you don’t like reddish tones, there are now many black henna alternatives available for purchase. These alternatives usually mix henna with another plant known as indigo, which tones down the reddish tones, resulting in a more brownish and natural colour.

HOW TO PREPARE THE HENNA PASTE

The dye can also be released by using warm or hot water (preferably around 70 °C). This will break down the lawsone and release more dye. Leaving the henna to oxidise in a warm place in an airtight bowl overnight will also give it a more intense colour. This is equivalent to leaving the henna on the hair for 9-10 hours.

Traditionally, in Pakistan and India, the henna mixture for hair consists solely of henna, water and tea; nothing else. A simple recipe with amazing effects!

However, and this is our personal recommendation, much more pigment is released if, in addition to leaving it to rest overnight in hot tea, you add the juice of 1 lemon. This method of preparation releases even more pigment, making the hair fibre dyeing process faster and covering grey hairs better. The same recommendations appear in this blog:

https://compartirmissecretos.blogspot.com/p/henna.html

Henna powder must be mixed with an acidic component for the colour to come out well. Use 1 lemon or 2 limes for every 50 grams of henna. Henna powder is green, and when mixed with acidic juice, it will turn dark brown. After adding the acidic juice, gradually mix the henna with water until it has the consistency of very thick yoghurt. Then, let it rest for several hours covered with a piece of cling film. Some people prepare the mixture before going to bed and let it rest overnight. This is an excellent method, as it allows all the colour molecules in the henna to be released.

Therefore, wait a few hours before applying the henna mixture.

Now it’s time to apply. At this point, we check our paste and, as it will probably be thick, we add a little very hot water (90 degrees). We continue until we achieve the texture of yoghurt or mashed potatoes. We then apply it as we would with normal dye, taking care not to stain everything because this paste is like a kind of mud. Personally, I always put on a plastic cape so as not to stain my clothes.

With vegetable dye, as it does not contain any added chemicals, it is necessary to leave the paste on the hair for at least 1 hour (2 hours is probably better), covered with a plastic cap to keep the head warm and optimise the fixing process.

Remember that you are at home, so it is not wasted time, but time that you can use to do other things. And, above all, what makes us feel good is thinking that, as well as dyeing our grey hairs, we are conditioning our hair and giving it life. This is something that never happens with chemical dyes.

HENNA DOES NOT PRODUCE A ROOT EFFECT

This is because the henna dyeing process is completely different from chemical colouring.

Chemical dyes penetrate the hair fibre, drying it out and thinning it over time. This results in split ends or damaged, dry and brittle hair, forcing us to use lots of hair conditioners.

Henna, however, does not penetrate but gradually coats the hair cuticle. This is why it does not cover grey hair after the first colouring, but we will have to do several or the “TWO-STEP COLOURING PROCESS” with indigo.

https://hennalovers.cl/blogs/news/cabellos-negros-con-henna-e-indigo?srsltid=AfmBOorfqxMEB4oegQQ1vvcttq3TsS81O48C-OkbU-m9zeJ7XrmD3kYs

2-STEP COLOURING PROCESS TO COVER GREY HAIR

🌿 1. Apply pure henna (first step):
• Prepare the henna according to the instructions (it should be macerated for 6 to 12 hours with the juice of 1 lemon).
• Apply the paste to all of your hair.
• Leave on for at least 2 hours. If you have grey hair, it is best to leave it on for 2 to 3 hours.
• Rinse with warm water only and, if necessary, a little conditioner.
Dry your hair completely before continuing with the second step.

Your grey hairs will have been coloured copper, which is why the second step is necessary.

🌿 2. Apply Indigo (second step):
• Prepare the indigo just before use, using only hot water.
• Do not macerate or mix with other ingredients.
• Apply the paste to your entire head of hair.
• Leave on for 2 hours, depending on the amount of grey hair.
• Rinse with warm water only (you can use conditioner if necessary).

Now you will see that your grey hairs are completely concealed, with a dark brown tone. However, with these vegetable dyes there is no “root effect”, so the colour always looks very natural and you can dye your hair whenever you want because there is no visible difference.

https://hennalovers.cl/blogs/news/doble-coloracion-para-cabellos-con-muchas-canas?_kx=kk1peKiCA_NoP0nhfLS9rROoXZs036YNksOIAQComCM.Vh6QzF

If you’re not worried about your grey hairs being slightly noticeable, because henna only conceals them and gives your hair a more uniform tone, then you’re sure to enjoy dyeing your hair with henna to take care of your locks. Henna gives your hair a natural, more vibrant and voluminous appearance. And as we said, since henna does not produce a root effect“, it does not produce the “split ends” effect either.

However, if you have light hair and want to cover up your grey hairs, we recommend using cassia or a mixture of henna and cassia macerated with lemon juice. Mixing cassia with henna will give your colour a golden “peach” tone. Some people also add indigo, but we personally find this a waste of product, given that henna and cassia are macerated in acid to extract the pigment. On the other hand, maceration in acid renders the indigo pigment useless, meaning it adds nothing to the mixture. This is the same reason why covering grey hair on dark heads requires a two-step colouring process. The henna is first macerated in acid, and then the indigo pigment is added, to which only hot water is added.

Cassia on grey hair acts as a neutral treatment or conditioner that deposits a natural golden tint, enhancing shine and adding volume. While pure cassia provides a gentle, moisturising conditioner without darkening the hair, a paste soaked in an acidic liquid, such as lemon juice, can produce golden highlights in blonde or grey strands. Adding amla, which is acidic, or chamomile also helps to enhance golden tones.

A CASSIA AND CHAMOMILE RECIPE FOR LIGHT HAIR

Ingredients:

Wooden or glass mixing bowl

Wooden spoon for mixing

Vinyl gloves

Plastic shower cap

100 grams of blonde henna powder Cassia obovata

50 g of chamomile tea essential for achieving blonde highlights

1 tablespoon of lemon juice

Optional: 1 tablespoon of Amla powder

1 tablespoon of organic honey

Instructions:

Boil the water and add the chamomile tea. Make a decoction, boil it for 5-10 minutes and leave it to stand overnight for best results.

Separately, macerate the cassia in another non-metallic bowl together with the juice of 1 lemon and, if desired, the amla and teaspoon of honey. Cover the mixture with cling film and leave to stand overnight.

In the morning, add the infused and heated chamomile, spoonful by spoonful, to the mixture, taking care not to make it too runny. Keep in mind that to make it easier to apply, you will need to maintain the consistency of thick yoghurt.

Wearing vinyl gloves, apply the henna to clean, dry hair.

Put on a plastic shower cap and leave the henna mixture on your hair for 2 hours.

After 2 hours, remove the henna in the shower with warm water until it disappears completely. It is best not to wash your hair for 24 to 48 hours so that the colour sets. However, if you cannot avoid washing your hair, use the coffee shampoo indicated below.

AND, AFTER APPLYING THE HENNA, WE USE COFFEE SHAMPOO

We have heard that it has become popular on social media to use a special henna shampoo after applying henna dye to reinforce the colour. This is not necessary at all if you have dyed your hair properly as described in the previous steps.

And gentlemen, if you are reading this, you should know that caffeine’s anti-hair loss effect is not only effective for women; current studies have shown that it has the same effect on male pattern baldness as it does on female pattern baldness. Some studies suggest that it prevents male baldness as effectively as minoxidil.

https://pubmed.ncbi.nlm.nih.gov/38764299

A summary: “Caffeine shows promise in preventing and treating hair loss, as it stimulates the metabolism and proliferation of hair follicle cells through interaction with the adenosine pathway and acts as an antioxidant. Although studies suggest that caffeine is safe and potentially effective for hair loss, particularly against androgenetic alopecia (AGA), larger and better-designed clinical trials are needed to confirm its efficacy, as current evidence is often limited by methodological shortcomings. Caffeine readily accumulates in hair follicles, making topical applications a promising route of administration“.

The simple act of adding a teaspoon of coffee powder to our shampoo can go a long way towards improving our hair health. And while studies are lacking to definitively confirm this in men, it has been more than proven in women:

https://pubmed.ncbi.nlm.nih.gov/29512972

If you want a hair tonic that is just as effective for men as it is for women, simply mix these three ingredients: rosemary, caffeine and mint in ethanol.

AN EXAMPLE OF A HAIR TONIC RECIPE

In a 100 ml glass container, mix:

60 ml of rosemary alcohol. We can prepare this ourselves by macerating dried rosemary in ethanol for a few weeks. Or we can buy it ready-made at the chemist’s.

40 ml of distilled water, in which we will have previously dissolved 1 teaspoon of menthol in a bain-marie and 1 teaspoon of natural coffee. (It is also possible to use 1 gram of cosmetic caffeine powder if we do not want the tonic to be brown in colour).

Mix everything together, and your anti-hair loss hair tonic is ready.

Apply it by rubbing it into the scalp after washing.

Formulating Biocompatible Homemade Cosmetics

In previous articles, we discussed the importance of formulating biocompatible homemade cosmetic products. In Ayurvedic medicine, the rule is even stricter: “Don’t put anything on your skin that you can’t ingest.” Therefore, in our homemade cosmetic formulations, we avoid synthetic ingredients derived from petroleum and broad-spectrum preservatives, as they are not necessary if we are not going to put our products on the market.

Formulating homemade cosmetics with natural butters and oils, without the need to add synthetic preservatives (although organic preservatives are fine, of course), is a luxury that those of us who make natural homemade cosmetics allow ourselves.

In this article, and on our blog in general, we try to demystify the scientific jargon so beloved by the beauty industry. Our homemade product recipes really make a difference and are free from retinols, acids, and peptides synthesized in a laboratory. If you prefer not to use 35 different products on your face every morning or watch tutorial videos on TikTok, or if you’ve ever looked in the mirror and thought, “Who is that?”, then this blog on natural homemade cosmetics is for you. Because women shouldn’t aspire to look younger, but to look better. Makeup or BB cream that hides our wrinkles under a thick layer of preservatives is not the best choice in the long run. All these touch-ups and aggressive treatments tend to leave our skin looking dull over time. What we want is for our skin to look fresher, without the need for so much makeup.

An example that illustrates these principles of natural cosmetics that we are trying to explain is the difference between treatments with Bakuchiol*, which is considered a substitute for commercial retinol*, and the use of more aggressive retinoids.

*RETINOL is a form of vitamin A belonging to the carotenoid group. It stimulates fibroblasts to produce elastin and collagen, improving skin density and firmness. However, retinol has some side effects, including skin irritation and redness, so high concentrations of this substance are not recommended in the initial phase of treatment. In addition, retinol has photosensitizing properties and a teratogenic effect. That’s nothing, and all to achieve fewer wrinkles!

*BAKUCHIOL: Bakuchiol is a natural compound extracted from the seeds and leaves of the Psoralea corylifolia plant, known as babchi. Its action is very similar to that of retinol. It accelerates the keratinization of the epidermis and has antioxidant, anti-inflammatory, and anti-acne properties by inhibiting the growth of Streptococcus aureus bacteria. It normalizes sebum secretion and lightens pigment spots on the skin. Bakuchiol alleviates the negative effects of UV radiation. It normalizes sebum secretion and stimulates the production of elastin and collagen.

As we said, to keep our face looking good over the years, the best option is natural treatments that are minimally invasive and free from artificial preservatives and synthetic ingredients. A few simple vitamins applied to our skin in a natural vegetable oil base can work wonders.

BIOCOMPATIBLE SKINCARE

For all these reasons, we also want to highlight the difference between antiseptic and bactericidal formulations in the treatments we recommend on this blog. This difference is based on the difference between antiseptic and bactericidal products.

Antiseptics and bactericides aim to reduce the risk of infection, but they differ in their scope and application. Antiseptics are substances applied to living tissue, such as skin, to prevent or inhibit the growth of microorganisms, including bacteria, fungi, and viruses. Bactericidal agents, on the other hand, are substances that kill bacteria. Although some antiseptics may be bactericidal, their primary function is to inhibit microbial growth rather than actively kill all bacteria.

In the context of creams and natural cosmetic products, biocompatibility means that the product is designed to work in harmony with the body’s natural systems, minimizing the risk of adverse reactions and promoting skin health. Basically, it means that the product is well tolerated by the skin and does not cause irritation, allergic reactions, or other harmful effects. In other words, biocompatible products are formulated to avoid disrupting the skin’s natural processes and barrier function, and are therefore less likely to cause redness, itching, or other forms of irritation that can occur with harsh chemicals or allergens.

Broad-spectrum preservatives (panacea), so widespread in homemade cosmetic recipes, are very effective bactericides that not only kill bacteria but also molds and yeasts, completely sterilizing our product. You can deduce from this that, when applied, they also sterilize the skin surface, destroying its natural microbiota.

And for this reason, the above distinction is so important. In this blog, we create antiseptic synergies that keep our creams and products in good condition for as long as they need to be used. We therefore do not use commercial broad-spectrum preservatives designed to kill all bacteria, fungi, and molds that may develop. In other words, we do not create sterile products, but products that respect the natural microbiome of our skin.

This is possible because homemade natural cosmetics are not intended to be sold commercially. Logically, if we needed to create a product that would remain in good condition for months on the shelves of a drugstore or perfume shop, then we would undoubtedly have to comply with ISO standards and legal requirements.

But since this is not our case, we can afford to create homemade natural cosmetics that are completely biocompatible and respectful of our skin’s microbiome.

Difference from “commercial” cosmetics: Regular commercial cosmetics sometimes contain substances that are not always well tolerated by the skin, such as synthetic fragrances, colorants, or preservatives. These substances can cause irritation or allergic reactions in some people.

Biocompatible cosmetics try to avoid these substances by respecting the biology of the skin and formulating with ingredients that are compatible with the skin’s natural composition and function to promote a healthy skin barrier. Choosing biocompatible cosmetics can contribute to healthy, radiant skin, as it reduces the likelihood of skin problems and allows the skin to function naturally. In this sense, products from some brands aimed at the treatment and biocompatibility of sensitive and atopic skin, which today corresponds to a large percentage of the population, or products from brands that have traditionally produced “organic” cosmetics such as Welleda or Dr. Hauschka, or any other that you may know, are more respectful of the skin microbiome and, therefore, “more biocompatible,” if we can put it that way.

A tip for choosing well is to look at the labels detailing the composition and whether the product or brand is advertised as environmentally friendly.

The shorter the list of ingredients and the higher the content of certified organic components, the more natural and better the product will undoubtedly be.

As we always say, what is good for the environment and animal life is generally also better for us.

Or, as the ancient emperor and Stoic philosopher Marcus Aurelius said: “Everything that is good for the bee is good for the honeycomb, and everything that is good for the honeycomb is good for the bee.”

And we are “absolute fans of bees.” Bee products are the basis of natural homemade cosmetics. We use beeswax as the best known natural emulsifier, honey as a moisturizer, propolis tincture as an antiseptic, etc.

BIOCOMPATIBILITY IN NATURAL HOME-MADE COSMETICS

This involves various strategies:

1. Avoid preservatives by formulating creams and products without an aqueous phase. It is perfectly possible to use water-based products such as hydrosols, toners, and facial serums before applying a 100% oil-based cream. This way, we also moisturize our skin intelligently, without having to come up with complex homemade cosmetic formulations to which we would inevitably have to add broad-spectrum preservatives to keep them from spoiling on our bathroom shelves.

And it is always possible to formulate a fatty cream using only oils or butters, beeswax, and a teaspoon of honey. The percentages would be 90% oils/butters and 10% beeswax emulsifier.

Honey is optional, but certainly very interesting because the synergy of honey with the emulsifier in beeswax creates a much creamier and more moisturizing texture than without this addition. Honey is moisturizing and combines very well with beeswax and oil, which is not the case if we use a synthetic emulsifier.

In addition, when mixed with coconut betaine, it becomes the most gentle cleansing gel (for the body, vagina, etc.) for atopic and sensitive skin. And don’t think that using honey makes it sticky—not at all! Coconut betaine, which is a natural surfactant, the most natural one that exists, takes care of that. *We will talk about it in a future article.

2. Formulate creams using self-preserving synergies. For example, it is known that a cream with a small percentage of water, if emulsified with beeswax and borax, preserves its ly, as the synergy between borax and beeswax chemically emulsifies the mixture, as well as preserving it.

3. We will avoid the use of synthetic self-emulsifying waxes because they are less likely to create self-preserving synergies, as is the case with beeswax, borax, and propolis tincture. Furthermore, due to the low affinity of synthetic self-emulsifying waxes with the skin, a “wash-off effect” may occur, which refers to the ability of the wax to be easily removed from the skin by water or sweat, dragging away the protective surface layer of the skin, resulting in a greater feeling of dryness and lack of hydration. If we need to use a synthetic self-emulsifying wax, it is important to use a biocompatible and biodegradable wax, such as “lamecreme” (glycerin stearate citrate) or “emulsan” or emulcare (methyl glucose sesquistearate).

4. If preservatives must be used, only organic and biocompatible preservatives should be used. To this end, it is generally advisable to treat the water that will be used in the preparation beforehand. Therefore, when formulating homemade cosmetics, it is also very important to bear in mind these concepts of biocompatibility and to use only organic and biocompatible preservatives, if necessary.

THE IDEA OF TREATING THE WATER

With this idea in mind, we have started to create creams with an aqueous phase in which we pre-treat the liquid component of the formulation.

We start with a distilled water base that we can treat in various ways:

1. By pre-ozonating (both water and oils) the distilled water or oil that we will use in the preparation of our homemade cream. In this way, we can emulsify our cream with beeswax, ozonated water, and borax, with the assurance that we will obtain a highly biocompatible product that will not spoil.

2. By treating our distilled water with borax* and a few drops of propolis tincture*, which reinforce the incorruptibility of our formulation as well as providing properties for the skin. Propolis acts synergistically with beeswax and borax and helps to reinforce and preserve the emulsion of water and oils.

3. It is possible to emulsify a cream with beeswax and borax by adding other biocompatible preservatives, such as: medicinal grapefruit seed extract (GSE), the natural cosmetic preservative Leucidal simple*, whose INCI is Leuconostoc Kimchii, propolis tincture, or colloidal silver.

*Leucidal simple is a preservative derived from radishes fermented with Leuconostoc Kimchii, which provides antimicrobial benefits. It is best to avoid Leucidal complete, as it is too strong.

4. In the case of serums and facial toners with a higher water content, it is important to use combined synergistic strategies to preserve our product, such as using a base of distilled salt water*, an ozonated distilled water or ozonated sea water base, adding a few drops of colloidal silver to the distilled water in the formulation, or propolis tincture, using distilled water in which we have dissolved 0.5 grams of borax, adding some essential oils to the distilled water, or using hydrosols as the base for our facial toner, etc.

*Salt is already a good natural preservative for organic substances. Let’s not forget the curing process of ham or some cheeses such as Parmesan, which remain in good condition for a very long time without the need for additional synthetic preservatives. Or, similarly, pickles fermented in brine, which have many probiotic properties when eaten.

5. Freeze natural aloe vera gel by dissolving half a teaspoon of citric acid per 100 grams/ml of fresh aloe vera gel. This will keep it in good condition until you defrost it. For example, you can defrost an aloe cube to prepare a serum base, and the rest of the aloe will remain frozen in good condition. If you do not freeze it, keep it in an airtight bowl in the refrigerator or in a cool place. In any case, store it in a glass bowl and protect it from sunlight.

In principle, this aloe serum base will keep well because it has been frozen with citric acid, which is a very mild preservative. If in doubt, you can always add a few drops of another mild preservative such as medicinal grapefruit seed extract or simple Leucidal. You can even add a few drops of essential oils, such as lemon essential oil, or a preservative tincture such as myrrh tincture, which is a natural preservative, or even benzoin tincture. All of these will give the aloe serum a very pleasant aroma, as well as helping to preserve it.

In this way, we use a synergy of several mild preservatives that reinforce each other without harming the whole. Our serum will continue to have a low biocide level, so when applied to the skin, it will not harm our skin flora. This way, we will be able to benefit from the properties of aloe vera with complete assurance.

6. It is also possible to use natural aloe vera juice without preservatives as a base for serums and facial toners. In this case, it will not be necessary to freeze it, and we can use it directly in our toners and serums as a base, with the addition of glycerin and xanthan gum to thicken it, (ratio 2:1; i.e., 2 parts glycerin to 1 part xanthan gum, normally) and a biocompatible preservative such as 1% borax or any of the biocompatible preservatives listed in the following section.

7. In the case of herbal infusions, adding a minimum of 20% ethanol will preserve them for several days in the refrigerator without any problems, and we will be able to enjoy natural infused lavender tonics, or other herbs, until they run out.

BIOCOMPATIBLE PRESERVATIVES

Propolis tincture: Propolis extract or tincture is a natural healing ingredient that has antioxidant, anti-inflammatory, and antifungal properties. Although produced by bees, propolis extract is not the same as honey, but rather the glue that bees use to hold the hive together and repair damage. In skin care, propolis extract offers great benefits in healing acne scars, hyperpigmentation, and inflammation. It also firms the surface and rejuvenates the skin. This extract is commonly found in commercial cosmetics in products such as moisturizers and toners.

Borax: Since ancient times, considerable amounts of this element have been mined on the shores of salt lakes in Asia Minor. The deposits in Tibet were the first to be exploited. Borax is also found as efflorescence in desert soils, hence its name “white gold of the desert.” Borax acts as a very mild preservative when emulsified with beeswax, yet it is widely compatible with the nature of our skin. In fact, boron has been used as a medicine in the natural medicine market.

Despite its recent demonization, it is used as a food additive under the code E285, as it acts as an antimicrobial preservative. This same property, combined with its pH-regulating and emulsifying effect, makes it very useful in cosmetics. In Eastern cuisine, its texturizing effect is used to make foods firm and chewy. At an industrial level, it is used in detergents, cosmetics, soaps, insecticides, pesticides, and enamels.

Sea celtic salt: This is another great natural preservative, used since ancient times to preserve a wide variety of foods. Its ability to extract moisture from food hinders the growth of bacteria and other microorganisms that cause decomposition, helping to preserve food for longer. In addition, salt affects the structure and function of microbial cells, inhibiting their growth and reproduction, which helps prevent spoilage. We recommend using gray Celtic salt with a moist texture, as it is the only type that retains all the mineral richness of seawater.

Ozone: It is possible to ozonize both the water in our preparation and the oil. Never both in the same preparation because it is too much. Ozonizing water is more interesting in aqueous products such as tonics and facial serums.

If we want to create a cream, it is better to ozonate the oil, which emulsifies better than ozonated water and helps our cream acquire the right thickness.

If you have a cheap ozonator (you can find them on Amazon for $40 to $50), it will be enough to keep your water or oil immersed in ozone for about 30 minutes. Any longer is too much, and both the water and oil will take on a strong ozone smell.

If you want to buy ozonated oil from a cosmetics store, always remember to choose a food-grade product so that the aroma is not too strong and can be pleasantly incorporated into your homemade cosmetic preparations. Stronger oils are best used as treatment oils for joint and rheumatic pain and, above all, in treatments for hemorrhoids and vascular problems.

Colloidal silver: We know it in naturopathy as a very useful medicine, but colloidal silver can also act as a preservative, especially in cosmetic and personal hygiene products. Its antimicrobial capacity helps prevent the growth of bacteria, fungi, and mold, which in turn prolongs the product’s shelf life.

As with ozonated water, anyone with the right equipment can make it themselves at home. These devices are usually a little more expensive than ozonizers, as they require silver rods. However, nowadays, they can also be found in many online stores, as can ozonizers, which are not only used to ozonize water, but also to obtain ozonized oils that are very useful for treating skin problems.

Benzoin tincture: Benzoin tincture is used as a natural preservative and antiseptic in cosmetics, as well as a fragrance fixative. It is obtained from the resin of the Styrax tree and dissolved in alcohol, forming a liquid extract that helps preserve cosmetic products, especially those containing natural ingredients or essential oils, by preventing the growth of bacteria and fungi.

Myrrh tincture: Thanks to its antiseptic and soothing properties, it is widely used in skin creams, leaving the skin smooth and soft. It has great preservative power, making it an ideal substitute for commercial chemical preservatives. It is an excellent disinfectant and has healing and regenerative properties for the skin.

You can find an online store selling natural myrrh tincture at this link:

https://maeselab.com/extracto-de-mirra-tintura

Ethanol: It is not a preservative in itself but acts as one when added to our product in proportions of 30% or more. This is why it is not used frequently, as a high percentage of ethanol is required to benefit from its preservative properties. However, in some cases it can be a very interesting additive, such as in facial tonics made from herbal infusions, where it adds freshness to the mixture.

Or in some cases of spray deodorants, perfumes, or even in its isopropyl alcohol form, it can be used in rosemary distillations for topical rubs, such as rubs to activate circulation in tired legs, etc.

Isopropyl alcohol: Also known as isopropanol or 2-propanol, it is a colorless, flammable liquid with a characteristic odor. It is widely used as a solvent, antiseptic, and cleaning agent in various applications. It is a key ingredient in rubbing alcohol and hand sanitizer , and is also used in industrial and pharmaceutical settings, such as the “rosemary alcohol” sold in pharmacies. As mentioned above, it does not pose any problems when used topically, as it acts as a base for the active ingredient rosemary and evaporates on contact with the skin. If we infuse natural rosemary in this type of alcohol, we obtain a maceration that does not require any other type of preservative and can be applied topically for rubbing.

Potassium sorbate or sodium benzoate salts: With great caution and never both at the same time in the same product, we can use minimal doses of edible preservative salts (widely used in the food industry) such as potassium sorbate salts or sodium benzoate salt.

These synthetic powdered salts are widely used in the food industry. Both are mainly used as preservatives to extend the shelf life of various products, especially in food and cosmetics. They work by inhibiting the growth of fungi, yeast, and bacteria, which helps prevent spoilage and decomposition.

Potassium sorbate is more useful in creamy textures and sodium benzoate in tonics, serums, and more acidic aqueous textures. In any case, it is best to use them only when absolutely necessary, and always separately, as together they become what is called a broad-spectrum preservative and their biocidal effects are enhanced.

Taking all these ideas into consideration, we have formulated a moisturizing base cream that can be used perfectly as a body milk for the entire body, given its light and fresh texture.

RECTIFICATION OF THE CREAM RECIPE with wax and ozonated water

PROPORTIONS WITH BEESWAX AND OIL

The amount of beeswax should be 15% of the oil, and the proportion of borax should be 5% of the amount of water used in the recipe.

THE BASIC CREAM RECIPE WITH GENERAL PERCENTAGES

Percentages for 100 g of base cream:

40% water … approx. 5% of the amount of water in borax

60% oil … 15% of the amount of oil in natural unbleached beeswax

Optional: One tablespoon of glycerin (between 10-15 g).

Preservative: 1 ml natural propolis tincture preservative per 100 g. The preservative is not necessary in principle if the borax is completely amalgamated with the beeswax.

For this, two conditions are necessary:

– A sufficient percentage of borax in relation to the total product.

– The beeswax must be natural (yellow) and not bleached, at least part of it, since bleached wax cannot chemically amalgamate efficiently with borax.

Some people use proportions of 50% water and 50% oils or fats to make the cream more moisturizing. However, in this case, to produce the emulsion of beeswax with water and oils, it is necessary to use a larger amount of borax, and, as always with preservatives, our maxim is “the minimum necessary” to obtain the product we want.

This is the recipe for EMULSIFIED BASE CREAM WITH BEESWAX

40 ml of ozonated distilled water … and about 2 g of borax

60 ml of virgin olive oil … and about 10 g of natural beeswax

10 g of glycerin, and nothing else because we have ozonated the water.

PREPARATION PROCEDURE:

The preparation system is “one pot.”

Previously, we ozonated the water for approximately 30 minutes in a homemade ozonator and then dissolved the 2 grams of borax in it.

We start by placing the beeswax in a heat-resistant container in a double boiler. Once melted, we add the oil to the same container and, when it is fully incorporated and the mixture is melted, we add the mixture of ozonated distilled water and borax.

When we see that it has been incorporated, we can start beating with an electric whisk. A chemical emulsion of beeswax with borax-treated water is produced, but in this case, our water is also ozonated, so the emulsion is very light.

In this case, after removing from the heat, we will see that we have obtained an emulsion in which the water sometimes seems to float a little. This is not a problem because the water has been treated, and the mixture does not spoil. We can therefore take advantage of this light and fresh texture to use it as a moisturizing body milk all over the body.

A totally natural BASE CREAM

We would also like to show you a base cream that can be enriched with natural active ingredients. The best “active ingredients” we can add to our products are of plant or even animal origin, such as silk proteins from silkworms or allantoin from snail slime… But don’t worry, although they are based on natural molecules, these components are now obtained synthetically in a laboratory. No one squeezes silkworms or snails to obtain them. However, they are still very interesting because they are molecules of organic origin. And nature knows what it’s doing.

ACTIVE INGREDIENTS OF ORGANIC ORIGIN

Silk proteins: Formed by naturally occurring macromolecular filaments consisting of silk proteins, which, although they break down (hydrolysis), give rise to amino acids very similar to those found in the collagen and elastin proteins of the skin. They have a much greater softening power than other products, promoting the formation of young, healthy skin cells and a silky, youthful complexion.

Allantoin: Allantoin is a chemical compound with healing, soothing, and anti-inflammatory properties. It is also moisturizing as it helps the skin retain moisture, leaving it soft and smooth. It is a crystalline, colorless powder, soluble in water and alcohol, derived from uric acid. It is found naturally in some plants such as comfrey, aloe vera, and snail slime, and can also be synthesized artificially.

Natural aloe vera gel, vegetable butters such as shea or cocoa butter, honey, and even zinc oxide, which, in addition to providing sun protection to our products, gives them emollient properties and protection against external aggressions such as humidity or friction. Hence its use in diaper creams.

And, of course, the active ingredients provided by cold-pressed virgin oils, loaded with fat-soluble vitamins, or oleates of balsamic resins and plant extracts such as oat, calendula, or chamomile.

Simply a high-quality oil, such as buriti oil, will provide you with carotenoids (vitamin A), as will an extract of urucum (achiote) seeds in powder form or macerated in glycerin. Or, for example, bakuchiol oil, which is said to be a natural substitute for retinol, but unlike retinol, it alleviates the negative effects of UV radiation and does not cause photosensitivity. In fact, it mitigates the harmful effects of the sun and makes the skin more resistant to sunlight.

RECIPE FOR EMULSIFIED CREAM BASE WITH BEESWAX

In this recipe, we have played with the proportions of beeswax, combining natural wax and bleached wax with the intention of obtaining a lighter and more pleasant colored product. Certainly, this cream is less yellow than the previous one. As you know, it is not possible to use only bleached wax because it does not chemically blend with borax as well as natural wax.

40 ml of distilled water … and 2 g of borax

60 ml of virgin olive oil …

and about 6 g of natural beeswax, combined with 4 g of bleached beeswax.

10 g of glycerin and 1 ml of propolis tincture.

PRODUCTION PROCESS:

The production system is “one pot.”

Previously, we have treated the distilled water by dissolving about 20 drops of propolis tincture in it.

We start by placing the beeswax in a heat-resistant container in a double boiler. Once melted, we add the oil to the same container and, when it is fully incorporated and the mixture is melted, we add the mixture of distilled water with the preservative tincture and borax to produce a chemical amalgam with the beeswax.

When everything is incorporated, we can start beating with an electric whisk. This produces a chemical emulsion of beeswax, borax, and water treated with propolis tincture, resulting in a very pleasant, creamy emulsion.

USE: This cream can be used as is, or you can add any other natural active ingredient from among those mentioned.

Some of these can simply be added at the end of the process, such as zinc oxide to provide sun protection…

Others, such as vitamin-rich oils or natural aloe gel, are best added during the mixing of the oil and water phases.

For example, SUN CREAM with SPF 20 made from this base cream

Take 50 g of the base cream and add a mixture of 2 tablespoons of zinc oxide (10 g), previously sifted, and, optionally, a tablespoon of cocoa powder to prevent a white film from forming on the skin.

In this simple way, we obtain a cream with sun protection factor. With 10 grams of zinc oxide, protection of 20 is guaranteed, but if you add a little more, you will surely obtain greater protection.

KNOW HOW TO CHOOSE THE INGREDIENTS FOR OUR FORMULATIONS WITH CRITERIA

Everything we put on our skin is absorbed—creams, shampoos, colognes—and does not remain on the surface.

Many everyday products contain parabens, phthalates, phenoxyethanol, and other compounds that act as endocrine disruptors. As you know, endocrine disruptors alter the hormonal system, interfere with neurological development, and may be linked to long-term health problems such as early puberty or brain development deficits.

There is little we can do about this, but there is something we can do: reduce our exposure to these types of products and choose less toxic products wisely, which also tend to be the most eco-friendly and least harmful to the environment.

If we can’t make them ourselves.

Because it’s not about living in fear, but with awareness.

Therefore, don’t let yourself be fooled by products invented by cosmetic supply stores to sell us “expensive active ingredients” that are actually cheap for them because they are not natural, but synthesized in a laboratory.

We are not going to mention specific online stores, just a few examples of “cosmetic active ingredients,” theoretically natural, that they try to sell to those of us who make homemade natural cosmetics.

For example: “Encapsulated retinol palmitate.” This is supposed to be a form of retinol, which is ultimately nothing more than vitamin A, that sensitive skin can tolerate better.

And its INCI is: Aqua, Polycaprolactone, Xanthan gum, Retinyl palmitate, Polyvinyl alcohol, Sorbitan stearate, Propanediol, 1,2-Hexanediol, Caprylyl glycol

Does this INCI sound like natural vitamin A to you?

Or, for example, this anti-wrinkle peptide compound with INCI: Dimethyl Isosorbide (and) Polysorbate 20 (and) Aqua (and) Acetyl Tetrapeptide-11 (and) Acetyl Tetrapeptide-9.

However, the same supply store may sell you very good oils and active ingredients, such as food-grade ozonated oils, vegetable oils loaded with fat-soluble vitamins (which our skin absorbs completely) such as the buriti oil we mentioned earlier, natural cupuaçu butter, or unprocessed shea butter, which are real treasures for the skin.

It’s all about knowing how to choose.

MINIMALIST AND NON-INVASIVE NATURAL COSMETICS

Our skin is the ultimate barrier between our body and the environment. It is an intelligent, protective shield with billions of microorganisms. Despite the stress it is subjected to and its surface resistance, the microbiome is extremely delicate. Moreover, we are only now realizing how important it is.

The public has heard about the importance of the gut microbiome for years. However, research on the skin microbiome pales in comparison. But like the gut, the skin flora is like a rainforest. Its diversity is the key to healthy skin and overall good health.

The type and number of pathogens vary greatly. Variations depend on location, environment, and hormones. They also depend on the amount of light, whether the environment is moist or dry, age, and gender. Although the skin acts as a barrier, we are now discovering that flora penetrates deeper. These micro-animals exist in the deepest layers of the skin, down to the subcutaneous fat layer. More research is needed. Our basic understanding is that communication between the microbiome and our immune system takes place at this level.

What happens when our skin’s microbiome becomes unbalanced?

This can manifest itself as acne, eczema, rosacea, or psoriasis. It can also be seen as premature aging, uneven skin tone, and loss of elasticity. Unfortunately, our modern lifestyle does not help.

Highly processed and preservative-laden foods, indiscriminate use of antibiotics, invasive medications, overly strict hygiene standards, products with aggressive active ingredients… In general, the higher stress levels of today’s population increase the skin’s susceptibility to imbalances in the microbiome. Their lower exposure to the outdoors also contributes to this sensitivity.

WHY DO WE ELABORATE HOMEMADE NATURAL COSMETICS WITHOUT PRESERVATIVES AS IT HAS ALWAYS BEEN DONE IN THE AYURVEDIC MEDICAL CURRENT?

Ayurvedic medicine has known for millennia the importance of preserving the skin microbiome in optimal conditions. Although it was probably not called that, this preservation is essential to take better care of our skin. It helps prevent problems like dryness, erythema, flaking, dermatitis, atopy, and premature wrinkles. Therefore it was always said: “Do not put anything on your skin that you can not eat”.

We need to avoid chemical preservatives for a healthy intestinal flora. This will also ensure we have a healthy skin flora. Nourish our skin with organic fats and pure vegetable oils. This is the same reason why, in this blog, we only use essential oils in our natural cosmetics with many precautions. We apply them in very low doses to benefit from their properties. This prevents their intrinsic biocidal capacity from altering the flora of our skin and causing problems.

For this very reason, new-generation commercial soaps and shower gels are much less aggressive to the skin. They are gentler than those used a few decades ago. The idea is to better preserve the skin microbiome so as to dry out the skin less.

BY TAKING BETTER CARE OF OUR SKIN, WE ALSO TAKE CARE OF THE ENVIRONMENT.

When we formulate in this more natural and skin-friendly way, we gain a secondary benefit. We also take care of the environment because these new formulations of surfactants and detergents are more biodegradable.

Undoubtedly, making homemade natural cosmetics is a luxury. It allows us to take care of our skin without the need to use preservatives. This is unlike commercial cosmetics, whether they are from the perfumery or herbalist. The repertoire of creams, balms, and ointments we can make is quite extensive. We achieve this without adding a drop of water to our product. You will have seen it in the different articles of our blog.

Cosmetics that do not contain water in their composition, such as balms, ointments, salves, lipsticks, body oils, dehydrated powders… and in general all fatty cosmetics that do not contain water, do not require the use of antimicrobial preservatives. Only antioxidants are recommended. These include vitamin E or rosemary extract CO2. They prevent the rancidity of fats and extend the shelf life of this type of cosmetic products.

In the end, after all, what we want is that our skin looks good and is nourished and in good condition to avoid problems of dryness, irritation, etc … Let alone if our skin is atopic, finally, what we are looking for is a product that nourishes and maintains its elasticity without altering it more. In short, what we are really looking for are natural fats and vitamins that keep our skin elastic and healthy in order to prevent skin problems and premature aging.

And for that, really, isn’t it better to try to understand how we can bring good fats and vitamins to our skin at the level of home cosmetics? Isn’t it a bit pretentious to try to understand how the whole process of making commercial cosmetics works, to understand what preservatives to use, what pH level to implement with each preservative in each formulation and in what ratio/percentage?

NATURAL BRANDS INNOVATE AND OFFER QUALITY PRODUCTS WITHOUT SYNTHETIC PRESERVATIVES

There are traditional natural brands of great renown. Certainly, some brands have made a more recent appearance, such as Welleda and Dra Hauschka, etc … that produce commercial creams that people with dermatitis and sensitive skin can also use without causing us problems. Apparently, the trick is to use several preservatives synergistically but in tiny doses. This is entirely different from the recipes of home cosmetics blogs. These blogs propose broad-spectrum preservatives in percentages between 1 and 2% of the formulation.

Welleda is said to use only essential oils in their formulations to preserve their products. I am not familiar with the subject. In any case, I think you need to be at least a chemist specialized in cosmetics. This is necessary to be able to design such a product.

Isn’t it too adventurous, at the amateur level of homemade cosmetics, to try to understand how the whole process of making commercial cosmetics works? Because in the end, all this stuff about the different types of synthetic preservatives and in what percentage we have to add them to our product, pH controls, etc. is only necessary if we are going to commercialize our product.

All ingredients: Aqua, Anthyllis Vulneraria Extract, Prunus Armeniaca Kernel Oil, Alcohol, Hamamelis Virginiana Bark/Leaf Extract, Prunus Amygdalus Dulcis Oil, Olea Europaea Fruit Oil, Arachis Hypogaea Oil, Helianthus Annuus Seed Oil, Hypericum Perforatum Flower/Leaf/Stem Extract, Glycerin, Calendula Officinalis Flower Extract, Lecithin, Daucus Carota Sativa Root Extract, Triticum Vulgare Bran Extract, Simmondsia Chinensis Seed Oil, Parfum*, Linalool*, Citral*, Farnesol*, Limonene*, Citronellol*, Geraniol*, Benzyl Benzoate*, Eugenol*, Benzyl Salicylate*, Algin, Xanthan Gum.*from natural essential oils

Let’s not kid ourselves. Homemade cosmetic recipes that appear on blogs and on the net in general do not work well. This is especially true for sensitive and problematic skin.

Most of these recipes use synthetic waxes and compounds. They avoid natural emulsifiers. These include beeswax, candelilla wax or carnauba wax. They also avoid soy lecithin. Even lanolin, which comes from sheep, is avoided. In the words of Google’s AI: “Among the most common cosmetic emulsifiers are polysorbate 20, 60 or 80. Other common ones include ceteareth-20, hydrogenated castor oil PEG-40, steareth-2 and steareth-21. You can also find cetearyl alcohol and ceteareth-33, and PEG-100 stearate.” Other popular emulsifiers include sucrose stearate, xylityl glucoside, polyglyceryl-3 polyricinoleate, cetearyl olivate and sorbitan olivate” Do any of these names sound like a natural compound in any way?

To emulsify oils with water, synthetic emulsifiers are necessary. These emulsifiers are needed for O/W emulsions, as they are known worldwide. However, did you know that they do not always fulfill the intended function?

A synthetic emulsifier can accumulate when it is used in a skin care product. It gathers in the upper layers of the skin. Washing and cleansing the skin carries a risk. The accumulated emulsifiers may dissolve the skin’s own oils. They can also remove these oils. This is known as the “washing effect“, which can cause the skin to become very dry and flaky. If you use one of these synthetically emulsified creams daily, your skin may look more “stiff” after a while. Don’t be surprised by this change.

And, after all, those of us who make homemade cosmetics, and those of us who like creativity above all else, don’t care about all that because we know we don’t design products that we have to market.

We design/formulate products to share them with our blog followers and those who like the idea of natural in their homemade products. And for this we do not need to use preservatives, even when we elaborate creams with aqueous phase, because there are plenty of ways to do it without using synthetic preservatives.

HOW TO CARE FOR OUR SKIN WITHOUT USING SYNTHETIC PRESERVATIVES AND SYNTHETIC EMULSIFIERS

The idea that preserving the skin microbiome is important is becoming more or less clear to everyone. However, few natural cosmetics blogs consider the fact that using natural and biodegradable self-emulsifying waxes is equally important. In the previous section, we saw how waxes create a “washing effect” on our skin. Synthetic products also contribute to this effect.

That’s right. The key is the bioavailability of the ingredients used. Ayurvedic cosmetics says: “Do not put anything on your skin that cannot be ingested“. Components and ingredients that are not of organic origin are usually not biodegradable. And what is not biodegradable is not bioavailable either, that’s for sure. Taking care of the environment is also taking care of our skin and our organism.

Therefore, when it comes to emulsifying our homemade cosmetic products, natural cosmetic waxes can be a more sustainable option. These waxes come from natural sources and can break down in nature, unlike synthetic waxes. The most common biodegradable cosmetic waxes are carnauba wax, jojoba wax, candelilla wax and beeswax. These waxes can decompose in nature without leaving residues.

Another common misconception is that skin care ingredients have to penetrate the skin to be effective. However, this is not always the case. Even ingredients that “just sit” on the outer layer can make a big difference in the appearance of the skin. For example, emollient and occlusive ingredients hydrate the skin. They can improve its appearance and soften it even if they do not penetrate. In any case, ingredients with higher bioavailability have also been found to offer a higher degree of penetration.

Going back to penetration, the skin is made up of three layers: epidermis, dermis and subcutaneous tissue. And it is really complicated to access the deeper layers of the skin topically. So why worry about penetrating cosmetics with complicated formulations? These formulations have active ingredients that require an aqueous phase. They also need synthetic preservatives. Isn’t it more appropriate in that case to take supplements? Because, in the end, what you want is for your skin to look healthy. We need something that works for us. We don’t need to formulate the perfect natural cosmetic which we don’t even intend to market it.

Vitamin supplements for the skin have been found lately to work even better than topically administered products. However, supplements should never replace a healthy diet. This diet should include pure, unadulterated fruits, vegetables, nuts, seeds, legumes, herbs, and spices. All of these foods have medicinal properties for the skin. For example, turmeric helps slow or reverse the aging process. Diet has a direct impact on the quality of our skin and that, too, in the long term.

Let’s also remember to take supplements with our overall health in mind, not just our beauty goals. Not that there is anything wrong with vanity, but we should consider our body as a whole instead of focusing only on our skin, hair and nails.

Yet, we are not saying that it is not necessary to use water and hydrolats in our beauty routines. On the contrary.

WHY IT IS IMPORTANT TO USE PRODUCTS CONTAINING WATER IN OUR BEAUTY RITUALS, AND HOW WE CAN RESPECT THIS RULE WITHOUT USING SYNTHETIC PRESERVATIVES.

To have soft and smooth skin, the first and most important thing is to protect the skin barrier. The skin barrier is responsible for ensuring that our skin can retain water. It also acts as a protective shield against harmful microorganisms by producing antimicrobial peptides and proteins. In addition, it regulates inflammation. When the skin barrier is healthy, the complexion appears smooth, clear and even-toned.

Skin care products containing ceramides and cholesterol help repair the skin barrier. Ceramides are basic components of the skin barrier. Cholesterol and other lipids and fatty acids are also crucial components of a healthy barrier. Cholesterol is often found in moisturizers rich in organic fats and fatty acids in vegetable oils. Niacinamide is also a skin care ingredient that strengthens the skin barrier by promoting ceramide synthesis. Although this is only one of the many skin benefits of niacinamide or vitaminB3. In addition, vitamin B3:

1. Evens out skin tone by improving the appearance of dark spots and other sun-damaged areas.

2. Reduces the size of enlarged pores and improves skin texture.

3. Reinforces the cutaneous barrier by promoting ceramide synthesis.

4. Improves redness and skin blemishes.

5. Protects against UV damage (ideal if combined with vitamin C).

As we said, to maintain a healthy skin barrier we must ensure that our skin has an optimal water content. And this is largely achieved by applying skin care products topically. Contrary to popular opinion, drinking water is not enough to keep skin hydrated.

HOW TO IMPLEMENT VITAMINS IN OUR HOMEMADE FORMULATIONS TO BRIGHTEN THE SKIN

First, we have to take into account that there are fat-soluble vitamins. These include vitamins A and E, which we can easily add to the oily phase of our preparations. There are water-soluble vitamins. Vitamins like B (niacinamide) or C require water-containing formulations to be dissolved. The best formulations will use synergistic ingredients.

Serums are, in principle, formulated with water. However, it is possible to replace water with more interesting alternatives. These alternatives include hydrosols, aloe vera liquid (gel or juice), and even purified seawater.

1. The easiest way to do it from natural home cosmetics is to use distilled water. You can also use facial tonics such as hydrolats, rose water, aloe vera juice, etc … and then one of your fatty creams without aqueous phase.

For example, from a base of purified seawater* and vegetable glycerin to which we can easily add water-soluble active ingredients. *Purified seawater bases sold for cosmetic use, for example as facial toners, usually have very mild preservatives incorporated, which saves us from having to add more invasive broad-spectrum preservatives such as those used in cosmetic blogging.

NIACINAMIDE-BASED FACIAL SERUM

Did you know that you can easily prepare a serum base with distilled water, a teaspoon of Celtic or nigari salt, rich in magnesium, and a teaspoon of glycerin?

Salt and glycerin are natural preservatives. Your facial serum will remain in good condition without synthetic preservatives. You can add vitamins or water-soluble active ingredients to this serum base. In this case, we have added a capsule of vitamin B3 (niacinamide) for internal use. The results are noticeable.

In this simple way, we’ve given our skin a drink without using a single preservative. It’s all about implementing a smart beauty routine. Likewise, we apply a natural vegetable oil all over our bodies when we get out of the shower. We do this even without drying off. It’s a smart way to nourish and moisturize at the same time.

2. It is also possible to create our own facial serums and toners without the need for synthetic preservatives using some smart cosmetics tricks such as:

Use a hydrolate that you like as a facial tonic in which you can easily pour 1/2 teaspoon of ascorbic acid (i.e. vitamin C that they also sell for internal use) and thus take advantage of all its properties without adding preservatives to your tonic. In addition, formulating products with vitamin C is very complicated because vitamin C is very unstable. However, this method allows you to easily take advantage of its properties. It directly helps to illuminate the skin of your face.

Use commercial aloe vera gel. It already contains its own preservatives. These are much gentler on the skin than those we can buy in cosmetic stores. It is very easy to add active ingredients to it such as vegetable oils, vitamins and glycerin.

Like in this recipe:

Use a vegetable oil, such as aloe vera oil, or almond’s oil. You can add a capsule of vitamin A for internal use to it. This is possible because vitamine A is fat-soluble. It will be enough to introduce our vitaminized oil in a dropper bottle. Then we already have a natural facial serum without the need to complicate with retinol *, etc… We can also use our capsule of vitamin A for internal intake. It will be very good for our skin.

*According to the IA: “Vitamin A and retinol are different names for the same compound, or rather, for a family of related compounds. Vitamin A is the generic name, while retinol is a specific form of this vitamin. In other words, retinol is an active form of vitamin A.”

Prepare an infusion, with lavender flowers, for example, and then filter it and add 25% vodka. The ethanol added in this percentage will act as a preservative of our infusion. This allows us to extend the shelf life of our natural lavender facial tonic for several days. After the application of our facial tonic, we spread one of our non-aqueous phase creams. It is emulsified with natural emulsifiers, such as beeswax. Our skin will be glowing.

3.- It is also very easy to prepare vitaminized exfoliants and masks for immediate use. Without the need to complicate, we will be adding water and fresh vitamins to our skin. Some examples:

ILLUMINATING EXFOLIANT of RICE FLOUR

Rice flour with a teaspoon of milk and a few drops (half a teaspoon) of lemon juice. Mix and then exfoliate your face.

DEPIGMENTING TREATMENT MASK with fresh potato.

Grate half a peeled potato into a puree.

Add a spoonful of rice flour that will provide exfoliating capacity.

Stir, add a spoonful of milk and form a paste that can be applied to the face.

We will try to prepare a minimum amount to use it at once. If it’s not possible, we can always refrigerate it. This all-natural product loses its properties after a few hours. Its texture also changes, that’s why we do not intend to keep it, but to use it immediately.

RICE AND LEMON DEPIGMENTING TONER

A rice and lemon toner is a natural skin solution that can help clarify, soothe and tone. The combination of rice and lemon can help reduce the appearance of blemishes and improve hydration. As you know, rice water has a natural depigmenting effect due to the kojic acid that rice contains. This combines with the ascorbic acid from the vitamin C in the lemon. Together, they create a synergistic effect that enhances the depigmenting character of this facial toner.

You will need: a cup of rice, 1 cup of water and the juice of half a lemon.

As easy as: Add the cup of rice to the water and the lemon juice. Let the mixture stand for 24 hours in a glass container. After 24 hours, remove the mixture and bring it to a low heat to boil for about 5 minutes. Let the mixture cool and strain it.

There are people who add the lemon juice to the rice water after a few hours, and after filtering the rice, and then they apply it directly without boiling it to better take advantage of the vitamin C in the lemon. It is also possible, although in this case it is necessary to be even more careful not to apply the tonic during the day so that the lemon does not come into contact with sunlight.

Use: Dip a cotton pad in the rice water and apply it on a clean face. Let it dry on the face and do not rinse.

TIPS: It is best to use the rice and lemon tonic at night because lemon is photo-sensitizing. It is possible to use this solution as a daily toner or several times a week.

4. It is possible to obtain a “creamy texture” to moisturize our skin without using emulsifying waxes of any kind. This happens when we use a natural vegetable butter. For example, shea butter. We then add a couple of teaspoons of one or two vitamin-rich vegetable oils. All we have to do is stir and beat the mixture well for a few minutes. This helps us obtain a fantastic creamy consistency without the use of preservatives or synthetic self-emulsifying waxes.

5. Finally, creams with an aqueous phase emulsified with beeswax and borax can be created. These do not require synthetic preservatives. They can keep for up to 3 months without refrigeration. This is more than enough time to finish the product without having to complicate ourselves.

CREAMS WITH AQUEOUS PHASE AND BEESWAX as emulsifier

To design this type of creams, it is necessary to consider the proportions of borax. We need to implement these proportions according to the amount of beeswax. Beeswax will be used as an emulsifier.

PROPORTIONS WITH BORAX

If we know that for every 15 grams of beeswax we will need approximately one gram of borax to produce the chemical emulsion between beeswax, oil and water; then it is easy to deduce by a simple rule of three. For example, for 3 grams of beeswax we will need about 0.2 grams of borax.

15 g wax ——– 0.9 g borax

3 g wax ———–   X

PROPORTIONS WITH THE BEESWAX AND THE OIL

90% of macerated-oil (oleado)

10% beeswax

PROPORTIONS WITH BEESWAX AND BORAX

In a cream recipe using beeswax and borax as co-emulsifier, a common ratio is 60% oils or fats such as shea butter, 10% beeswax and 30% water. To prepare a richer cream, a maximum of 80% oils/fats, 5% beeswax and the rest water can be used. In the water we will include the borax in a percentage of 1% of the total product. In other words, for 100 grams of cream, we will use approximately one gram of borax, depending also on the ratio of beeswax, as mentioned above.

For example: An ointment recipe might include 80% oil, 5% beeswax, 1% borax and 15% water. The exact proportions can be adjusted to achieve the desired consistency and texture. For a creamier texture, increase the oil phase. Decrease the water phase correspondingly.

LET’S GO TO OUR RECIPE

Ingredients to prepare about 100 grams of product:

OIL PHASE

40 grams of oat oleate

12 grams of shea butter

8 g vegetable glycerin

8 grams of beeswax

AQUEOUS PHASE

30 grams of distilled water to which, previously, we will add 0.75 grams of borax (which acts as emulsifier and preservative).

PROCEDURE:

Melt the beeswax and the oil/fat in a bain-marie. At the same time, we heat the distilled water, to which we have previously added the borax. Both phases should be at a maximum temperature of 70 degrees.

When the mixture of wax and oil (oily phase) is completely melted, we will gradually add the mixture of water and borax (aqueous phase). We should continue beating vigorously. Now, we will pour the mixture into a bowl with cold water. We’ll continue whisking until our cream is fully condensed.

Finally, we will introduce the cream in a glass container, if possible. The only preservative, as well as co-emulsifier of this preparation with aqueous phase, is borax. Therefore, the use of a glass container will prolong its preservation and keep our cream in the best conditions. Also, for this reason, we should prepare small quantities of product. This way, we can consume them in just a few months.

THE COMPONENTS OF OUR 100% NATURAL CREAM

This type of cream has been known since the time of the physician Galen (galenic creams). Even then they were made with beeswax and borax. Galenic creams proved to be a good treatment for skin problems such as irritation, inflammation and itching.

BEESWAX: Beeswax is a natural wax that provides a solid, waxy texture to the cream. It acts as a humectant, helping to retain moisture and soften the skin. And it has antioxidant properties helping to protect the skin from free radical damage.

OATMEAL OLEADO: We have used an oat oleate* (oil macerated in oats’ meal). It is prepared in a homemade way with oatmeal as we introduced in our post on “How to make herbal creams at home”. Oatmeal is rich in beta-glucans. Its cosmetic use has been found to have a much more moisturizing effect than hyaluronic acid. This is because it is much better absorbed. In addition, oatmeal soothes sensitive skin and moisturizes it naturally, preventing redness and irritation.

SHEA BUTTER: It is rich in fatty acids. This richness makes it ideal to moisturize and nourish the skin in depth. It improves the skin’s elasticity and softness. It is especially recommended to treat dry and mature skin and even to prevent itching and irritation of sensitive skin. Especially if you get it without deodorizing or processing, it is in itself a natural balm for the skin.

VEGETAL GLYCERIN: Glycerin is a humectant that attracts and retains moisture, making it very beneficial to the skin. Its main properties include moisturizing, protecting, softening and improving the skin barrier, making the skin feel smooth and healthy. When applied, glycerin does not simply stay on the skin. It penetrates and allows the skin to breathe while retaining moisture. Glycerin is really a safe and natural skin care product that works very simply to keep skin soft, beautiful and moisturized.

Food-grade vegetable glycerin is used to prepare “glycerites“, also known as glycerol extracts. Glycerin, or glycerol, is a sweet alcohol and is used as an extraction medium to obtain extracts from plants or other substances. Vegetable glycerin is produced from vegetable oils by processes such as hydrolysis, which separates the fatty acids from the glycerin.

In natural cosmetics, vegetable glycerin can be used to create and preserve various vegetable extracts. These extracts can be used in cosmetic preparations without the need for added preservatives. For example: Use aloe vera powder by placing it in a glass container. Cover it with glycerin for a few weeks. Once ready, filter it, and it’s prepared for use in our cosmetic preparations. The same with dried turmeric, with geranium petals powder, with dried chamomile flowers, etc … the creativity is endless.

BORAX: Borax is an alkaline mineral salt. It is a natural mineral element that helps beeswax to emulsify with water and oil. Borax, on the other hand, has disinfectant and anti-inflammatory properties, which can help soothe irritation and inflammation in case of eczema, psoriasis or dermatitis.  


OIL PHASE: The oil phase provides the moisturizing and emollient properties of the cream. The most common oils are sweet almond oil or shea butter. In this case, we have used chamomile oil for its properties to soothe irritated skin. We also included shea butter and glycerin. Glycerin is an all-natural moisturizer and moisturizer.

AQUEOUS PHASE: The aqueous phase provides the hydration and helps to create the emulsion. It is also possible to use hydrolates. These can be combined with borax and beeswax. However, we have preferred to keep it simple by using only distilled water.

NATURAL EMULSIFIER: The ratio of oil, beeswax and water is crucial to create a stable emulsion. Beeswax and borax, when combined, act as emulsifiers. They allow the oil and water to mix without mismatching. A chemical bond is produced between them. The ceronic acid in the beeswax reacts chemically with the sodium hydroxide. This sodium hydroxide is produced by the hydrolysis of the borax. Together, they produce the emulsion of the water with the oil.

DIY Caffeine and Salt Shampoo for Volume

First of all, it is very important that we use a shampoo that promotes hair volume without greasing our hair. And if our hair also tends to be straight and dull, it is best to use a shampoo based on caffeine and salt to provide shine, volume and prevent hair loss.

And secondly, it is important not to use post-wash treatments and conditioners with silicones and substances volumizing that give an impression of volume at first but in the long run weigh down the hair and create the need to wash it more frequently to make it look loose and voluminous again. In this case, it is best to use a homemade sea salt spray.

WHY DOES THE ADDITION OF COFFEE AND SALT TO A NEUTRAL SHAMPOO WORK SO WELL?

Greasy hair is the result of overactive sebaceous glands in the scalp that produce too much oil. The more frequently we wash our hair, the more we increase the problem. And of course, how do we stop this cycle if our hair quickly regains an oily appearance?

Dry shampoo sprays, which are so fashionable nowadays, produce the sensation of degreasing our hair and, although they can be useful as an emergency solution, their frequent use is not recommended because they end up worsening our problem of sebaceous gland hyperactivity.

However, this problem can be solved with salt. A salt shampoo produces the opposite effect, i.e. its frequent use ends up regulating the excess production of hair sebum.

We had discussed in a previous post the benefits of adding a tablespoon of coffee to a mild neutral shampoo.

The idea of adding natural coffee to our shampoo was to prevent hair loss with frequent washing. The addition of coffee, in addition to preventing hair loss, revitalizes and adds shine.

The addition of salt is especially suitable for treating straight hair that lacks volume and tends to become greasy, which undoubtedly worsens with frequent washing.

So, to slow down the WASHING-GREASE cycles and keep our hair voluminous and healthy looking, it is best to use a homemade salt and coffee shampoo like this one we bring you in this article.

As we mentioned earlier, the problem with straight hair that lacks volume and tends to get greasy is that it is actually dehydrated*, which  why issalt, which retains moisture and water in the environment, gives it volume without leaving it greasy like shampoos volumizing with added silicones.

*Try spreading a tablespoon of castor oil on your hair before washing it and you will see how moisturized it stays for days. This is proof that synthetic silicones, foams and conditioners give a sensation, at first, that they moisturize and condition our hair, but it is a sensation not that is long lasting and ends up making them greasy and aggravating further our problem of re-washing and themre-conditioning .

OUR RECIPE FOR HOMEMADE SALT AND COFFEE SHAMPOO

This simple trick turns any shampoo neutral you have at home into a hair treatment shampoo, a shampoo that will be an ally for the beauty of your hair.

This recipe will give you volume (thanks to the addition of salt) and softness and shine (thanks to the caffeine), which will also prevent hair loss.

Just add 2-3 tablespoons to your shampoo and wash your hair normally. After the first treatment, you will notice the positive results. First of all, our hair will have more volume, and as the days go by we will see that it will take longer to get greasy, so you will avoid frequent washing and break the wash-oil cycle.

LET’S GO THROUGH THE PROCESS

We will need a cup of neutral shampoo, the most ecological and softest you can find, a tablespoon of sea salt, and a tablespoon of pure coffee.

Ingredients:

Half a cup of neutral shampoo

One tablespoon of sea salt

One tablespoon of coffee

It is convenient to take a small part of your neutral shampoo (about half a cup or less) to mix the tablespoons of coffee and salt in a bain-marie.

This is a tip we share based on our experience, since using all the shampoo to put it in a bain-marie tends to thicken the shampoo and make it liquid due to the effect the heat has on the shampoo.

In this way, by using only a sample of the shampoo to integrate the salt and the coffee, we get the same result without the total of our shampoo remaining liquid. And if you find a commercial salt shampoo, like for example this one we have found, then even better because you can heat only the tablespoon of coffee, in half a cup of this salt shampoo, and when you take it off the heat add the rest of the shampoo and you will see that it becomes thick again as before the procedure.

INCI: purified sea salt water, cocamidopropyl betaine, decyl glucoside and lauryl glucoside (glucose based surfactant), cetearyl alcohol, castor oil, stearalkonium chloride, caprylic/capric triglyceride, glyceryl stearate, xanthan gum, tetrasodium glutamate diacetate (made from plat material), bare skin fragrance (phthalate free).

STEPS TO FOLLOW:

First, we will put our sample (half a cup or less) of neutral shampoo in a water bath and add, as a first step, the salt that tends to thicken the shampoo. And finally, the tablespoon of coffee.

We will mix the coffee and salt well in our shampoo sample, until they are perfectly diluted and integrated, then we will turn off the heat and wait for the mixture to cool before adding it to the total content of our neutral shampoo.

Another way of doing it that can be even better is to simply add a tablespoon of salt and a teaspoon of coffee to our bottle of neutral shampoo and stir well.
After about 12 hours, the salt and coffee will have integrated into the shampoo and we can use it with a total guarantee of effectiveness. In this case, the shampoo maintains its thickness, which is a very good quality for better hair washing.
Optionally, if our hair is dyed or particularly damaged, we can also add a tablespoon of castor oil for extra hydration. No other oil moisturizes the hair as much as this one.

*With these two tablespoons (one of salt and one of coffee) we can perfectly fill 250 ml of neutral shampoo that, from now on, we will have available and that we can put in a bottle of recycled commercial shampoo, for example.

POST-WASH CARE: SEA SALT SPRAYS

As we mentioned before, the best way to slow down the WASH-GREASE cycles is to use a homemade salt and coffee shampoo like the one we have seen in the previous recipe and, after washing, it is also highly recommended to use a DIY salt spray sea for which we also provide a recipe below.

SALT SPRAY FOR HAIR

You’ve probably noticed that the summer, and the beach, left your hair with more volume and more wave. If you want to keep the beach effect in your hair, you can easily prepare a sea salt spray to spray on your hair after washing.

The most basic spray only needs water and salt in a proportion that allows all the salt to dissolve completely in the water. That’s enough to spray the mixture on wet hair and create beautiful, voluminous waves.

But, if you are looking for sophistication, the following recipe is easy and simple:

DIY SEA SALT SPRAY:

Approximately 120 ml of purified wateror distilled

3 teaspoons sea salt

1 teaspoon of coconut oil caprylic (the kind that does not solidify)

*Optionally: 4 drops of essential oil, lavender, lemon, peppermint, ylang- ylang, etc…

INSTRUCTIONS:

Mix all of the above ingredients in a jar and .pour into a spray bottle of your choice

It is advisable to shake it every time you are going to spray it so that the coconut oil mixes well with the contents.

USE: Spray all over damp or dry hair and distribute evenly, scrunching to form beach waves. Let it dry.

A SECOND SPRAY RECIPE SALT HAIR

This second recipe is made with aloe vera gel and coconut oil for extra conditioning

Ingredients:

200 ml of warm water

2 tablespoons saltEpson

1 tablespoon fine sea salt

1 teaspoon of coconut oilcaprylic , argan oil, etc…

1 teaspoon of aloe vera gel

*Optional: A few drops of essential oil to give your spray a pleasant scent. Ylang-ylang essential oil, for example, is an EO with very good hair care properties and, mixed with coconut oil, gives a pleasant summer scent.

If you have a 250 ml glass spray bottle, all the better, because your spray lotion glass will keep better for a longer period of time without the addition of .synthetic preservatives

PROCEDURE:

Take your spray bottle and pour the hot water into it, then add the coconut oil, aloe vera gel, salt Epson and sea salt. Then cap the bottle and shake it for 1-2 minutes until all the salt is dissolved.

USES:

Spray the hairspray on damp hair and style it with your fingers to get loose beach waves. Don’t blow dry, just scrunch and .let it air dry

On dry hair it is also possible to spray it to get more volume. And if your hair is fine and straight, we suggest you wash it at night and it spray with the salt spray and let it dry in a braid or bun. The next morning, you can spray it again while removing the braid and you will see that it will stay wavy all day.

Sprays containing salt can dry out a bitthe hair , so it is best to use them a maximum of 2 to 3 times a week.

Although if you make this formulation, because it contains coconut oil and aloe gel, it tends to be better conditioned. And of course, it is also very important to avoid the use of synthetic foams and silicone caking agents in order to lengthen the washing-oiling cycles.

LAST BUT NOT LEAST

Cosmetic solutions may be fine when they really work, but if they don’t, perhaps considering the deficits in our diet may be a solution.

Sometimes excessively greasy and dull hair can be greatly improved if we find out which mineral or group of minerals it is deficient in.

For example, have you ever thought that you may be deficient in magnesium, which is a mineral needed in more than 600 enzymatic reactions, biological processes and cellular functions in our body.

In addition, it is an essential mineral for life that our body cannot produce by itself.  This means that we must ingest it through food.  According to studies, our body functions much worse without this mineral. Its functions are diverse and extend to all levels: physical, mental and emotional. From increased sensitivity to stress, moodiness, headaches and migraines to sleep disorders with restlessness and nervousness, difficulty concentrating and physical disorders such as hypertension, osteoporosis, brittle nails, etc ….

HOW TO MAKE HERBAL CREAMS AT HOME

The easiest way to prepare creams with an herbal base is to make an herbal oil and then incorporate this oil into our formulation.

HOW A MACERATED OIL IS MADE

Here is a link to a previous blog post that explains how to make an “oleado” from wild rose hips.

Also this other link:

https://naturamatters.blog/2021/03/05/how-to-make-infused-oil-2/

However, you can also visualise the procedure in this video of the Gingko Education school: https://www.youtube.com/watch?v=BINGTb3ouqo

HOW TO MAKE A CREAM OR OINTMENT FROM HERBAL OIL

Once we know the method (either hot or cold) to macerate our herbs and prepare an oleado, we have two options:

1.- Use our oleado to prepare the balm or ointment, in this case we only need to add a certain amount of beeswax to thicken our ointment and it will be ready.

2.- We can choose to prepare our cream or ointment in situ by macerating our oil with an herbal extract of our choice. In this case, the process of preparing the oil occurs at the same time as we prepare our balm or ointment.

This video shows this second way of making our cream based on herbal extracts, in this case, calendula.

Balms or ointments require, as a general rule, an oil (or ointment if infused with herbal extracts) and a certain amount of beeswax to emulsify it.

General rule: The amount of beeswax used is always about a quarter of the oil or oil used. This is also known as the 10% rule, in which we would use 90% oil and 10% beeswax to emulsify the oil.

So, for example, to fill a container of about 100 grams, we would use about 90 grams of oil and about 10 grams of wax. This consistency is ideal for use on the face, hands, etc.

If we are looking to make an ointment that spreads almost like wax, then we can increase the amount of wax up to 15 grams. It depends on the consistency we are looking for.

In our opinion, 10 grams (1/4 wax) is an excellent consistency, but, for example, if we are looking to create an ointment with a high concentration of active ingredients, in order to spread it on small areas (for example, an ointment to treat haemorrhoids), it may be more interesting to use a higher proportion of wax so that the active ingredients are better concentrated.

WHY PREPARE A BALM-LIKE CREAM WITHOUT AN AQUEOUS PHASE?

Very simple. These creams do not require preservatives.

Only antioxidants such as vitamin E or rosemary extract CO2 are usually added to extend the life of the product, as these antioxidants prevent the rancidity of fats and oils.

By avoiding the use of preservatives and added synthetic actives, we obtain a product that is much gentler and more tolerable for all skin types.

This is especially important if our homemade DIY product is to be used by people with sensitive or atopic skin. In these cases, such products can be used on a daily basis to safely moisturise and nourish our skin.

The balms whose recipes are detailed below are totally suitable for treating sensitive or atopic skin and skin affected by dermatitis.

Of course, each has its own specific characteristics. For example, the oatmeal balm whose recipe is described below is particularly suitable for daily use on skin affected by itchy dermatitis, as oatmeal has an anti-inflammatory, itch-soothing effect on irritation.

It would be very interesting to use a calendula oil as a base oil for this balm, for example. By adding the ground oatmeal to it, we would enrich our balm even more, giving it very good properties for treating this type of sensitive skin.

In any case, with this type of skin, we must above avoid creams loaded with preservatives and synthetic active ingredients, even if they are homemade, as they have an irritating effect on this type of skin.

As well as minimising the use of essential oils (just a couple of drops, or none at all) and avoiding chemical fragrances as much as possible.

HOW TO PREPARE MACERATED HERBAL EXTRACTS

Very simple, grinding the dried herbs with a coffee grinder.

This is how we have made our oatmeal powder, from grinding the oat flakes from breakfast. Or aloe vera, from grinding the dried aloe bark left over from emptying the aloe stalks.

You can also use other powdered extracts such as orange, which also smells very good.

PROCEDURE:

To obtain the orange extract powder, follow the same procedure as above. Dry the orange peels, and when they are very dry, grind them in a coffee grinder.

This powder will be placed in a recycled glass jar, so that it will last much longer and can be used in future cosmetic preparations.

PROPERTIES OF DIFFERENT FLOURS AND HERBAL EXTRACTS

Herbal extracts to enrich our cream or balm with their therapeutic properties can be of many different types:

These can be flours such as oat or baobab flour, yeast such as brewer’s yeast, powdered vitamin extracts such as Niacinamide or astaxanthin, ground herbs such as bearberry, or even ground rinds of different fruits such as oranges, tangerines or lemons.

ORANGE PEEL POWDER

INCI: Citrus aurantium powder

Orange extract powder can be macerated in oil, glycerine and also water. It is a plant-based ingredient used in cosmetics to formulate a wide range of products, such as creams, gels, soaps, shampoos, conditioners, hair fixatives…

Orange extract has anti-wrinkle, circulation-activating, anti-inflammatory, exfoliating, depigmenting, antiseptic, moisturising properties… The recommended dosage of orange extract in cosmetics ranges from 0.5 to 5%.

The cosmetic powder of orange peel, contains among other nutrients vitamin C that helps us to fight acne and has antioxidant properties, calcium that renews dead skin, potassium that moisturizes and regenerates the skin, magnesium that helps to give shine and youth to your skin. It is toning and astringent and it leaves hair soft, supple and shiny, improving also circulation in the scalp.

With dehydrated orange peel powder, you can make a facial mask to cleanse the skin or revitalizing baths, for oily skin and pimples, tired and dull skin, for all hair types.

Applications: masks, soaps, exfoliating creams, solid shampoo, etc…

Dosage: 0 to 5%. In conjunction with other powders up to 15%.

GROUND OATMEAL

INCI: Avena Sativa

Oats contain manganese, selenium, phosphorus, magnesium and zinc. It has moisturising and nourishing elements and hypoallergenic, emollient, and protective properties.

Oatmeal soothes skin irritations, both allergic and non-allergic, as well as itching. It improves itching caused by psoriasis, scabies, or itching caused by other types of dermatitis.

Because it moisturises and softens the skin, it is recommended for all skin types, extremely dry or flaky skin, also for sensitive skin and children.

It is also widely used in facial masks, as it is an excellent skin cleanser. Its particles absorb dirt and cellular residues while respecting and caring for the skin structure.

ALKANET ROOT POWDER

INCI: Alkanna Tinctoria

Alkanna tinctoria is a plant native to the Mediterranean part of the Boraginaceae family. Its roots contain a red dye that has been used as a dye since ancient times. It also has great medicinal properties.

The Greek physician, Hippocrates, recorded the use of this root for the treatment of skin ulcers. Because the plant contains pyrrolizidine alkaloids (which can cause liver toxicity), it is now almost exclusively used as a cosmetic dye and as a medicinal plant for topical use.

Traditionally, it has been used to treat wounds and skin diseases due to its antimicrobial and skin regenerating activity. The use of this root is therefore highly recommended in treatments for skin affected by dermatitis and eczema. It is also thought to have antiviral action against the herpes simplex virus. 

In addition to being antibacterial, it is very effective in improving inflammation, is suitable for sunburn and is able to act as a natural sunscreen. In fact, it is combined with ghee to treat burns and infected wounds.

Cosmetics: It has been used as a colouring agent for lipstick and in powder blusher.

HIBISCUS FLOWER

INCI: Hibiscus Sabdariffa Flower Powder

Hibiscus flower stimulates cell renewal, helps eliminate blemishes and reduces wrinkles caused by the signs of ageing as well as providing other skin benefits.

Its richness in vitamin E, essential fatty acids and natural antioxidants helps to fight against skin ageing and the harmful effects of UV rays. This is why it is added to a wide range of cosmetics such as: facial masks, creams and lotions, serums and soothing after-sun treatments.

BAOBAB FLOUR

INCI: Adansonia Digitata

Contains: triterpenoids, flavonoids and phenolic compounds, sterols and saponins. Vitamins A, B, C and E so that it nourishes the epidermis, hair and nails. It is ideal for the treatment of dry skin, predisposed to the formation of wrinkles.

Thanks to its polyunsaturated fatty acids, it ensures optimal hydration and tissue protection. Its vitamin components and organic acids slow down skin ageing, keeping the skin elastic and glowing.

Its properties allow the skin to regenerate quickly; it also acts as a natural antibacterial, cleanses deeply and leaves a feeling of freshness, delaying skin ageing.

BREWER’S YEAST EXTRACT POWDER

INCI: Yeast Saccharomyces cereviciae Extract

The most important cosmetic properties of brewer’s yeast are to promote the production of collagen, elastin, to rebuild the extracellular matrix and to be refreshing to the skin. Its good results in post-solar products are particularly striking, which has generated innovative combinations for a new class of cosmetics with anti-inflammatory and rehydrating action on damaged and water-deficient skin.

It can be considered a unique internal moisturiser, swelling the skin surface by increasing hydration and incorporating nascent proteins into the skin cells to help the skin oxygenate and appear more luminous.

ASTAXANTHIN EXTRACT

INCI: ASTAXANTHIN

Astaxanthin is a natural antioxidant derived from microalgae. It supports joint, skin and eye health and provides a wide range of health benefits.

A study on the role of astaxanthin in UV-induced skin damage in healthy people suggested that it offered some sun protection. Skin is damaged by daily exposure to the sun, so the skin-protective effects of astaxanthin may be particularly important.

In addition, several data show that astaxanthin has important nutraceutical applications and health benefits, especially in healthy ageing processes as it prevents oxidative stress.

ALOE VERA POWDER

INCI: ALOE BARBADENSIS

Aloe vera powder is made from dried aloe vera leaves ground to a powder consistency. It can be used in many ways in different products and offers multiple benefits to the body due to its high content of antioxidants and vitamin C, which strengthen the immune system by repairing and soothing the digestive tract.

For the skin: Aloe vera powder heals the skin and improves its elasticity.  It has moisturising and soothing properties that relieve scars and marks, as well as minor burns, eczema, psoriasis and acne.

It is anti-inflammatory and increases collagen production in the skin, as well as acting as an antiseptic to help reduce any pain, swelling or itching related to mosquito bites, sunburn or allergic reactions.

OATMEAL BALM RECIPE

As mentioned above, this balm is particularly suitable for treating atopic skin and skin affected by dermatitis or eczema with itching, as oatmeal has an anti-inflammatory effect, soothing itching and softening irritation.

It would be very interesting to use a calendula oil as a base oil for this balm, for example. By adding the ground oatmeal to it, we would enrich our balm even more, giving it very good properties for treating this type of sensitive skin.

In any case, with this type of skin we must avoid, above all, creams loaded with preservatives and synthetic active ingredients, even if they are homemade, as they have an irritating effect on this type of skin.

As well as minimising the use of essential oils (just a couple of drops, or none at all) and avoiding chemical fragrances as much as possible.

Below we describe the properties of some of the essential oils most suitable for the treatment of atopic skin and skin affected by dermatitis. These include blue chamomile and Roman chamomile, which are anti-inflammatory, sandalwood, which is a regulator, geranium, which is regenerative, rosewood, carrot seed extract and, above all, patchouli to treat itching.

Ingredients for about 100 grams of product:

About 70 ml of calendula oil, if available, or almond oil.

About 10 grams of oatmeal* powder, and

About 15 grams of beeswax.

Optionally, a few drops, no more than 5, of carrot seed EO or chamomile. Both have very good properties for treating the most delicate skins.

As this balm does not contain water, it does not require the addition of preservatives. Only, if we want to extend its life by preventing rancidity, we can add a few drops of vitamin E.

*Some people go to the trouble of buying colloidal oatmeal to incorporate into creams and balms like this one. We have found that you get much the same result by grinding the oat flakes from the supermarket in a coffee grinder to a fine powder that dissolves easily in the oil since, after all, what we are doing is sort of macerating the oats in the oil as if they were a hot oleate. Finally, the properties of the powdered oatmeal will pass into our oil and thus into our balm.

PROCEDURE:

Place a heat-resistant container in a bain-marie and start by melting the beeswax.

When it is completely melted, add the calendula oil or, in its place, the almond oil and, finally, the oat powder, stirring constantly until everything is perfectly integrated.

Remove from the heat and, if we have decided to do so, this would be the moment to add the drops of EO, as they are thermolabile substances.

As you can see, with balms and ointments based on oil and wax, the proportion used is more or less 90% oil to 10% beeswax. The percentages, as you will understand, can be flexible depending on how hard we want our balm to be. If we like it to have a softer consistency, then, for example, instead of 15 grams of wax for 70 grams of oil, we will add only 10 grams of wax.

PROPERTIES OF ESSENTIAL OILS:

Carrot seed essential oil: This oil is moisturising, anti-inflammatory, antifungal, and sunscreen. It also adds a mild and special aroma to the recipe.

Blue chamomile essential oil: Blue chamomile oil owes its blue colour to the chamazulenic acid contained in this essential oil. Chamazulenic acid is anti-inflammatory and promotes skin healing. This oil can therefore be used diluted in a carrier oil to disinfect wounds.

*With essential oils, less is more, as a few drops can add good properties to our balm, while too much can cause irritation with daily use. We should also bear in mind that this is a balm for sensitive skin, which often cannot even tolerate essential oils topically.

THERE ARE VARIOUS TYPES OF CHAMOMILE OILS AND EXTRACTS:

BLUE CHAMOMILE ESSENTIAL OIL: Blue chamomile essential oil, which is the one we have chosen, is specially selected for the treatment of atopic skin.

ROMAN CAMOMILE ESSENTIAL OIL: But, it would be equally possible to use Roman chamomile EO, which also has anti-inflammatory and analgesic properties. It is also used topically to treat allergies, skin irritations, etc. ….

CAMOMILE OIL EXTRACT: In this case, we are not talking about an essential oil, but a macerate of chamomile flowers in virgin sunflower oil.

INCI: Helianthus Annuus Seed Oil, Chamomilla Recutita Flower Extract.

The difference is that this oily extract could be incorporated in larger quantities in our recipes for sensitive skin as it lacks the highly biocidal capabilities of all essential oils.

In this way, just as we would do by adding a marigold oil, we would be using the softening, protective and regenerating qualities of chamomile or marigold to treat this type of skin without the disadvantages of the biocidal effect that these same plants would have if we used them in the form of essential oil.

PATCHOULI ESSENTIAL OIL:

Thanks to the potent analgesic, anti-inflammatory and pain-relieving properties of its bioactive component, patchoulen, this oil is widely used to relieve pain and inflammation in cases of arthritis and joint pain. As a natural vasodilator, it is also used to treat painful muscle spasms, muscle pain, arthritic conditions and other inflammatory conditions.

And it is because of these same analgesic and anti-inflammatory properties that it is so effective in treating atopic skin with pruritus.

Patchouli essential oil is renowned for its use in skin cell regeneration. Endowed with countless active ingredients and antibacterial properties, it facilitates wound healing and effectively reduces wrinkles, scars, blemishes and other signs of ageing. This aromatic oil also plays a key role in the fight against bacteria and germs that ultimately cause pimples, acne and other skin infections, giving us radiant, impurity-free skin.

ROSEWOOD ESSENTIAL OIL

Rosewood Essential Oil (Aniba rosaeodora) is obtained by steam distilling the wood of a tree. It is noted for its skin regenerating and mind calming properties.

It is analgesic, antidepressant and stimulant, antiseptic, tonic and aphrodisiac. Therefore, it is also soothing for this type of skin.

HOMEMADE ALOE VERA BALM RECIPE

This balm, like all the balms we show you in this article, could also be used on atopic and sensitive skin. However, it is more suitable for all skin types that we want to purify and moisturise on a daily basis.

Ingredients for about 100 grams of product:

About 70 ml of cold-pressed virgin olive oil.

About 10 grams of powdered aloe vera*, and

About 15 grams of beeswax.

Optionally, a few drops of antioxidant to extend its shelf life, no more than 10 drops of critical CO2 rosemary extract.

Rosemary extract CO2 critical: CO2 critical extracts are not exactly the same as essential oils. The technology with which they are obtained is far more sophisticated and a much better result is achieved with them. Thus, this type of extract optimally preserves the original aroma and properties of the plant from which it is extracted.

In the case of rosemary, this extract has antioxidant properties as well as antimicrobial properties. This is why we can use it instead of vitamin E to prevent rancidity in our aloe vera balm.

Rosemary EO is particularly beneficial for those suffering from conditions such as rosacea or dermatitis, helping to reduce associated inflammation and discomfort.

As the balm also contains no water, it does not require the addition of preservatives.

PROCEDURE:

Place a heat-resistant container in a bain-marie and start by melting the beeswax.

When it is completely melted, add the olive oil and, finally, the aloe vera powder, stirring constantly until everything is perfectly integrated.

Remove from the heat and, if we have decided to do so, this is the moment to add the droplets of rosemary extract CO2, which is a thermolabile substance.

HOW TO PROCESS PLANT EXTRACTS FOR USE IN OUR HOMEMADE COSMETIC PREPARATIONS

Ayurvedic medicine gives priority to natural foods that are fundamentally nourishing for the body, mind and soul. In addition to healthy skin, Ayurvedic diets have been proven to lower cholesterol levels, reduce the risk of cancer, protect against diabetes, promote weight loss and promote a calming effect on the mind, thus reducing anxiety.

Beauty is not only superficial. Any suffering our body undergoes is reflected in its outward appearance. Therefore, the use of Ayurvedic lifestyle practices is essential to sustainably maintain a healthy and glowing skin.

Ayurveda advises very natural products based on virgin oils and herbal extracts to take care of our skin, and that is why in these articles of our blog we try to find recipes and ways to create a natural cosmetic adapted to our modern life.

In this post, in particular, we want to explain how we can process the plants in our garden to make all kinds of extracts from them, such as tinctures, oleomacerates and hydroglycerine extracts.

What does the skin NEED to stay balanced?

First of all, it needs to absorb the nutrients it needs to stay in balance and that, as with almost everything else, according to Ayurvedic medicine and naturopathy, starts with a healthy diet.

Stress, lack of sleep, poor hydration and inactivity are detrimental to health and therefore to the skin. With its holistic approach, Ayurveda recommends stress management, simple physical activity, regular meditation, sufficient water and sleep to complement and enhance the effects of other Ayurvedic beauty rituals we may follow. In addition, these practices balance the body’s hormone levels, calm the mind and even boost immunity.

In addition to a healthy diet and lifestyle, it is equally necessary to follow healthy daily hygiene rituals; because certain practices, even if we follow the perfect diet for our body, can clearly worsen the condition of our skin.

WHAT YOU NEED TO DO, HYGIENICALLY, TO KEEP YOUR SKIN MOISTURISED

1.- Limit daily showers to 5 or 10 minutes. If we shower daily, it is better to use a salt stone to wash ourselves. Soap should only be left for when we come back from the gym.

2.- Use mild soaps, detergents and cosmetics. Glycerine soaps in bars are highly recommended, as well as cold saponified soaps with a high rate of overgreasing, of course.

If you do not know how to make them and need to buy a commercial soap, try to avoid gels that do not respect the skin’s microbiota. New generation shower gels, such as Sanex shower gels, are already designed to respect the skin’s bacterial flora.

3.- The same applies to commercial creams. There are already creams on the market such as those from Dr. Organic that have probiotics added to respect the skin’s microbiome. Specifically, in this Dr. Organic cream we were telling you about, you can see in its composition the addition of active ferments (*LACTOBACILLUS FERMENT LYSATE, LACTOBACILLUS FERMENT, KEY ACTIVE: Probiotic).

Without a doubt, these new generation creams are much more tolerable for all skin types, especially the most sensitive or problematic ones.

4.- Use a humidifier during the winter when the heating is on to prevent the room from drying out.

5.- Drink more water throughout the day, always without forcing ourselves because this also has negative consequences. A good tip is to drink herbal teas or juices that we like (some people add small pieces of lime, fruit or cinnamon to water to make it more palatable), because this way we end up drinking fluids without forcing ourselves and causing an electrolyte imbalance in our body.

WHAT THE SKIN NEEDS AT A COSMETIC LEVEL TO STAY HYDRATED

If our skin is still dry and flaky, it is a good idea to apply a moisturising cream or a moisturising mask. Before buying any skin care product, it is a good idea to know your skin type in order to adapt the product, whether it is commercial or homemade. Homemade cosmetics are the best, as you know 😊

In any case, you should avoid products that can clog your pores and cause acne, as the products you will then have to use to treat it can sometimes dry out your skin even more.

The key, as always, is diet.

Basically, very few natural ingredients are needed to keep our skin hydrated and nourished. If you make natural cosmetics, make them minimalist. Why? What does your skin need on a cosmetic level to stay hydrated: fats, butters, oils, herbal extracts containing nutrients, vitamins, and little else. And natural vegetable oils and fats, as well as herbal extracts, already contain all those vitamins and antioxidants the skin needs, the fresher they are, the less preservatives and synthetic ingredients they contain.

There is no need to add silk proteins, urea, allantoin, hydrolysed marine collagen, hydrolysed elastin, vegetable squalene, essential oils in quantities of 1 gram, trehalose, chamomile oil or borage Bio, which cost a fortune, etc, etc, etc … Oh, and let’s not forget the addition of 1 gram of organic preservative, always, but at the same time synthetic.

All you are doing is adding to the coffers of the suppliers of cosmetic raw materials without achieving what you intended from the beginning, which is to learn how to take care of your skin independently and without depending on dozens of synthetically processed commercial products.

That’s like going to the supermarket and, instead of buying the vegetable ingredients to prepare a natural soup yourself, i.e. (celery, potatoes, leek, etc.), you are advised that you have to buy these bouillon cubes to enrich your soup with vitamins, that you have to add glutamate to give it a more intense flavour, or this or that flavouring to make it more appetising.

Doesn’t it seem absurd if someone suggests something like that when you go to buy the ingredients to prepare your own natural soup? Well, that’s what natural cosmetics suppliers do with the recipes for creams and other products that they propose on their websites and blogs.

For that, you can buy a commercial cream such as Dr. Organic, or Dr. Hauschka’s Rose Cream, which will be cheaper, don’t you think?

*Dr. Hauschka’s Rose Cream: This cream, although it does not contain probiotics like Dr. Organic’s previous one, has a simpler and more natural composition of ingredients than many of the recipes advocated by home cosmetics blogs. That’s why it feels so good on the skin!

WHAT WE DO WANT TO ADD TO OUR HOMEMADE COSMETIC RECIPES IS

Cold-pressed vegetable oils, beeswax (the best known emulsifier), natural fats and butters, herbal extracts, tinctures and vegetable oils, which we can also prepare ourselves with dried plants from our garden.

Now, that’s environmentally friendly!

And we can even add orange or oat powder extracts to our recipes, which are very easy to obtain from orange peels or oat flakes from the supermarket.

And what do you need for this, almost nothing, dry your plants, and then grind them with a coffee grinder to incorporate them in the form of a powdered extract into your preparations. The same goes for oat flakes, or orange or lemon peels, once they have been dried.

And, if you want to prepare an oleate, the same dried plants are left to macerate in oil. And if what you want is a tincture or a hydroglycerinated extract, then in alcohol and vegetable glycerine.

In any case, and this is the golden rule, the best and most effective treatment is to try to ingest the nutrients and vitamins the skin needs by following the healthy diet that best suits our metabolism and rhythm of life. Don’t you think this is much more logical than trying to deliver those vitamins topically with the addition of preservatives and other ingredients synthesised in a laboratory?

KINDS OF NATURAL COSMETICS

Moisturising or hydrating products are based on vegetable glycerin derived from saponified vegetable fats, which draws water from the air and deeper layers of the skin into the stratum corneum to provide hydration.

Occlusives, such as beeswax, soybean oil and lanolin, form a barrier that prevents water from evaporating. It is possible to make vegetable lanolin, to add to our cosmetic preparations, with shea butter and rosin. This recipe is still pending.

Emollients such as coconut oil, shea butter and colloidal oatmeal make the skin soft.

Regenerators, which are a combination of hydration and regeneration, are mainly based on natural or powdered aloe vera.

Hydration goes beneath the skin barrier. It infuses water into the cells to “replenish” them, and this is perfectly possible with all-natural products such as Ayurvedic masks and creams. And it is not only possible, but also very interesting when you consider that at least 60% of the substances that come into contact with the skin end up in the body. Some of the toxic compounds are eliminated via the liver and kidneys, but others accumulate in organs and tissues and can cause long-term hormonal disorders and various diseases.

This is why Ayurveda always advises not to put anything on our skin that is not edible at the same time.

HOW TO MAKE OLEOMACERATES, TINCTURES AND HYDROGLYCERINE EXTRACTS

There are various types of extracts, such as tinctures, where we use ethanol (organic alcohol) or vodka as solvents; or hydroglycerinated extracts, where we use water and vegetable glycerine as solvents; or hydroalcoglycerinated extracts, which use water, ethanol and glycerine, and which are more complete. And, of course, oleomacerates, in which we extract the fat-soluble components of plants. We are going to talk about all of them and how to process them below.

Because, you should know that we prefer to use oleomacerate extracts in ointments and hydroglyceric extracts in tonics and shampoos. In creams, both types can be added.

HOW TO MAKE OLEOMACERATES

An OLEADO is the result of macerating a medicinal or aromatic plant rich in fat-soluble components in a vegetable oil. It can also be called OLEOMACERATE. Thus, the vegetable oil dissolves the fat-soluble ingredients of the plant and the properties of the plant are transferred to the oil. Different types of oil are often used, such as olive, sunflower or coconut oil, the important thing is that they are cold-pressed virgin oils.

In the case of oleomacerates, the compounds to be extracted are those that are soluble and related to fats. By macerating the plant in the oil, we are therefore extracting the fat-soluble compounds from the plant so that we can easily introduce them into our preparations or use them directly on the skin or hair. In this way, we can easily and effectively take advantage of the active principles of the plants and benefit from their properties.

Some oleomacerates widely used in natural cosmetics are: calendula oil, rosemary oil, arnica oil, hypericum oil or chamomile oil, for example …

We often have plants in the garden, or even in pots, that we do not know that if we dry them, they can be very useful for making many types of extracts which, depending on the solvent we use, will become oleomacerates, tinctures or hydroglycerine extracts.

WHY MAKE AN OLEOMACERATE

If anyone wonders why it is interesting to prepare oleomacerates, when we have essential oils, which are much more potent; it is important to know that not all components of a plant enter into the steam distillation of essential oils. Only the smallest molecules are extracted by this method, so the full essence of the plant is never captured. In this sense, if you can buy a C02 extract from a plant, know that it is much more complete because its distillation process is simply better and more capable of extracting the distilled essence of the plant.

In the case of oleomacerates, the maceration process captures the heavier and larger molecules. Other extraction techniques capture different chemical substances, as mentioned in the case of critical C02 extracts.

Thus, for example, when making a lavender-based cream, the therapeutic effect can be enhanced by also including macerated lavender oil and even fluid extracts or hydrosols.

Another advantage of macerated oils is that they add properties to our recipes in a gentler way than essential oils. Essential oils sometimes cause rashes on sensitive skin and irritation with daily use, even on normal skin.

We may also have access to a plant that does not have a corresponding essential oil, such as lilac or elderflower, for example, or we may want to use a plant whose essential oil is very expensive, such as jasmine or rose, for example. Through maceration, we can access the healing fat-soluble chemical compounds of these plants and use them in our skin care.

As we said before, we often have plants in the garden that we don’t know that if we dry them they can be very useful. This is the case of the humble marigolds. I am sure that many of us have them in the garden without knowing it. However, marigold or immortelle flowers have a great therapeutic value if we pick them and dry them.

The marigold is a plant with great therapeutic potential for the skin. It regenerates, combats possible germs and fights inflammation. It is a restorative par excellence for irritated, itchy skin, eczema, chilblains caused by the cold, etc.

Another use of calendula oil is to treat earaches. We put 2 to 3 drops in the ear and hold a bag or warm cloth over it. However, if the symptoms persist or if there is an infection, it is best to consult a doctor.

By infusing the flowers in oil, we can extract many of these properties and incorporate them into easy-to-use products such as: recipes for balms, lip balms, soaps, creams and lotions.

That is why we are going to explain below the two known methods to prepare an oleate, that is, to infuse or macerate a vegetable oil with the properties of an herb or plant. In this case, we are going to explain how to prepare a marigold oil macerate, although it would be perfectly possible with any other dried plant or flower.

MARIGOLD MACERATED OIL

For this we will need dried marigold flowers. Fresh herbs can also be used to prepare the infused oils, but this is not a good idea because the water content of fresh flowers and herbs tends to create mould and spoil the oils.

Simply spread the previously harvested flowers on a paper towel in a dry place or in the sun and turn them daily for one or two weeks until they are completely dry.

When they are dry, fill a glass jar 1/3 full with your dried flowers and fill it with an oil that does not rancid easily. The best oils are olive and coconut, because they do not go rancid as quickly as sunflower or soybean oil. It is also possible with jojoba oil, which does not rancid easily, although it is more expensive. Or almond oil. If you live in an area where it is cold in winter and coconut oil solidifies, you can mix it with another oil to keep it liquid.

After maceration, strain it and add 0.2% vitamin E as an antioxidant. This will extend the shelf life to a year or more. In this way you will have a pure marigold extract.

As the “natural freak” website says: “Jojoba and coconut oils are also often used or added, while sweet almond oil is better suited to smaller batches as it rancidifies faster than the other oils”

https://freakofnatural.com

Cover the jar tightly and store in a cool, dark place for a minimum of four weeks (40 days is ideal). Shake it periodically. There are even “schools” that say that you should give it the light of the sun and the moon, because of the energy issue. However, don’t worry if you don’t, the result will also be acceptable.

After 40 days, strain the flowers and our macerated oil is ready. To strain the herbs, you can use a cotton filter or a fine cloth, or even a paper coffee filter. In some cases, you will have to repeat the operation so that the oil is free of residues.

The oil, now infused, should be kept in a jar, preferably a dark glass jar so that it has a longer shelf life. Store the bottle in a dry, dark place, protected from heat sources. If we think that our oil may go rancid, we can add a little wheat germ oil or a few drops of vitamin E to prevent oxidation and rancidity.

As we said, to prepare a homemade oleado, it is enough to leave the dried plant to macerate in oil for a few days.

THE HOT INFUSION METHOD

The second method of infusion is a hot infusion method, which has been detailed for centuries in traditional herbal remedy manuals such as “Maria Treben’s Cures”.

This form of hot maceration is the most suitable for harder parts of the plant, such as the roots. The temperature should never exceed 40 ºC and, logically, we will need a container resistant to the temperature, such as a pyrex, etc.

Put the flask with the herbs in a bain-marie for 2 hours on a low heat. The time is relative, some people leave it for less time and with a little more temperature, it also depends on the hardness of the roots of the plant, etc. …

HOW TO MAKE TINCTURES AND HYDROGLYCERINE EXTRACTS

Tinctures consist of macerating a plant in ethanol (organic alcohol, or even vodka) to extract its active principles. Although they are widely used in natural medicine, as they can be directly ingested to take advantage of their medicinal properties, they can also be used in natural cosmetics to enrich our treatment creams. For example, comfrey tincture can be used to make an ointment with healing and soothing properties to treat haemorrhoids. However, oleates are much more commonly used because of their ease of incorporation into our oily preparations.

When preparing a tincture, we must use an organic alcohol (ethanol) with the appropriate alcohol content. For example, when we say that an alcohol is 96º, what we mean is that, out of every 100 grams of alcohol, 96 grams are alcohol and 4 grams are water.

The alcohol content to be used and the maceration time depend on the type of plant. In general terms, we can be guided by the following data:

1.-Flowers, leaves and delicate parts of a dried plant: use alcohol of about 70º, and leave them to macerate for 48 hours to a week.

2.-The hard stems, bark and roots need 80º alcohol and are left to macerate for 2-3 weeks.

3.-The resins, which are even harder, will need alcohol with a minimum alcohol content of 90º and we will leave them to macerate for 8-10 days.

This table explains the amount of water that needs to be added to 96° alcohol to dilute it:

I want 100 gr alcohol ofGrams I need of 96º alcoholGrams I need of water
70º73,526,5
80º8416
90º94,55,5

IMPORTANT: Never use normal pharmacy alcohol to make tinctures for internal use, as it contains toxic additives. In the case of external or topical use, for example to rub rosemary alcohol on the legs, we can use pharmacy alcohol without any problem, and for this, the table above will be very useful.

PREPARATION OF THE TINCTURES:

In general terms, to make the tinctures we will use ground dried plants, which will allow us to reduce their volume considerably so that we can cover them well with the alcohol.

The usual plant/alcohol ratio according to traditional pharmacopoeia is 1:5, what does this mean?  It means that for each part of plant we put 5 parts of alcohol (of the grade that suits each plant).

For example: Suppose we want to make a rosemary tincture. To do this, we weigh 20 g (one part) of ground rosemary and add 100 g (5 parts) of 70º alcohol, which is suitable for leaves and stems. If we do not have 70º alcohol, we prepare it with 73.5 g of 96º alcohol and 26.5 g of distilled or mineral water, as indicated in the table.

PREPARATION: Start by weighing the dried plant to be used and placing it in a clean, sterilised glass bottle that closes tightly.

Weigh the alcohol of the recommended strength according to the part of the plant to be used and add it to the bottle. The plant must be well covered.

Close the bottle tightly and keep it away from light and heat for the time necessary for maceration. Try to shake it at least once a day.

Once the maceration time has elapsed, it is filtered through a cloth strainer, or gauze, or paper filter. It is very important that it is well filtered and that no plant remains so that it does not become mouldy and spoil the preparation.

Finally, store the tincture in a dark glass container protected from light and heat, well labelled and with the date of preparation.

*Many people simply use raw vodka to make herbal tinctures and, we have to say, it works very well too. So if you are not making a commercial tincture, but for your own and your family’s use, know that vodka is also a great option.

Even Maria Treben’s famous Swedish herbs* are often macerated in brandy or eau-de-vie. *Maria Treben’s Swedish Herbs are a mixture of 11 medicinal plants, including bitter and digestive plants.

CONSERVATION: Tinctures do not need a preservative because of their high alcohol content. If they are well made and well filtered, they can be perfectly preserved for 3 to 5 years.

TIPS: When incorporating them into our cosmetic preparations, remember that they contain alcohol and therefore dry out the skin. We should also ensure that our tincture does not exceed 5% of the total formula for body use and 2% for facial use, always avoiding the eye contour area. Nor should they be applied to dry or chapped skin, which is better suited to other types of extracts.

PREPARATION OF HYDROGLYCERINATED and HYDROALCOGLYCERINATED EXTRACTS

Extracts can be prepared from glycerine in a variety of ways. The two most common types of extracts are HG (containing water and glycerine) and HAG (containing water, glycerine and alcohol).

HYDROGLYCERIN OR HG

For this type of maceration we will use a mixture of distilled water and liquid glycerine as a solvent. Depending on the plant used, the plant/solvent proportions, the water/glycerine proportions and the maceration times may vary.

Hydro-glycerine macerates are very good to add to our face creams. They are added in the aqueous phase, instead of glycerine. To make these macerates, we will normally use 70% vegetable glycerine and 30% water. This is known as the 30:70 ratio.

Quantities to be used:

As in the case of tinctures, we will use ground dried plants to reduce their volume and to be able to cover them well. Normally, we will use a glass container in which we will put our dried plant (more or less up to 1/3 of the container) and cover the rest with the solvent (glycerine – distilled water) in a ratio of 30:70, as we said, i.e. 30 grams of water for 70 grams of glycerine.

Example of mallow HG 30:70

We weigh 20 g of dried and ground malva sylvestris and pour it into a glass bottle. We prepare our solvent in a ratio of 30 % water and 70 % glycerine. To fill the glass bottle, at least three times as much solvent as dried plant should be added. That is, a plant/solvent ratio of 1:3.

As we had 20 grams of dried mallow flowers, we will add a minimum of 60 grams of solvent (20 grams x 3 parts = 60 grams). Of these 60 grams, 30% will be water and 70% glycerine. According to the rule of three, we will need approximately 18 grams of water and 42 grams of glycerine.

Now we pour the solvent into the bottle, stir well and close it. Store the bottle in a place away from light and heat. The maceration time will be between 8 and 20 days. During this time, shake the bottle from time to time. After the maceration time, filter the macerate through a coffee filter or a very tightly woven cotton cloth so that no traces of the marigold remain.

Our HG should preferably be packaged in a dark bottle, protected from light and heat, with its production date and name. This preparation does not require a preservative, just be careful to put it in the fridge in summer. With this precaution, you can keep it from one year to the next.

Also if you make it in a 50:50 ratio, i.e. half water, half glycerine. However, if we incorporate it immediately into one of our preparations, we will avoid all this. That is why it is better to prepare only a certain amount of product, the amount you are going to use soon.

HYDROALKYLGLYCERINATE OR HAG

Now we are going to prepare extracts with a mixture of water, ethanol and glycerine. With this type of macerates we will be able to extract more active principles than with only glycerine and water. The plant/solvent ratio will also be 1:3 in most cases.

As we said, these types of extracts are preferably added to our facial tonics, serums, masks and facial creams. To do this, add 1% to 5% to these types of preparations.

And we will add up to 15% by weight of our product for preparations such as creams or body washes, as well as hair treatment shampoos.

Example of the amount of solvent for 25 g of plant according to the table above:

21 grams of 96º pharmacy alcohol

29 g water

25 g glycerine

In total, the 75 grams of solvent we have to add to our 25 grams of plant, according to the 1:3 rule

A simpler way to prepare our HAG is to use vodka (40 proof alcohol). In this case, the solvent mixture will consist of 2 parts vodka and 1 part glycerine.

Example of the amount of solvent for 25 g of plant:

50 g vodka

25 g glycerine.

And, of course, you don’t need to add water, so the preparation keeps even better.

The steps to follow to elaborate the HAG are the same as for the hydroglycerine, the only difference is that in this case the maceration time is 8 to 10 days, also trying to shake it several times a day. The HAGs can be incorporated into our cosmetic preparations without any problem, in a proportion of up to 15% for body preparations and between 1-5% for facial preparations.

AN EXAMPLE OF HYDRO-GLYCERINATED MALLOW EXTRACT

Mallow has hydrophilic compounds, so it is best to make a hydro-glycerine extract with water and glycerine to get the most active ingredients out of this soft, protective flower.

Ingredients:

10 g dried mallow flowers in a small glass container (to which we add 30 g of solvent)

9 g distilled water

21 g vegetable glycerine

PROCEDURE:

Crush the flowers well and add the water and glycerine solution. Leave to macerate for 2 weeks, protected from light and heat and shaking from time to time. Then filter and store in the refrigerator.

Mallow Flower Extract is recognised for its moisturising, soothing, emollient and natural collagen-activating properties, as well as its ability to regulate trans-epidermal water loss in the skin. This is due to the mucilage content of its flowers. It also has a healing and anti-inflammatory action.

Mallow is also used in products to treat tired legs due to its content of venoactive flavonoids, i.e. being able to decrease the permeability of blood capillaries and increase their resistance.

 It is also used in eye drops to decongest inflamed eyes, as it tones up the microcirculation in the eye.

HYDROALCOGLYCERINATED CUCUMBER EXTRACT

The best-known benefit of cucumbers is their soothing, calming effects. People often use cucumber extract for the skin to soothe morning puffiness or any irritation.  This is partially due to cucumbers’ powerful hydration content.  But cucumbers also contain Vitamin K, A, and C, which not only act as antioxidants but also have anti-inflammatory and moisturizing effects on the skin.  Cucumber extract skin benefits also include reducing dark circles and slightly smoothing out wrinkles.

Recently, researchers found that cucumber fruit extract contains rutin and ascorbic acid oxidase, both free radical scavengers that can help protect against skin damage. 

The plant/solvent ratio shall be 1:2, i.e. two parts solvent to one part plant.

And the ratio of water, glycerine, alcohol shall be 30:40:30.

In this case, as we have used 15 grams of fresh crushed cucumber, we will add the quantities, according to the proportion 30:40:30, in which we include a proportion of double the solvent than the crushed cucumber, because 9+12+9 is equivalent to 30 grams of solvent, which is double the plant we had, in this case, double the crushed cucumber.

9 grams of distilled water, which is 30% of the total 30 grams of solvent.

12 grams of vegetable glycerine, which is 40% of 30 grams.

9 grams of alcohol, which is 30% of 30 grams.

PROCEDURE:

After cutting the cucumber into very small pieces, about half a centimetre in size, i.e. almost crushed, place it in a wide-mouthed glass container with an airtight lid.

Add the solvent of water, glycerine and alcohol and leave it covered for a week or so.

Filter it through a dense cotton cloth.

After 8 to 10 days, our macerate will be ready to be incorporated into our cosmetic preparations. We will keep it in the refrigerator while we are not going to use it, although thanks to the mixture of glycerine and alcohol, it does not require the addition of synthetic preservatives.

Natural Preservatives for Homemade Skincare

Are you worried about the problem of synthetic preservatives in your homemade preparations, but fear that if you leave them out of the refrigerator they will spoil in a short time?

Believe it or not, we have a natural solution for this that won’t leave your complexion looking stiff and won’t cause irritation or dermatitis.

And it’s super cheap too. Forget about buying preservatives other than simple Leucidal, which is the only commercial preservative that is natural enough not to cause any problems, and which you will need to add to this moisturizing colour cream. Otherwise, all you need is mineral water, optionally dried herbs, and a small packet of calcium hydroxide.

https://www.healthline.com/health/calcium-hydroxide

If you read the linked article, you will see that calcium hydroxide is so safe that it has been widely used in the food industry and traditionally in food preparation since time immemorial, for example in Central America, where calcium hydroxide has been used for thousands of years to process maize.

AROMATIC LAVENDER WATER WITH PRESERVATIVE PROPERTIES

We had set out to make a tinted moisturiser with a sun protection factor for daily use and we needed a preservative that wouldn’t give us any problems.

And as we had already seen that creams with lime water in the aqueous phase are like good wine, which over time ferments and improves instead of spoiling, we decided to prepare an herbal infusion to which we would later add the lime. It is possible to do this with just mineral water, as you know, but with herbs it has a better aroma.

So we start by making an infusion of dried lavender to which, after cooling, we add a teaspoon of food-grade calcium hydroxide.

The ratio is about 5 grams of calcium hydroxide per half litre of demineralised water, or in this case cold herbal tea.

After filtering the lavender water, we add a few drops of lavender essential oil to enhance its aroma.

After an hour’s rest, during which the lime remained at the bottom of the container, we used a coffee filter to filter the lime from our infusion and thus obtain our lavender water with the properties of the dead lime.

TINTED MOISTURISING FPS CREAM

As we said, the recipe below is, as we like in this blog, a minimalist and simple recipe to make a colour cream with sun protection factor.

INGREDIENTS to make about 100 ml of cream:

About 20 grams of quality cold pressed oil, such as sesame oil, grape seed oil, etc …

About 5 grams of oat powder, which, in addition to providing properties, will fluff up the final result, as creams with zinc oxide tend to become caked.

About 70 grams of our aromatic lavender water

8 grams of emulsan, a new ecological emulsifier that is very natural.

8 g zinc oxide

For pigment, we used 5 DASH teaspoons of light brown oxide and one DASH teaspoon of pink oxide, the DASH measure is also known as PINCH.

And finally, 15 to 20 drops of plain Leucidal*.

*This is a precaution because when the lime water, in a recipe like this one, is completely absorbed and fully integrated into the emulsion, it can happen that our cream, with use, when we run our fingers over it, becomes contaminated. It is also possible to use a small plastic spatula to avoid this problem.

In any case, if our cream is emulsified with beeswax, as is the case with the calcareous bio-liniment, and the water is out of phase, this problem does not occur. We have more than proved this.

This is a picture of our BIO-LINIMENT, after months of frequent use, as it is a product that we highly recommend, especially for the most sensitive and dry skins.

We remind you of the recipe of the BIO-LINIMENT calcareous

To prepare about 200 ml of this liniment, we will need:

100 ml of lime water

100 ml olive oil

And about 4 grams of beeswax

And you don’t need to add anything else at all to get a very moisturising and natural face and body balm that will never give you any problems.

*Just remember not to leave the calcium hydroxide in the distilled water for more than an hour so that the water does not take on too much aroma and your liniment smells good.

THE STEP-BY-STEP PREPARATION OF THE COLOUR CREAM RECIPE:

Weigh the ingredients.

In a heat-resistant container, such as a pyrex, etc., place the emulsifying wax (Emulsan), the 20 grams of grape seed oil, the 8 grams of zinc oxide and the 5 grams of oat powder in a bain-marie, in that order, adding each component once the previous one is dissolved and integrated into the mixture.

In another container, we will warm our aromatic lavender water.

When both phases are hot, add the aqueous phase, i.e. the lavender water, to the oily phase, whisking vigorously so that everything is integrated. It is advisable to use a small cosmetic mixer, such as a coffee skimmer, etc…

Finally, add the pigments, stirring well and checking each time on the back of your hand to see if the colour you obtain matches your skin tone.

And, if we have so decided, 15-20 drops of simple Leucidal, which is the INCI: Leuconostoc/Radish Root Ferment. It is the most skin-friendly, effective and ecological preservative that we know of.

And this was the result.

A tinted cream with a sun protection factor adapted for daily use to prevent facial skin blemishes.

We have prepared our moisturising colour cream without adding essential oils, just a few drops of lavender water, before preparing our cream, to give it a little more aroma and properties.

But if you want to add essential oils, it is advisable to take into account the advice of the experts:

According to the blog of the French Institution Robert Tisserand:

“But if you are going to use essential oils orally following the recommendations you saw on social networks, with a 99% probability I assure you that those recommendations will not be correct. If you don’t believe me, let’s take a look at a few:

  • Add one or two drops of essential oil in a glass of water and then drink it: essential oils do not mix with water! This is the same as ingesting them undiluted, with a high risk of irritation or burning of your digestive mucosa, gastric ulcers, etc.
  • Take essential oils every morning as a self-care routine: Essential oils taken orally have the highest bioavailability and should only be used for a short time to reduce the risk of internal toxicity and liver overload.
  • Adding essential oils to a shotglass because you think it’s cool: you will only be giving your liver even more work!”

 What Robert Tisserand is saying is that essential oils, like any other chemical substance, whether of natural origin or not, whether intended for medicinal use or not, produce their effects when administered.

Tisserand, in his blog, would ratify the maxim of Paracelsus, the great physician of antiquity: “Everything is poison and nothing is without poison; only the dose makes a thing not poison”.

Paracelsus (1493-1541) was one of the many physicians who used distillation to separate essential oils from plants. It was he who coined the famous phrase “Everything is poison and nothing is without poison; only the dose makes a thing not poison”, meaning that a substance containing toxic properties can only cause harm if it is present in a sufficiently high concentration. In other words, any chemical – even water – can be toxic if the body ingests or absorbs too much of it.

And we could continue with the same recommendations taken from the blogs of some influencers who offer recipes for natural cosmetics in which large doses of essential oils abound in products designed to be absorbed by our skin and which, if we follow them to the letter, are potentially very irritating. Such as, for example, those recipes with doses of essential oils and synthetic preservatives of one gram, etc. …

Antonia Jover, who also quotes Tisserand in her blog on scientific aromatherapy, discusses the proper use of essential oils which, as we have commented on other occasions, are a medicine and not a cosmetic product, and should therefore be used as such.

https://aromaterapiafamiliar.wordpress.com/category/aromaterapia-cientifica/

In this blog you can find extensive information of great value on essential oils and their uses in the field of health, which is not the same field as that of natural cosmetics, which is why the doses must be different. Cosmetics, as we always say, are not a medicine, unless we design them for that purpose, for example, balms, treatment shampoos, etc…

NEW GENERATION COMMERCIAL CREAMS

On the other hand, if you look at the composition of new-generation commercial natural creams, when essential oils are used, they appear at the end of the INCI because they are used in very small doses and with the precaution of not overloading the recipe with other potentially irritating elements, such as synthetic preservatives. In addition, in this recipe, lactobacillus ferments have been added to improve the overall tolerance of the product.

All these improvements make today’s synthetic creams much more tolerable than the old recipes were. For example, WELLEDA is also making use of such recipes with very low doses of essential oils and without the addition of extra synthetic preservatives to improve tolerability.

The INCI listed below is for a new serum from the Purèz brand, which is advertised, however, from 40 euros: Phytotherapy Revitalizing Face & Eye Serum/Cream BIO € 41,28 – € 82,60 Excl. BTW

Ingrediënten

Algae extract*, Dicaprylyl Carbonate, Aqua (Water), Ricinus communis* (Castor oil), Hyaluronic acid, Hydrolyzed Oat Protein, Glyceryl oleate, Cetearyl alcohol, Glyceryl stearate (Olive Oil*), Silica, CI77019 , Lactobacillus Ferment, Tocopherol (Natural Vitamin E*). Contains the essential oils of Citrus sinensis* (Sweet Orange), Pelargonium graveolens* (Rose Geranium), Rosa damascena* (Rose) Immortelle* (Helichrysum italicum).

*** In certified natural cosmetics – such as Purèz – the term perfume means ‘mixture of various natural essential oils’. In conventional cosmetics, the same term means “any possible mixture of fragrances, including chemicals and/or synthetic and even toxic fragrances”.

Such a composition would be comparable to the composition of Dr. Hauschka’s ROSE CREAM, which is included below:

Rose Cream, INCI: Aqua, Arachis Hypogaea Oil, Cera Alba, Althaea Officinalis Root Extract, Rosa Damascena Flower Water, Hypericum Perforatum Flower/Leaf/Stem Extract, Butyrospermum Parkii Butter, Sorbitan Olivate, Persea Gratissima Oil, Polyglyceryl-3 Polyricinoleate, Parfum*, Citronellol*, Geraniol*, Linalool*, Limonene*, Citral*, Farnesol*, Benzyl Alcohol*, Eugenol*, Rosa Damascena Flower Extract, Rosa Canina Fruit Extract, Copernicia Cerifera Cera, Zinc Sulfate, Lecithin, Rosa Damascena Flower Wax

In this image it is clear that the ingredients are natural, only a couple of strange names are emulsifiers, such as Sorbitol Olivate, which is also usually part of OLIVEM 1000, or Polyglyceryl-3 Polyricinoleate.

The following composition of the otherwise very popular OLAY REGENERIST cream shows a considerable difference in its composition:

INGREDIENTS: Water, Glycerin, Isohexadecane, Niacinamide*, Distarch Phosphate, Isopropyl Isostearate, Dimethicone, Panthenol**, Palmitoyl Pentapeptide-4***, Sodium Hyaluronate, Caprylic/Capric Triglyceride, Ethylhexylglycerin, Hydroxyacetophenone, Dimethiconol, Cetearyl Glucoside, Cetearyl Alcohol, Stearic Acid, Palmitic Acid, Stearyl Alcohol, Cetyl Alcohol, Behenyl Alcohol, Disodium EDTA, Sodium Acrylates Copolymer, PEG-100 Stearate, Titanium Dioxide, Mica, Phenoxyethanol, Fragrance, *Vitamin B3, **Pro-Vitamin B5, ***Peptide

Because, what is the point of making homemade natural cosmetics if not to create our own products for everyday use, adapted to our skin type, ecological, cheap, and that do not give us problems in frequent use because they only contain ingredients of vegetable origin and natural emulsifiers?

SOLID NATURAL MAKE-UP

We also wanted to contribute a recipe for solid make-up, which we think is a great idea because, as it is solid, it does not require packaging or a water phase, which is the one that always causes conservation problems, given that water is the one that corrupts in the composition of any product that we are going to make by hand.

We have solved this, to a large extent, with our idea of using lime water in our compositions with aqueous phase, as it prevents the recipes from becoming corrupted. However, whenever we can prepare a recipe without using an aqueous phase, all the better, because we avoid the problem from the start.

In this case, we only need to add a little vitamin E, which will act as an antioxidant to extend the durability of the fats we use in our composition and prevent them from going rancid.

As we said, as it is a solid make-up base, it does not require preservatives😊.

And its second great advantage is that it already contains mineral sunscreen filters (zinc oxide), which means that it is no longer necessary to use other day creams with protection factors.

INGREDIENTS:

Beeswax, 10 g

Shea butter, 20 grs.

Zinc oxide, 15 g

Cosmetic grade iron oxide pigment, usually a ratio of 4 teaspoons Pinch brown oxide to 1 teaspoon pink oxide, and always testing and adapting to your natural skin tone.

And a few drops of vitamin E

PROCEDURE:

First, put the beeswax, shea butter and zinc oxide in a heat-resistant container, in this order. Place this container in a bain-marie until everything is melted and liquid.

When the base ingredients are melted, turn down the heat and it is time to add the pigments while whisking with a mini electric mixer so that the pigments are well integrated.

Now that we have our pigment well integrated, you will see that the mixture has risen in colour, remove from the heat and add the vitamin E (not before because the vitamin is thermosensitive).

Now we can pour our mixture into a silicone mould, and wait until it cools and solidifies before unmoulding.

It’s that simple and, with this mixture, you get a spectacular foundation that covers all the imperfections of the face, even dark circles under the eyes. As it is super-covering, we advise you to use it sparingly.

We like to use it on holidays, and the previous, gentler one, can be used every day as it is also photoprotective!