
In this blog on natural cosmetics, we aim to provide our readers with enjoyable and informal recipes for natural cosmetics for face and body skin care that are as simple and free of synthetic preservatives… More

A blog about natural cosmetics
In this blog on natural cosmetics, we aim to provide our readers with enjoyable and informal recipes for natural cosmetics for face and body skin care that are as simple and free of synthetic preservatives… More

Simple DIY recipes for healthy natural hair

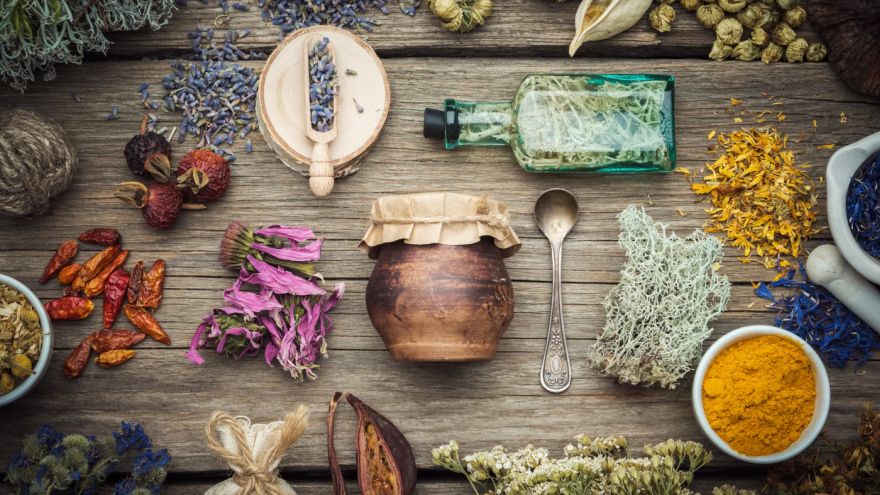
The article emphasizes the benefits of homemade biocompatible cosmetics, advocating for natural ingredients over synthetic ones. It discusses avoiding harsh preservatives and promoting skin health using oils, butters, and natural extracts like propolis and bakuchiol. By respecting skin microbiota and minimizing additives, users can achieve healthier, fresher skin without aggressive treatments.
Our skin is the ultimate barrier between our body and the environment. It is an intelligent, protective shield with billions of microorganisms. Despite the stress it is subjected to and its surface resistance, the microbiome is extremely delicate. Moreover, we are only now realizing how important it is.
The public has heard about the importance of the gut microbiome for years. However, research on the skin microbiome pales in comparison. But like the gut, the skin flora is like a rainforest. Its diversity is the key to healthy skin and overall good health.
The type and number of pathogens vary greatly. Variations depend on location, environment, and hormones. They also depend on the amount of light, whether the environment is moist or dry, age, and gender. Although the skin acts as a barrier, we are now discovering that flora penetrates deeper. These micro-animals exist in the deepest layers of the skin, down to the subcutaneous fat layer. More research is needed. Our basic understanding is that communication between the microbiome and our immune system takes place at this level.
This can manifest itself as acne, eczema, rosacea, or psoriasis. It can also be seen as premature aging, uneven skin tone, and loss of elasticity. Unfortunately, our modern lifestyle does not help.
Highly processed and preservative-laden foods, indiscriminate use of antibiotics, invasive medications, overly strict hygiene standards, products with aggressive active ingredients… In general, the higher stress levels of today’s population increase the skin’s susceptibility to imbalances in the microbiome. Their lower exposure to the outdoors also contributes to this sensitivity.
Ayurvedic medicine has known for millennia the importance of preserving the skin microbiome in optimal conditions. Although it was probably not called that, this preservation is essential to take better care of our skin. It helps prevent problems like dryness, erythema, flaking, dermatitis, atopy, and premature wrinkles. Therefore it was always said: “Do not put anything on your skin that you can not eat”.
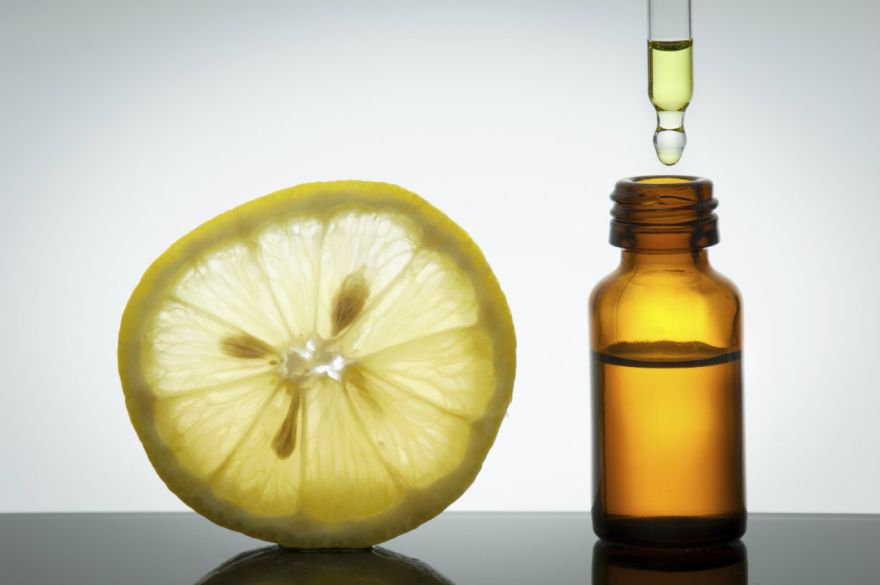
We need to avoid chemical preservatives for a healthy intestinal flora. This will also ensure we have a healthy skin flora. Nourish our skin with organic fats and pure vegetable oils. This is the same reason why, in this blog, we only use essential oils in our natural cosmetics with many precautions. We apply them in very low doses to benefit from their properties. This prevents their intrinsic biocidal capacity from altering the flora of our skin and causing problems.
For this very reason, new-generation commercial soaps and shower gels are much less aggressive to the skin. They are gentler than those used a few decades ago. The idea is to better preserve the skin microbiome so as to dry out the skin less.

When we formulate in this more natural and skin-friendly way, we gain a secondary benefit. We also take care of the environment because these new formulations of surfactants and detergents are more biodegradable.
Undoubtedly, making homemade natural cosmetics is a luxury. It allows us to take care of our skin without the need to use preservatives. This is unlike commercial cosmetics, whether they are from the perfumery or herbalist. The repertoire of creams, balms, and ointments we can make is quite extensive. We achieve this without adding a drop of water to our product. You will have seen it in the different articles of our blog.
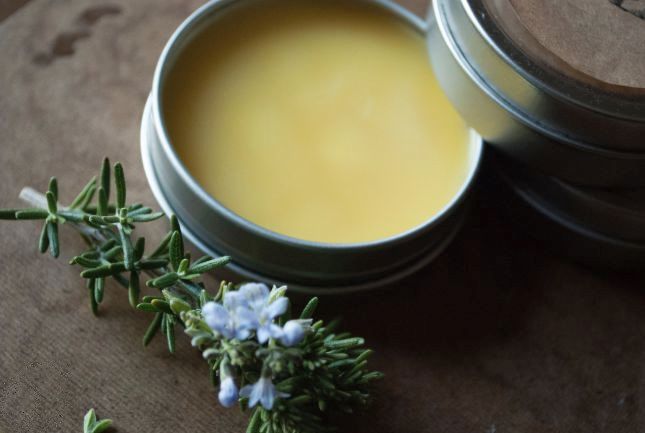
Cosmetics that do not contain water in their composition, such as balms, ointments, salves, lipsticks, body oils, dehydrated powders… and in general all fatty cosmetics that do not contain water, do not require the use of antimicrobial preservatives. Only antioxidants are recommended. These include vitamin E or rosemary extract CO2. They prevent the rancidity of fats and extend the shelf life of this type of cosmetic products.
In the end, after all, what we want is that our skin looks good and is nourished and in good condition to avoid problems of dryness, irritation, etc … Let alone if our skin is atopic, finally, what we are looking for is a product that nourishes and maintains its elasticity without altering it more. In short, what we are really looking for are natural fats and vitamins that keep our skin elastic and healthy in order to prevent skin problems and premature aging.
And for that, really, isn’t it better to try to understand how we can bring good fats and vitamins to our skin at the level of home cosmetics? Isn’t it a bit pretentious to try to understand how the whole process of making commercial cosmetics works, to understand what preservatives to use, what pH level to implement with each preservative in each formulation and in what ratio/percentage?
There are traditional natural brands of great renown. Certainly, some brands have made a more recent appearance, such as Welleda and Dra Hauschka, etc … that produce commercial creams that people with dermatitis and sensitive skin can also use without causing us problems. Apparently, the trick is to use several preservatives synergistically but in tiny doses. This is entirely different from the recipes of home cosmetics blogs. These blogs propose broad-spectrum preservatives in percentages between 1 and 2% of the formulation.
Welleda is said to use only essential oils in their formulations to preserve their products. I am not familiar with the subject. In any case, I think you need to be at least a chemist specialized in cosmetics. This is necessary to be able to design such a product.
Isn’t it too adventurous, at the amateur level of homemade cosmetics, to try to understand how the whole process of making commercial cosmetics works? Because in the end, all this stuff about the different types of synthetic preservatives and in what percentage we have to add them to our product, pH controls, etc. is only necessary if we are going to commercialize our product.

All ingredients: Aqua, Anthyllis Vulneraria Extract, Prunus Armeniaca Kernel Oil, Alcohol, Hamamelis Virginiana Bark/Leaf Extract, Prunus Amygdalus Dulcis Oil, Olea Europaea Fruit Oil, Arachis Hypogaea Oil, Helianthus Annuus Seed Oil, Hypericum Perforatum Flower/Leaf/Stem Extract, Glycerin, Calendula Officinalis Flower Extract, Lecithin, Daucus Carota Sativa Root Extract, Triticum Vulgare Bran Extract, Simmondsia Chinensis Seed Oil, Parfum*, Linalool*, Citral*, Farnesol*, Limonene*, Citronellol*, Geraniol*, Benzyl Benzoate*, Eugenol*, Benzyl Salicylate*, Algin, Xanthan Gum.*from natural essential oils
Let’s not kid ourselves. Homemade cosmetic recipes that appear on blogs and on the net in general do not work well. This is especially true for sensitive and problematic skin.
Most of these recipes use synthetic waxes and compounds. They avoid natural emulsifiers. These include beeswax, candelilla wax or carnauba wax. They also avoid soy lecithin. Even lanolin, which comes from sheep, is avoided. In the words of Google’s AI: “Among the most common cosmetic emulsifiers are polysorbate 20, 60 or 80. Other common ones include ceteareth-20, hydrogenated castor oil PEG-40, steareth-2 and steareth-21. You can also find cetearyl alcohol and ceteareth-33, and PEG-100 stearate.” Other popular emulsifiers include sucrose stearate, xylityl glucoside, polyglyceryl-3 polyricinoleate, cetearyl olivate and sorbitan olivate” Do any of these names sound like a natural compound in any way?
To emulsify oils with water, synthetic emulsifiers are necessary. These emulsifiers are needed for O/W emulsions, as they are known worldwide. However, did you know that they do not always fulfill the intended function?
A synthetic emulsifier can accumulate when it is used in a skin care product. It gathers in the upper layers of the skin. Washing and cleansing the skin carries a risk. The accumulated emulsifiers may dissolve the skin’s own oils. They can also remove these oils. This is known as the “washing effect“, which can cause the skin to become very dry and flaky. If you use one of these synthetically emulsified creams daily, your skin may look more “stiff” after a while. Don’t be surprised by this change.
And, after all, those of us who make homemade cosmetics, and those of us who like creativity above all else, don’t care about all that because we know we don’t design products that we have to market.
We design/formulate products to share them with our blog followers and those who like the idea of natural in their homemade products. And for this we do not need to use preservatives, even when we elaborate creams with aqueous phase, because there are plenty of ways to do it without using synthetic preservatives.
The idea that preserving the skin microbiome is important is becoming more or less clear to everyone. However, few natural cosmetics blogs consider the fact that using natural and biodegradable self-emulsifying waxes is equally important. In the previous section, we saw how waxes create a “washing effect” on our skin. Synthetic products also contribute to this effect.
That’s right. The key is the bioavailability of the ingredients used. Ayurvedic cosmetics says: “Do not put anything on your skin that cannot be ingested“. Components and ingredients that are not of organic origin are usually not biodegradable. And what is not biodegradable is not bioavailable either, that’s for sure. Taking care of the environment is also taking care of our skin and our organism.
Therefore, when it comes to emulsifying our homemade cosmetic products, natural cosmetic waxes can be a more sustainable option. These waxes come from natural sources and can break down in nature, unlike synthetic waxes. The most common biodegradable cosmetic waxes are carnauba wax, jojoba wax, candelilla wax and beeswax. These waxes can decompose in nature without leaving residues.
Another common misconception is that skin care ingredients have to penetrate the skin to be effective. However, this is not always the case. Even ingredients that “just sit” on the outer layer can make a big difference in the appearance of the skin. For example, emollient and occlusive ingredients hydrate the skin. They can improve its appearance and soften it even if they do not penetrate. In any case, ingredients with higher bioavailability have also been found to offer a higher degree of penetration.
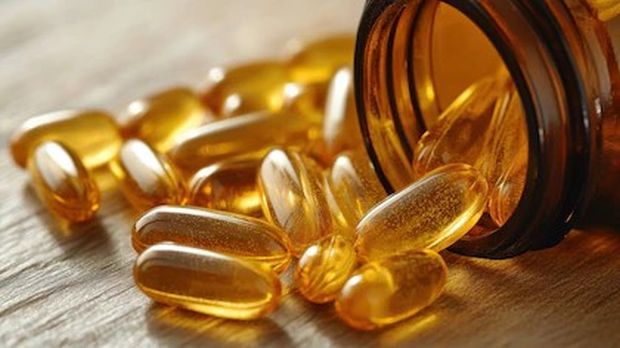
Going back to penetration, the skin is made up of three layers: epidermis, dermis and subcutaneous tissue. And it is really complicated to access the deeper layers of the skin topically. So why worry about penetrating cosmetics with complicated formulations? These formulations have active ingredients that require an aqueous phase. They also need synthetic preservatives. Isn’t it more appropriate in that case to take supplements? Because, in the end, what you want is for your skin to look healthy. We need something that works for us. We don’t need to formulate the perfect natural cosmetic which we don’t even intend to market it.
Vitamin supplements for the skin have been found lately to work even better than topically administered products. However, supplements should never replace a healthy diet. This diet should include pure, unadulterated fruits, vegetables, nuts, seeds, legumes, herbs, and spices. All of these foods have medicinal properties for the skin. For example, turmeric helps slow or reverse the aging process. Diet has a direct impact on the quality of our skin and that, too, in the long term.
Let’s also remember to take supplements with our overall health in mind, not just our beauty goals. Not that there is anything wrong with vanity, but we should consider our body as a whole instead of focusing only on our skin, hair and nails.
Yet, we are not saying that it is not necessary to use water and hydrolats in our beauty routines. On the contrary.
To have soft and smooth skin, the first and most important thing is to protect the skin barrier. The skin barrier is responsible for ensuring that our skin can retain water. It also acts as a protective shield against harmful microorganisms by producing antimicrobial peptides and proteins. In addition, it regulates inflammation. When the skin barrier is healthy, the complexion appears smooth, clear and even-toned.
Skin care products containing ceramides and cholesterol help repair the skin barrier. Ceramides are basic components of the skin barrier. Cholesterol and other lipids and fatty acids are also crucial components of a healthy barrier. Cholesterol is often found in moisturizers rich in organic fats and fatty acids in vegetable oils. Niacinamide is also a skin care ingredient that strengthens the skin barrier by promoting ceramide synthesis. Although this is only one of the many skin benefits of niacinamide or vitaminB3. In addition, vitamin B3:
1. Evens out skin tone by improving the appearance of dark spots and other sun-damaged areas.
2. Reduces the size of enlarged pores and improves skin texture.
3. Reinforces the cutaneous barrier by promoting ceramide synthesis.
4. Improves redness and skin blemishes.
5. Protects against UV damage (ideal if combined with vitamin C).
HOW TO IMPLEMENT VITAMINS IN OUR HOMEMADE FORMULATIONS TO BRIGHTEN THE SKIN
First, we have to take into account that there are fat-soluble vitamins. These include vitamins A and E, which we can easily add to the oily phase of our preparations. There are water-soluble vitamins. Vitamins like B (niacinamide) or C require water-containing formulations to be dissolved. The best formulations will use synergistic ingredients.
Serums are, in principle, formulated with water. However, it is possible to replace water with more interesting alternatives. These alternatives include hydrosols, aloe vera liquid (gel or juice), and even purified seawater.
1. The easiest way to do it from natural home cosmetics is to use distilled water. You can also use facial tonics such as hydrolats, rose water, aloe vera juice, etc … and then one of your fatty creams without aqueous phase.
For example, from a base of purified seawater* and vegetable glycerin to which we can easily add water-soluble active ingredients. *Purified seawater bases sold for cosmetic use, for example as facial toners, usually have very mild preservatives incorporated, which saves us from having to add more invasive broad-spectrum preservatives such as those used in cosmetic blogging.
NIACINAMIDE-BASED FACIAL SERUM
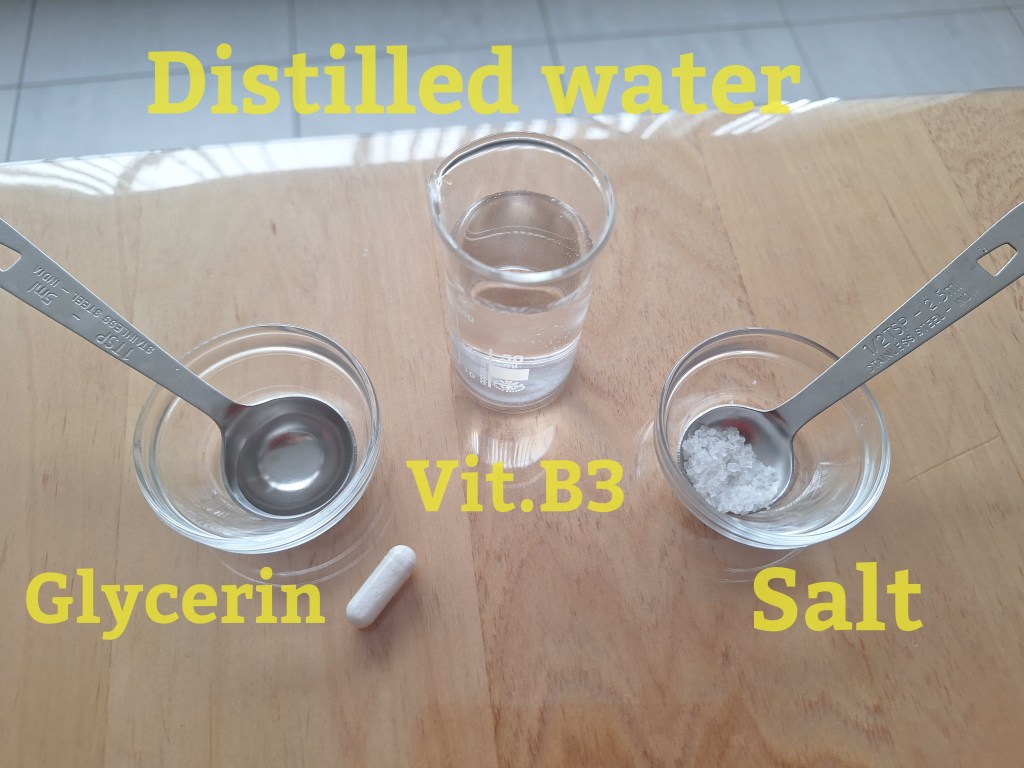
Did you know that you can easily prepare a serum base with distilled water, a teaspoon of Celtic or nigari salt, rich in magnesium, and a teaspoon of glycerin?
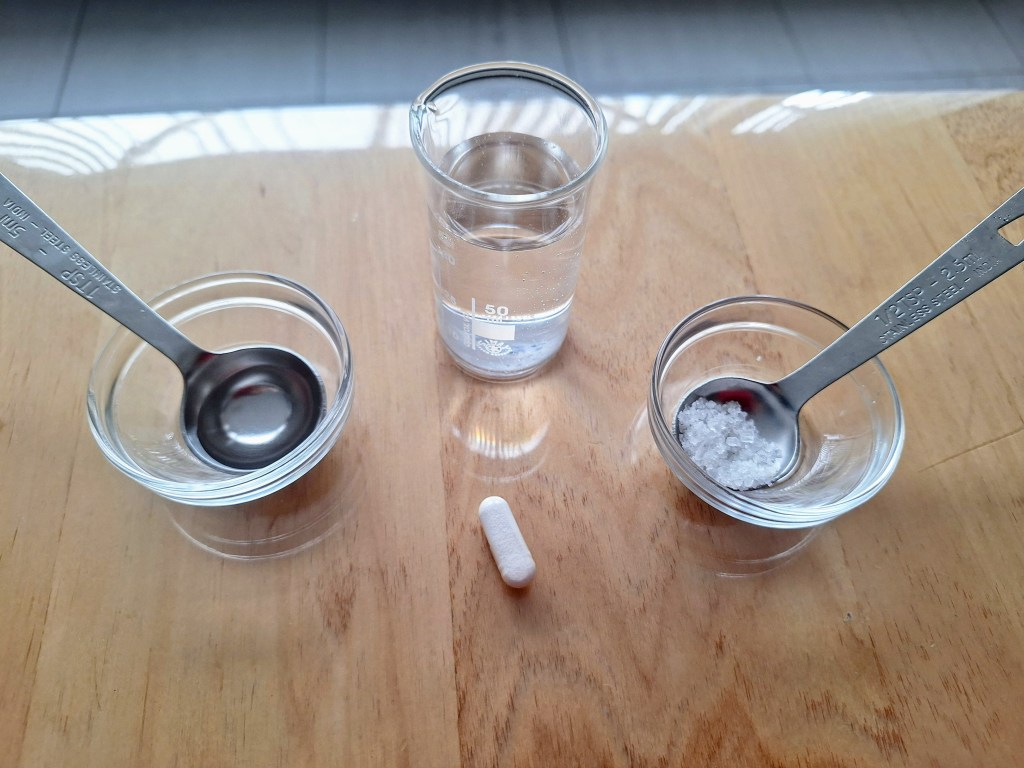
Salt and glycerin are natural preservatives. Your facial serum will remain in good condition without synthetic preservatives. You can add vitamins or water-soluble active ingredients to this serum base. In this case, we have added a capsule of vitamin B3 (niacinamide) for internal use. The results are noticeable.
In this simple way, we’ve given our skin a drink without using a single preservative. It’s all about implementing a smart beauty routine. Likewise, we apply a natural vegetable oil all over our bodies when we get out of the shower. We do this even without drying off. It’s a smart way to nourish and moisturize at the same time.
2. It is also possible to create our own facial serums and toners without the need for synthetic preservatives using some smart cosmetics tricks such as:
–Use a hydrolate that you like as a facial tonic in which you can easily pour 1/2 teaspoon of ascorbic acid (i.e. vitamin C that they also sell for internal use) and thus take advantage of all its properties without adding preservatives to your tonic. In addition, formulating products with vitamin C is very complicated because vitamin C is very unstable. However, this method allows you to easily take advantage of its properties. It directly helps to illuminate the skin of your face.
–Use commercial aloe vera gel. It already contains its own preservatives. These are much gentler on the skin than those we can buy in cosmetic stores. It is very easy to add active ingredients to it such as vegetable oils, vitamins and glycerin.
Like in this recipe:
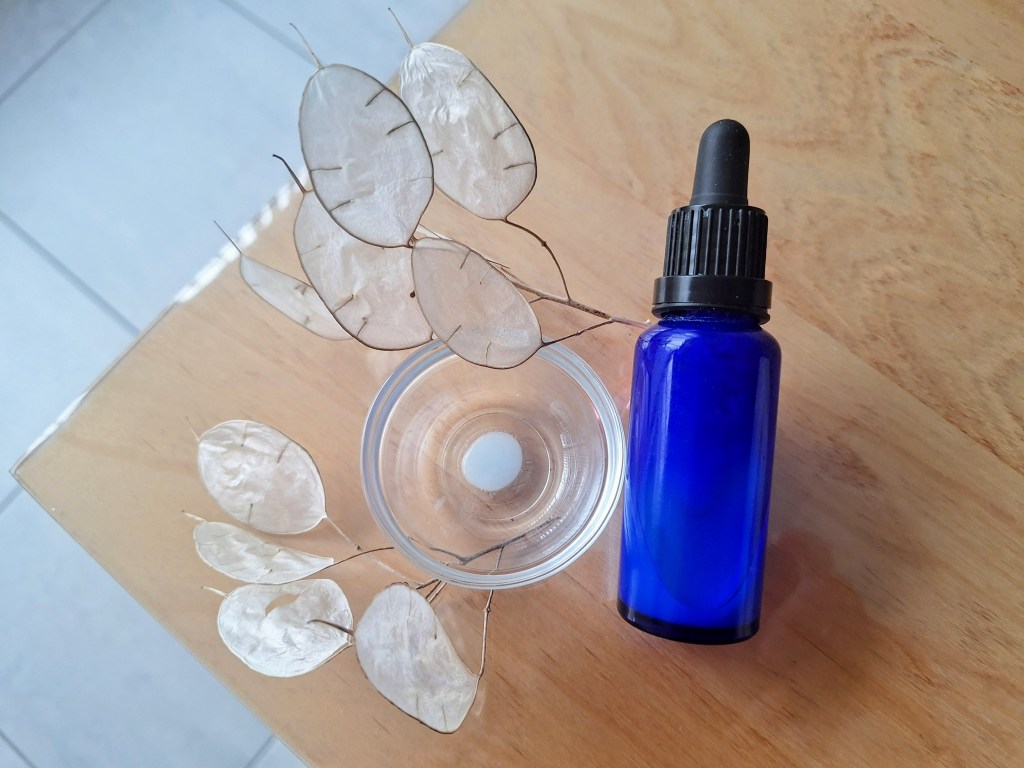
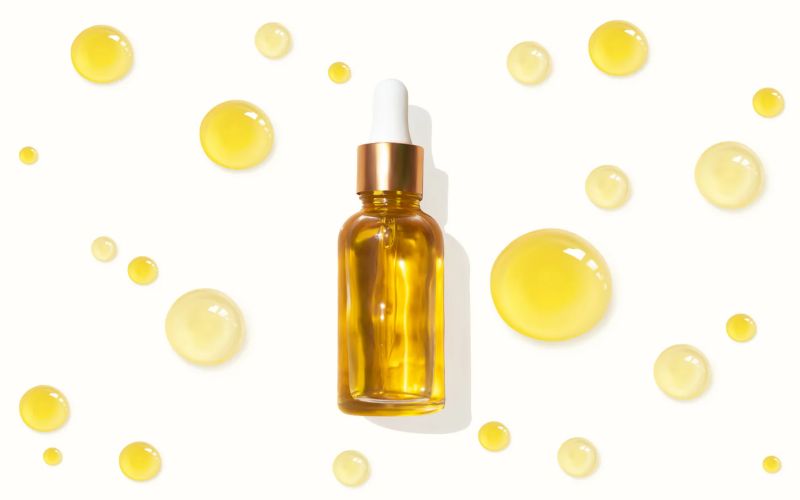
–Use a vegetable oil, such as aloe vera oil, or almond’s oil. You can add a capsule of vitamin A for internal use to it. This is possible because vitamine A is fat-soluble. It will be enough to introduce our vitaminized oil in a dropper bottle. Then we already have a natural facial serum without the need to complicate with retinol *, etc… We can also use our capsule of vitamin A for internal intake. It will be very good for our skin.
*According to the IA: “Vitamin A and retinol are different names for the same compound, or rather, for a family of related compounds. Vitamin A is the generic name, while retinol is a specific form of this vitamin. In other words, retinol is an active form of vitamin A.”
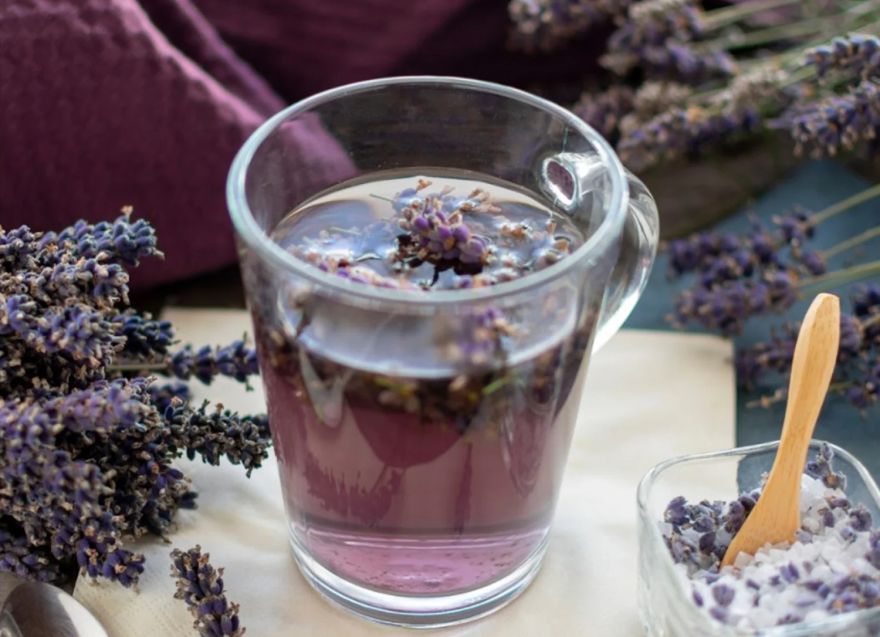
–Prepare an infusion, with lavender flowers, for example, and then filter it and add 25% vodka. The ethanol added in this percentage will act as a preservative of our infusion. This allows us to extend the shelf life of our natural lavender facial tonic for several days. After the application of our facial tonic, we spread one of our non-aqueous phase creams. It is emulsified with natural emulsifiers, such as beeswax. Our skin will be glowing.
3.- It is also very easy to prepare vitaminized exfoliants and masks for immediate use. Without the need to complicate, we will be adding water and fresh vitamins to our skin. Some examples:
ILLUMINATING EXFOLIANT of RICE FLOUR
Rice flour with a teaspoon of milk and a few drops (half a teaspoon) of lemon juice. Mix and then exfoliate your face.

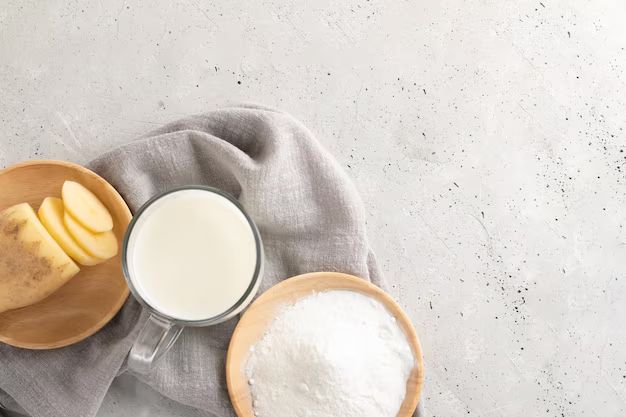
DEPIGMENTING TREATMENT MASK with fresh potato.
Grate half a peeled potato into a puree.
Add a spoonful of rice flour that will provide exfoliating capacity.
Stir, add a spoonful of milk and form a paste that can be applied to the face.
We will try to prepare a minimum amount to use it at once. If it’s not possible, we can always refrigerate it. This all-natural product loses its properties after a few hours. Its texture also changes, that’s why we do not intend to keep it, but to use it immediately.
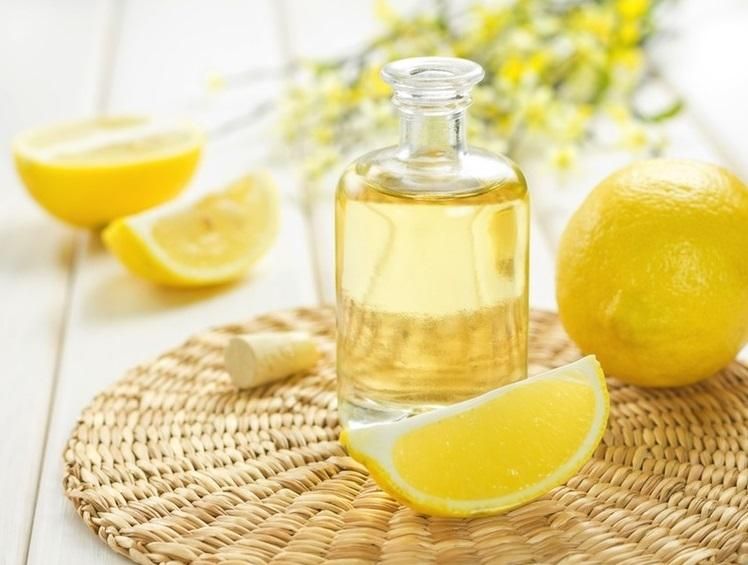
RICE AND LEMON DEPIGMENTING TONER
A rice and lemon toner is a natural skin solution that can help clarify, soothe and tone. The combination of rice and lemon can help reduce the appearance of blemishes and improve hydration. As you know, rice water has a natural depigmenting effect due to the kojic acid that rice contains. This combines with the ascorbic acid from the vitamin C in the lemon. Together, they create a synergistic effect that enhances the depigmenting character of this facial toner.
You will need: a cup of rice, 1 cup of water and the juice of half a lemon.
As easy as: Add the cup of rice to the water and the lemon juice. Let the mixture stand for 24 hours in a glass container. After 24 hours, remove the mixture and bring it to a low heat to boil for about 5 minutes. Let the mixture cool and strain it.
There are people who add the lemon juice to the rice water after a few hours, and after filtering the rice, and then they apply it directly without boiling it to better take advantage of the vitamin C in the lemon. It is also possible, although in this case it is necessary to be even more careful not to apply the tonic during the day so that the lemon does not come into contact with sunlight.
Use: Dip a cotton pad in the rice water and apply it on a clean face. Let it dry on the face and do not rinse.
TIPS: It is best to use the rice and lemon tonic at night because lemon is photo-sensitizing. It is possible to use this solution as a daily toner or several times a week.
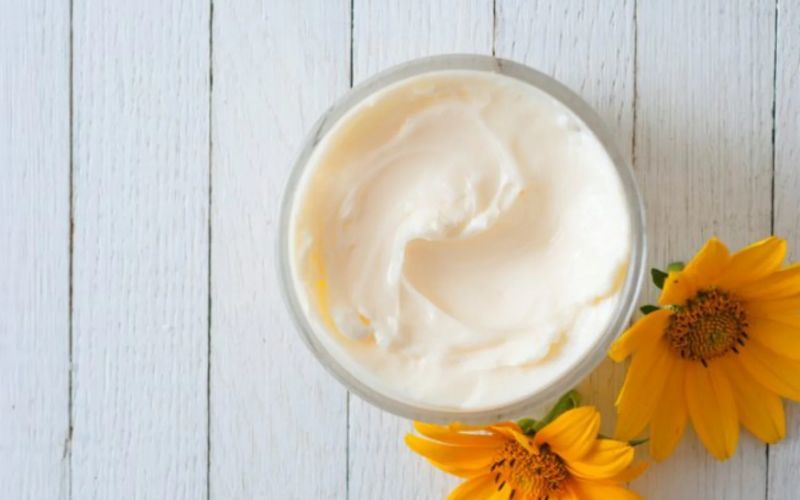
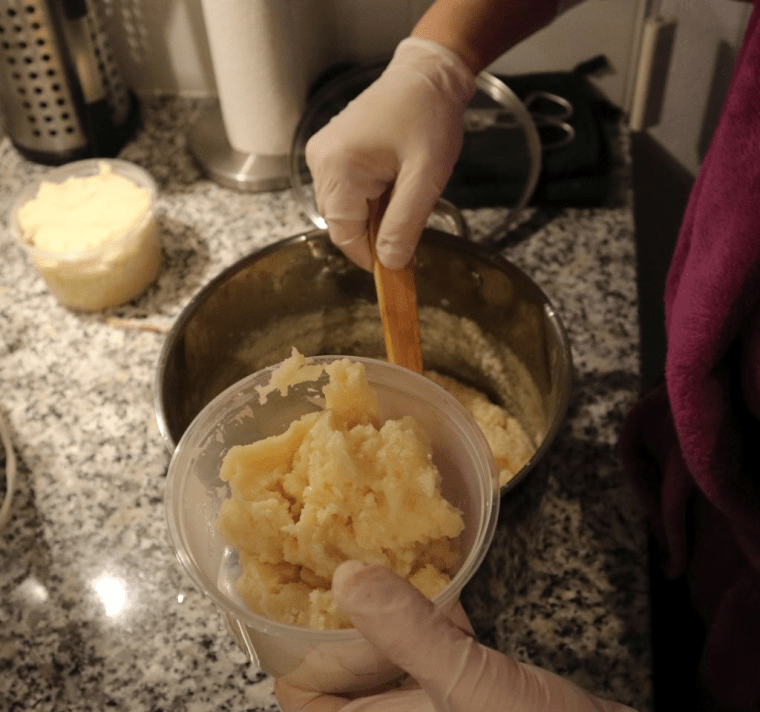
4. It is possible to obtain a “creamy texture” to moisturize our skin without using emulsifying waxes of any kind. This happens when we use a natural vegetable butter. For example, shea butter. We then add a couple of teaspoons of one or two vitamin-rich vegetable oils. All we have to do is stir and beat the mixture well for a few minutes. This helps us obtain a fantastic creamy consistency without the use of preservatives or synthetic self-emulsifying waxes.
5. Finally, creams with an aqueous phase emulsified with beeswax and borax can be created. These do not require synthetic preservatives. They can keep for up to 3 months without refrigeration. This is more than enough time to finish the product without having to complicate ourselves.
To design this type of creams, it is necessary to consider the proportions of borax. We need to implement these proportions according to the amount of beeswax. Beeswax will be used as an emulsifier.
PROPORTIONS WITH BORAX
If we know that for every 15 grams of beeswax we will need approximately one gram of borax to produce the chemical emulsion between beeswax, oil and water; then it is easy to deduce by a simple rule of three. For example, for 3 grams of beeswax we will need about 0.2 grams of borax.
15 g wax ——– 0.9 g borax
3 g wax ———– X
PROPORTIONS WITH THE BEESWAX AND THE OIL
90% of macerated-oil (oleado)
10% beeswax
PROPORTIONS WITH BEESWAX AND BORAX
In a cream recipe using beeswax and borax as co-emulsifier, a common ratio is 60% oils or fats such as shea butter, 10% beeswax and 30% water. To prepare a richer cream, a maximum of 80% oils/fats, 5% beeswax and the rest water can be used. In the water we will include the borax in a percentage of 1% of the total product. In other words, for 100 grams of cream, we will use approximately one gram of borax, depending also on the ratio of beeswax, as mentioned above.
For example: An ointment recipe might include 80% oil, 5% beeswax, 1% borax and 15% water. The exact proportions can be adjusted to achieve the desired consistency and texture. For a creamier texture, increase the oil phase. Decrease the water phase correspondingly.
Ingredients to prepare about 100 grams of product:
OIL PHASE
40 grams of oat oleate
12 grams of shea butter
8 g vegetable glycerin
8 grams of beeswax
AQUEOUS PHASE
30 grams of distilled water to which, previously, we will add 0.75 grams of borax (which acts as emulsifier and preservative).
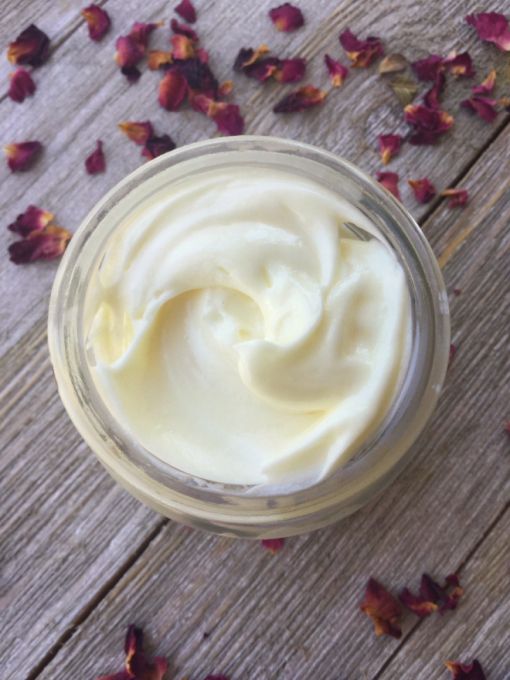
Melt the beeswax and the oil/fat in a bain-marie. At the same time, we heat the distilled water, to which we have previously added the borax. Both phases should be at a maximum temperature of 70 degrees.
When the mixture of wax and oil (oily phase) is completely melted, we will gradually add the mixture of water and borax (aqueous phase). We should continue beating vigorously. Now, we will pour the mixture into a bowl with cold water. We’ll continue whisking until our cream is fully condensed.
Finally, we will introduce the cream in a glass container, if possible. The only preservative, as well as co-emulsifier of this preparation with aqueous phase, is borax. Therefore, the use of a glass container will prolong its preservation and keep our cream in the best conditions. Also, for this reason, we should prepare small quantities of product. This way, we can consume them in just a few months.
This type of cream has been known since the time of the physician Galen (galenic creams). Even then they were made with beeswax and borax. Galenic creams proved to be a good treatment for skin problems such as irritation, inflammation and itching.
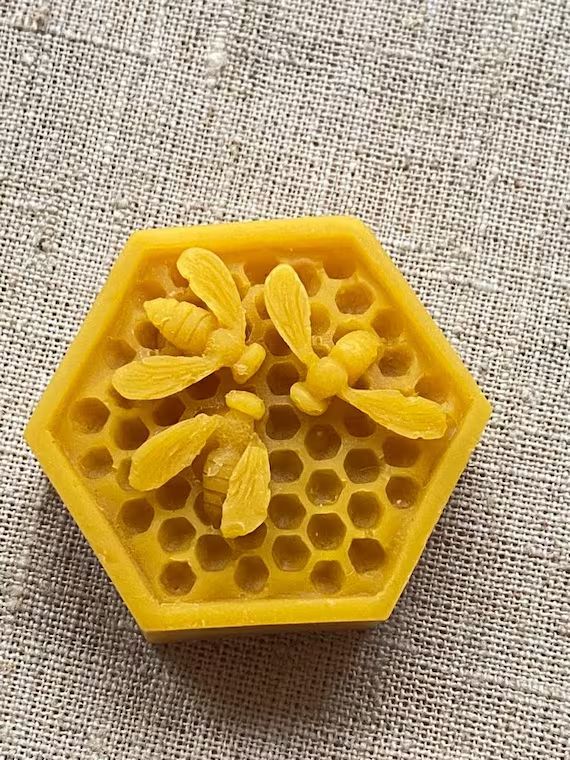
BEESWAX: Beeswax is a natural wax that provides a solid, waxy texture to the cream. It acts as a humectant, helping to retain moisture and soften the skin. And it has antioxidant properties helping to protect the skin from free radical damage.
OATMEAL OLEADO: We have used an oat oleate* (oil macerated in oats’ meal). It is prepared in a homemade way with oatmeal as we introduced in our post on “How to make herbal creams at home”. Oatmeal is rich in beta-glucans. Its cosmetic use has been found to have a much more moisturizing effect than hyaluronic acid. This is because it is much better absorbed. In addition, oatmeal soothes sensitive skin and moisturizes it naturally, preventing redness and irritation.
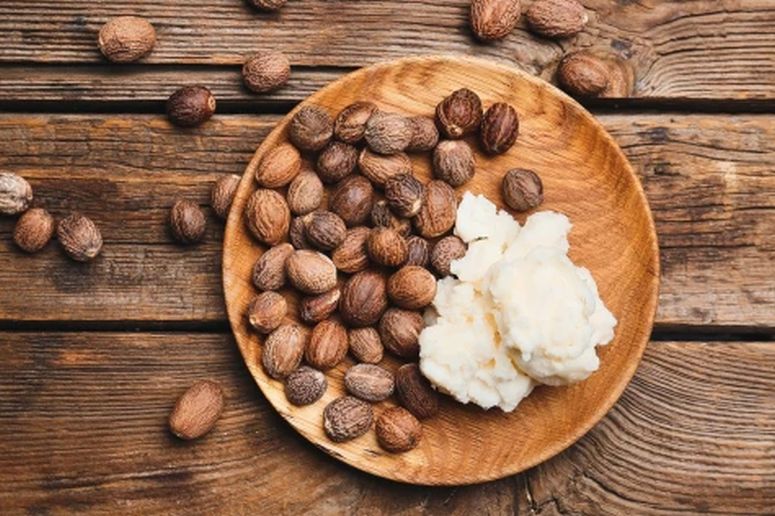
SHEA BUTTER: It is rich in fatty acids. This richness makes it ideal to moisturize and nourish the skin in depth. It improves the skin’s elasticity and softness. It is especially recommended to treat dry and mature skin and even to prevent itching and irritation of sensitive skin. Especially if you get it without deodorizing or processing, it is in itself a natural balm for the skin.
VEGETAL GLYCERIN: Glycerin is a humectant that attracts and retains moisture, making it very beneficial to the skin. Its main properties include moisturizing, protecting, softening and improving the skin barrier, making the skin feel smooth and healthy. When applied, glycerin does not simply stay on the skin. It penetrates and allows the skin to breathe while retaining moisture. Glycerin is really a safe and natural skin care product that works very simply to keep skin soft, beautiful and moisturized.
Food-grade vegetable glycerin is used to prepare “glycerites“, also known as glycerol extracts. Glycerin, or glycerol, is a sweet alcohol and is used as an extraction medium to obtain extracts from plants or other substances. Vegetable glycerin is produced from vegetable oils by processes such as hydrolysis, which separates the fatty acids from the glycerin.
In natural cosmetics, vegetable glycerin can be used to create and preserve various vegetable extracts. These extracts can be used in cosmetic preparations without the need for added preservatives. For example: Use aloe vera powder by placing it in a glass container. Cover it with glycerin for a few weeks. Once ready, filter it, and it’s prepared for use in our cosmetic preparations. The same with dried turmeric, with geranium petals powder, with dried chamomile flowers, etc … the creativity is endless.
BORAX: Borax is an alkaline mineral salt. It is a natural mineral element that helps beeswax to emulsify with water and oil. Borax, on the other hand, has disinfectant and anti-inflammatory properties, which can help soothe irritation and inflammation in case of eczema, psoriasis or dermatitis.
OIL PHASE: The oil phase provides the moisturizing and emollient properties of the cream. The most common oils are sweet almond oil or shea butter. In this case, we have used chamomile oil for its properties to soothe irritated skin. We also included shea butter and glycerin. Glycerin is an all-natural moisturizer and moisturizer.
AQUEOUS PHASE: The aqueous phase provides the hydration and helps to create the emulsion. It is also possible to use hydrolates. These can be combined with borax and beeswax. However, we have preferred to keep it simple by using only distilled water.
NATURAL EMULSIFIER: The ratio of oil, beeswax and water is crucial to create a stable emulsion. Beeswax and borax, when combined, act as emulsifiers. They allow the oil and water to mix without mismatching. A chemical bond is produced between them. The ceronic acid in the beeswax reacts chemically with the sodium hydroxide. This sodium hydroxide is produced by the hydrolysis of the borax. Together, they produce the emulsion of the water with the oil.

First of all, it is very important that we use a shampoo that promotes hair volume without greasing our hair. And if our hair also tends to be straight and dull, it is best to use a shampoo based on caffeine and salt to provide shine, volume and prevent hair loss.
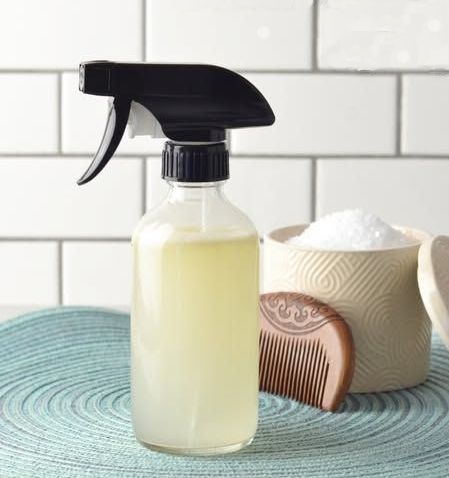
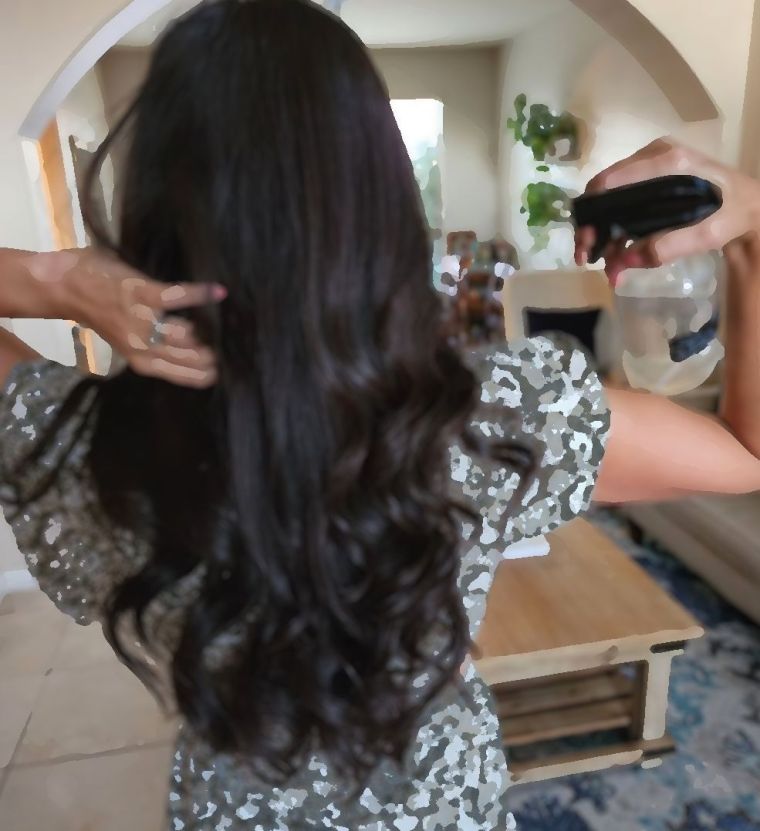
And secondly, it is important not to use post-wash treatments and conditioners with silicones and substances volumizing that give an impression of volume at first but in the long run weigh down the hair and create the need to wash it more frequently to make it look loose and voluminous again. In this case, it is best to use a homemade sea salt spray.
Greasy hair is the result of overactive sebaceous glands in the scalp that produce too much oil. The more frequently we wash our hair, the more we increase the problem. And of course, how do we stop this cycle if our hair quickly regains an oily appearance?
Dry shampoo sprays, which are so fashionable nowadays, produce the sensation of degreasing our hair and, although they can be useful as an emergency solution, their frequent use is not recommended because they end up worsening our problem of sebaceous gland hyperactivity.
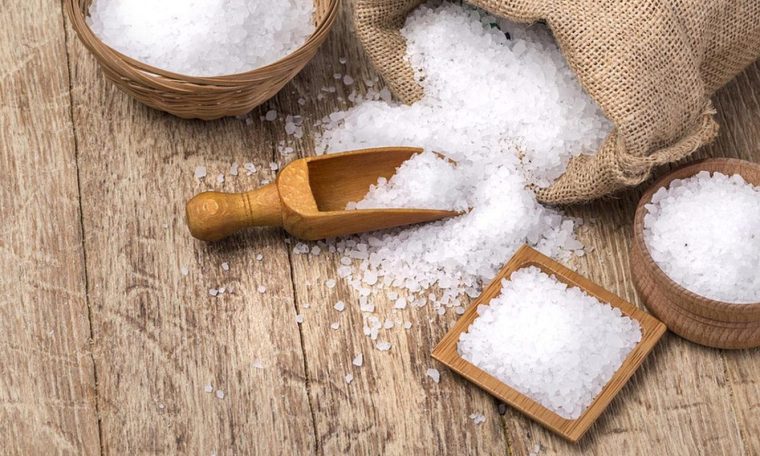
However, this problem can be solved with salt. A salt shampoo produces the opposite effect, i.e. its frequent use ends up regulating the excess production of hair sebum.
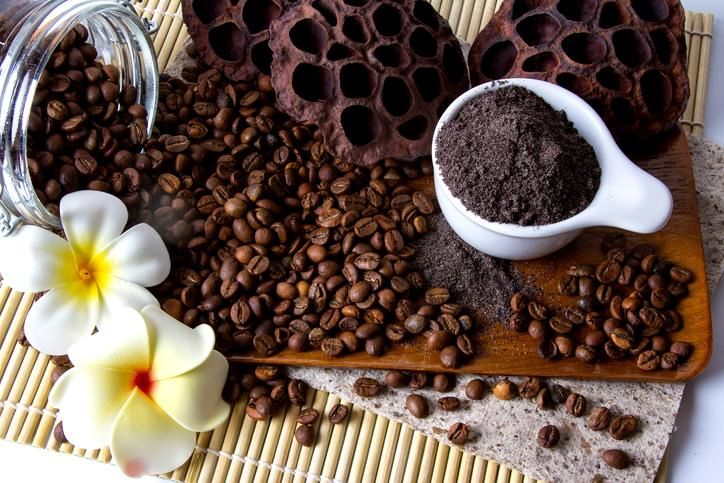
We had discussed in a previous post the benefits of adding a tablespoon of coffee to a mild neutral shampoo.
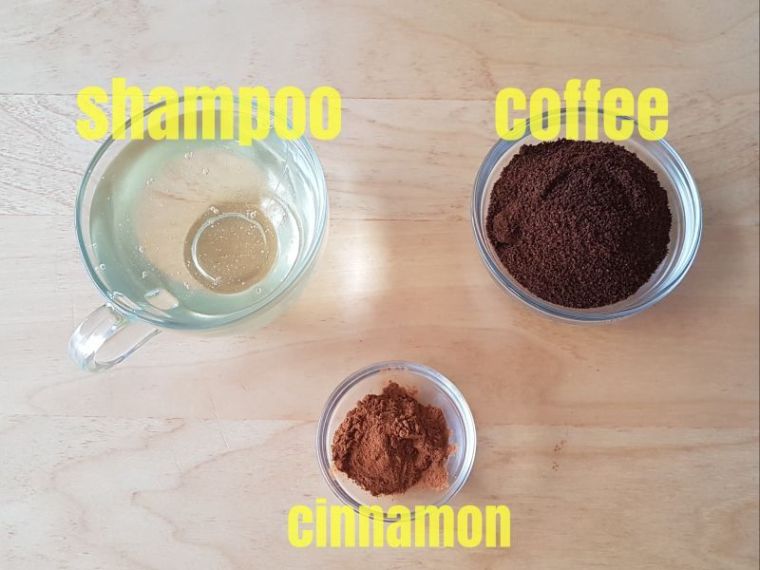
The idea of adding natural coffee to our shampoo was to prevent hair loss with frequent washing. The addition of coffee, in addition to preventing hair loss, revitalizes and adds shine.
The addition of salt is especially suitable for treating straight hair that lacks volume and tends to become greasy, which undoubtedly worsens with frequent washing.
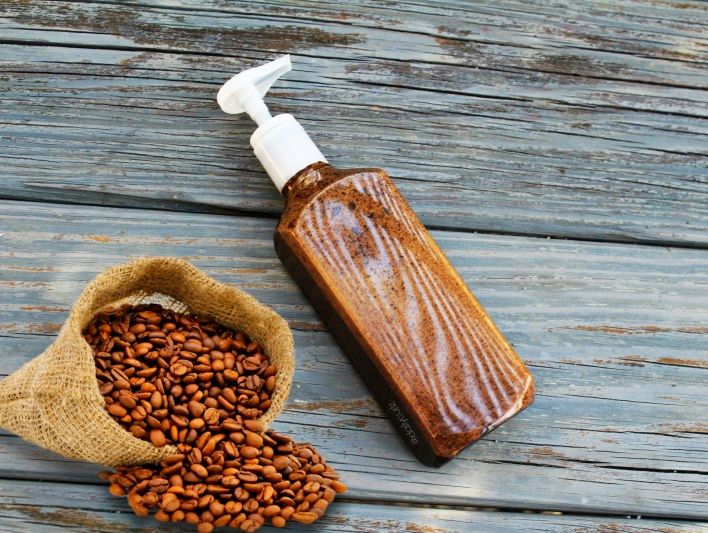
So, to slow down the WASHING-GREASE cycles and keep our hair voluminous and healthy looking, it is best to use a homemade salt and coffee shampoo like this one we bring you in this article.
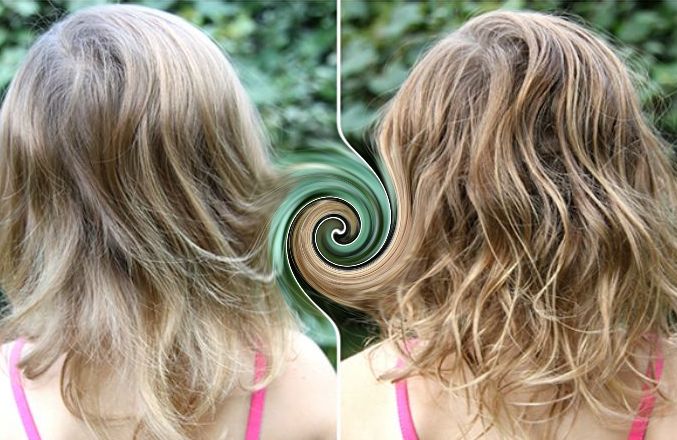
As we mentioned earlier, the problem with straight hair that lacks volume and tends to get greasy is that it is actually dehydrated*, which why issalt, which retains moisture and water in the environment, gives it volume without leaving it greasy like shampoos volumizing with added silicones.
*Try spreading a tablespoon of castor oil on your hair before washing it and you will see how moisturized it stays for days. This is proof that synthetic silicones, foams and conditioners give a sensation, at first, that they moisturize and condition our hair, but it is a sensation not that is long lasting and ends up making them greasy and aggravating further our problem of re-washing and themre-conditioning .
This simple trick turns any shampoo neutral you have at home into a hair treatment shampoo, a shampoo that will be an ally for the beauty of your hair.
This recipe will give you volume (thanks to the addition of salt) and softness and shine (thanks to the caffeine), which will also prevent hair loss.
Just add 2-3 tablespoons to your shampoo and wash your hair normally. After the first treatment, you will notice the positive results. First of all, our hair will have more volume, and as the days go by we will see that it will take longer to get greasy, so you will avoid frequent washing and break the wash-oil cycle.
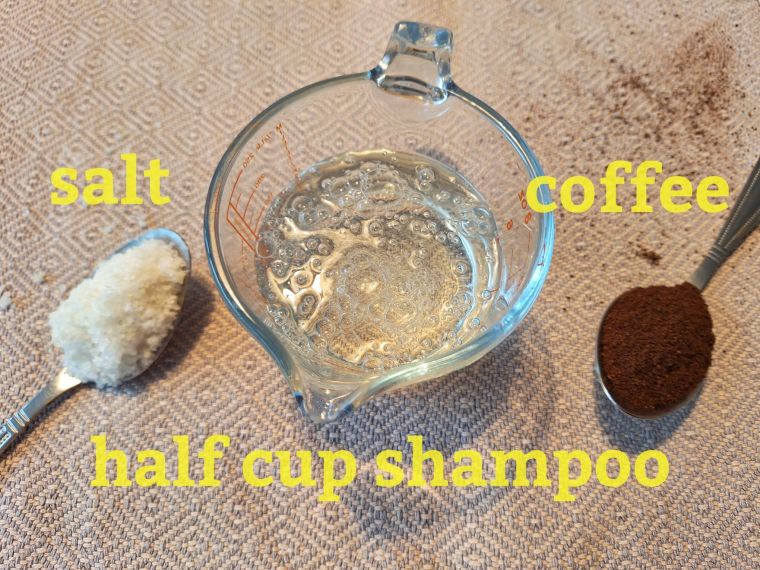
We will need a cup of neutral shampoo, the most ecological and softest you can find, a tablespoon of sea salt, and a tablespoon of pure coffee.
Ingredients:
Half a cup of neutral shampoo
One tablespoon of sea salt
One tablespoon of coffee
It is convenient to take a small part of your neutral shampoo (about half a cup or less) to mix the tablespoons of coffee and salt in a bain-marie.
This is a tip we share based on our experience, since using all the shampoo to put it in a bain-marie tends to thicken the shampoo and make it liquid due to the effect the heat has on the shampoo.

In this way, by using only a sample of the shampoo to integrate the salt and the coffee, we get the same result without the total of our shampoo remaining liquid. And if you find a commercial salt shampoo, like for example this one we have found, then even better because you can heat only the tablespoon of coffee, in half a cup of this salt shampoo, and when you take it off the heat add the rest of the shampoo and you will see that it becomes thick again as before the procedure.

INCI: purified sea salt water, cocamidopropyl betaine, decyl glucoside and lauryl glucoside (glucose based surfactant), cetearyl alcohol, castor oil, stearalkonium chloride, caprylic/capric triglyceride, glyceryl stearate, xanthan gum, tetrasodium glutamate diacetate (made from plat material), bare skin fragrance (phthalate free).
First, we will put our sample (half a cup or less) of neutral shampoo in a water bath and add, as a first step, the salt that tends to thicken the shampoo. And finally, the tablespoon of coffee.
We will mix the coffee and salt well in our shampoo sample, until they are perfectly diluted and integrated, then we will turn off the heat and wait for the mixture to cool before adding it to the total content of our neutral shampoo.
Another way of doing it that can be even better is to simply add a tablespoon of salt and a teaspoon of coffee to our bottle of neutral shampoo and stir well.
After about 12 hours, the salt and coffee will have integrated into the shampoo and we can use it with a total guarantee of effectiveness. In this case, the shampoo maintains its thickness, which is a very good quality for better hair washing.
Optionally, if our hair is dyed or particularly damaged, we can also add a tablespoon of castor oil for extra hydration. No other oil moisturizes the hair as much as this one.
*With these two tablespoons (one of salt and one of coffee) we can perfectly fill 250 ml of neutral shampoo that, from now on, we will have available and that we can put in a bottle of recycled commercial shampoo, for example.
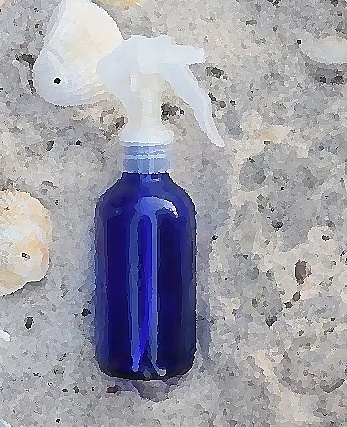
As we mentioned before, the best way to slow down the WASH-GREASE cycles is to use a homemade salt and coffee shampoo like the one we have seen in the previous recipe and, after washing, it is also highly recommended to use a DIY salt spray sea for which we also provide a recipe below.
You’ve probably noticed that the summer, and the beach, left your hair with more volume and more wave. If you want to keep the beach effect in your hair, you can easily prepare a sea salt spray to spray on your hair after washing.
The most basic spray only needs water and salt in a proportion that allows all the salt to dissolve completely in the water. That’s enough to spray the mixture on wet hair and create beautiful, voluminous waves.
But, if you are looking for sophistication, the following recipe is easy and simple:
Approximately 120 ml of purified wateror distilled
3 teaspoons sea salt
1 teaspoon of coconut oil caprylic (the kind that does not solidify)
*Optionally: 4 drops of essential oil, lavender, lemon, peppermint, ylang- ylang, etc…
INSTRUCTIONS:
Mix all of the above ingredients in a jar and .pour into a spray bottle of your choice
It is advisable to shake it every time you are going to spray it so that the coconut oil mixes well with the contents.
USE: Spray all over damp or dry hair and distribute evenly, scrunching to form beach waves. Let it dry.
This second recipe is made with aloe vera gel and coconut oil for extra conditioning
Ingredients:
200 ml of warm water
2 tablespoons saltEpson
1 tablespoon fine sea salt
1 teaspoon of coconut oilcaprylic , argan oil, etc…
1 teaspoon of aloe vera gel
*Optional: A few drops of essential oil to give your spray a pleasant scent. Ylang-ylang essential oil, for example, is an EO with very good hair care properties and, mixed with coconut oil, gives a pleasant summer scent.
If you have a 250 ml glass spray bottle, all the better, because your spray lotion glass will keep better for a longer period of time without the addition of .synthetic preservatives
Take your spray bottle and pour the hot water into it, then add the coconut oil, aloe vera gel, salt Epson and sea salt. Then cap the bottle and shake it for 1-2 minutes until all the salt is dissolved.
Spray the hairspray on damp hair and style it with your fingers to get loose beach waves. Don’t blow dry, just scrunch and .let it air dry
On dry hair it is also possible to spray it to get more volume. And if your hair is fine and straight, we suggest you wash it at night and it spray with the salt spray and let it dry in a braid or bun. The next morning, you can spray it again while removing the braid and you will see that it will stay wavy all day.

Sprays containing salt can dry out a bitthe hair , so it is best to use them a maximum of 2 to 3 times a week.
Although if you make this formulation, because it contains coconut oil and aloe gel, it tends to be better conditioned. And of course, it is also very important to avoid the use of synthetic foams and silicone caking agents in order to lengthen the washing-oiling cycles.
Cosmetic solutions may be fine when they really work, but if they don’t, perhaps considering the deficits in our diet may be a solution.
Sometimes excessively greasy and dull hair can be greatly improved if we find out which mineral or group of minerals it is deficient in.
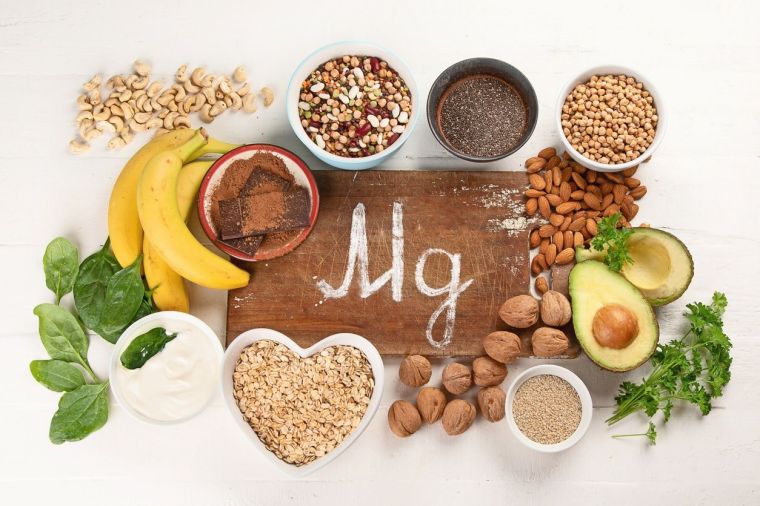
For example, have you ever thought that you may be deficient in magnesium, which is a mineral needed in more than 600 enzymatic reactions, biological processes and cellular functions in our body.
In addition, it is an essential mineral for life that our body cannot produce by itself. This means that we must ingest it through food. According to studies, our body functions much worse without this mineral. Its functions are diverse and extend to all levels: physical, mental and emotional. From increased sensitivity to stress, moodiness, headaches and migraines to sleep disorders with restlessness and nervousness, difficulty concentrating and physical disorders such as hypertension, osteoporosis, brittle nails, etc ….

The easiest way to prepare creams with an herbal base is to make an herbal oil and then incorporate this oil into our formulation.
Here is a link to a previous blog post that explains how to make an “oleado” from wild rose hips.
Also this other link:
https://naturamatters.blog/2021/03/05/how-to-make-infused-oil-2/
However, you can also visualise the procedure in this video of the Gingko Education school: https://www.youtube.com/watch?v=BINGTb3ouqo

Once we know the method (either hot or cold) to macerate our herbs and prepare an oleado, we have two options:
1.- Use our oleado to prepare the balm or ointment, in this case we only need to add a certain amount of beeswax to thicken our ointment and it will be ready.
2.- We can choose to prepare our cream or ointment in situ by macerating our oil with an herbal extract of our choice. In this case, the process of preparing the oil occurs at the same time as we prepare our balm or ointment.
This video shows this second way of making our cream based on herbal extracts, in this case, calendula.
Balms or ointments require, as a general rule, an oil (or ointment if infused with herbal extracts) and a certain amount of beeswax to emulsify it.
General rule: The amount of beeswax used is always about a quarter of the oil or oil used. This is also known as the 10% rule, in which we would use 90% oil and 10% beeswax to emulsify the oil.
So, for example, to fill a container of about 100 grams, we would use about 90 grams of oil and about 10 grams of wax. This consistency is ideal for use on the face, hands, etc.
If we are looking to make an ointment that spreads almost like wax, then we can increase the amount of wax up to 15 grams. It depends on the consistency we are looking for.
In our opinion, 10 grams (1/4 wax) is an excellent consistency, but, for example, if we are looking to create an ointment with a high concentration of active ingredients, in order to spread it on small areas (for example, an ointment to treat haemorrhoids), it may be more interesting to use a higher proportion of wax so that the active ingredients are better concentrated.
Very simple. These creams do not require preservatives.
Only antioxidants such as vitamin E or rosemary extract CO2 are usually added to extend the life of the product, as these antioxidants prevent the rancidity of fats and oils.
By avoiding the use of preservatives and added synthetic actives, we obtain a product that is much gentler and more tolerable for all skin types.
This is especially important if our homemade DIY product is to be used by people with sensitive or atopic skin. In these cases, such products can be used on a daily basis to safely moisturise and nourish our skin.
The balms whose recipes are detailed below are totally suitable for treating sensitive or atopic skin and skin affected by dermatitis.
Of course, each has its own specific characteristics. For example, the oatmeal balm whose recipe is described below is particularly suitable for daily use on skin affected by itchy dermatitis, as oatmeal has an anti-inflammatory, itch-soothing effect on irritation.
It would be very interesting to use a calendula oil as a base oil for this balm, for example. By adding the ground oatmeal to it, we would enrich our balm even more, giving it very good properties for treating this type of sensitive skin.
In any case, with this type of skin, we must above avoid creams loaded with preservatives and synthetic active ingredients, even if they are homemade, as they have an irritating effect on this type of skin.
As well as minimising the use of essential oils (just a couple of drops, or none at all) and avoiding chemical fragrances as much as possible.
Very simple, grinding the dried herbs with a coffee grinder.
This is how we have made our oatmeal powder, from grinding the oat flakes from breakfast. Or aloe vera, from grinding the dried aloe bark left over from emptying the aloe stalks.
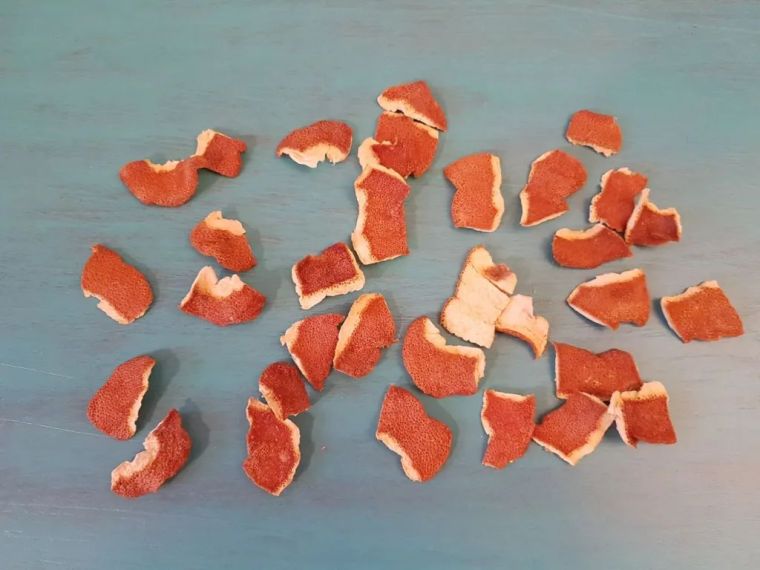
You can also use other powdered extracts such as orange, which also smells very good.
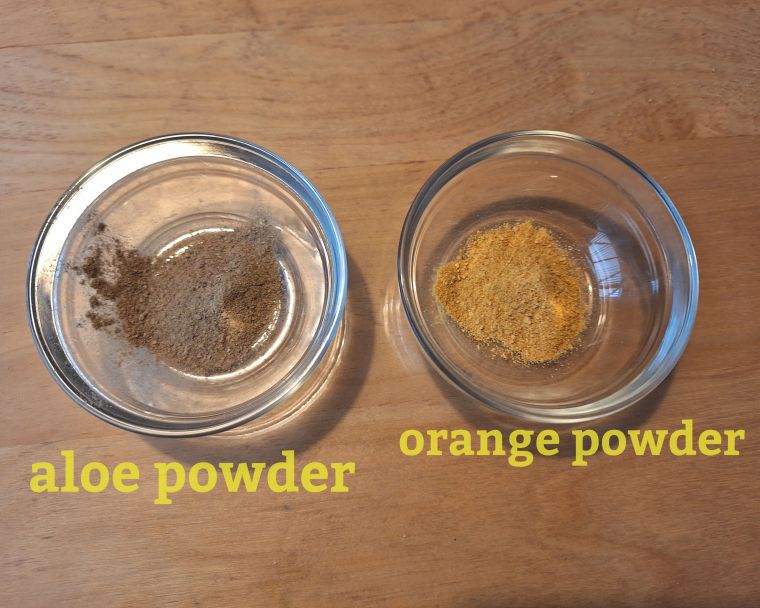
To obtain the orange extract powder, follow the same procedure as above. Dry the orange peels, and when they are very dry, grind them in a coffee grinder.
This powder will be placed in a recycled glass jar, so that it will last much longer and can be used in future cosmetic preparations.
Herbal extracts to enrich our cream or balm with their therapeutic properties can be of many different types:
These can be flours such as oat or baobab flour, yeast such as brewer’s yeast, powdered vitamin extracts such as Niacinamide or astaxanthin, ground herbs such as bearberry, or even ground rinds of different fruits such as oranges, tangerines or lemons.
ORANGE PEEL POWDER
INCI: Citrus aurantium powder
Orange extract powder can be macerated in oil, glycerine and also water. It is a plant-based ingredient used in cosmetics to formulate a wide range of products, such as creams, gels, soaps, shampoos, conditioners, hair fixatives…
Orange extract has anti-wrinkle, circulation-activating, anti-inflammatory, exfoliating, depigmenting, antiseptic, moisturising properties… The recommended dosage of orange extract in cosmetics ranges from 0.5 to 5%.
The cosmetic powder of orange peel, contains among other nutrients vitamin C that helps us to fight acne and has antioxidant properties, calcium that renews dead skin, potassium that moisturizes and regenerates the skin, magnesium that helps to give shine and youth to your skin. It is toning and astringent and it leaves hair soft, supple and shiny, improving also circulation in the scalp.
With dehydrated orange peel powder, you can make a facial mask to cleanse the skin or revitalizing baths, for oily skin and pimples, tired and dull skin, for all hair types.
Applications: masks, soaps, exfoliating creams, solid shampoo, etc…
Dosage: 0 to 5%. In conjunction with other powders up to 15%.
GROUND OATMEAL
INCI: Avena Sativa
Oats contain manganese, selenium, phosphorus, magnesium and zinc. It has moisturising and nourishing elements and hypoallergenic, emollient, and protective properties.
Oatmeal soothes skin irritations, both allergic and non-allergic, as well as itching. It improves itching caused by psoriasis, scabies, or itching caused by other types of dermatitis.
Because it moisturises and softens the skin, it is recommended for all skin types, extremely dry or flaky skin, also for sensitive skin and children.
It is also widely used in facial masks, as it is an excellent skin cleanser. Its particles absorb dirt and cellular residues while respecting and caring for the skin structure.
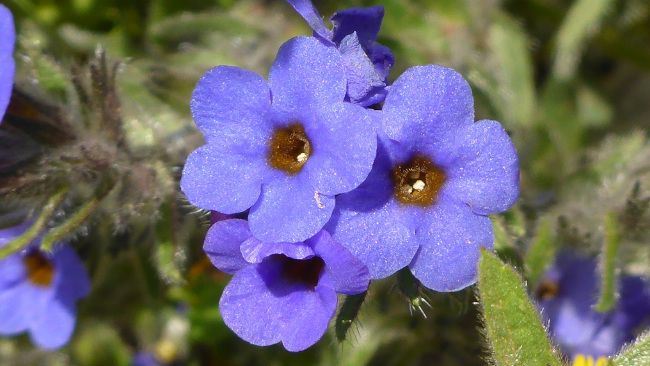
ALKANET ROOT POWDER
INCI: Alkanna Tinctoria
Alkanna tinctoria is a plant native to the Mediterranean part of the Boraginaceae family. Its roots contain a red dye that has been used as a dye since ancient times. It also has great medicinal properties.
The Greek physician, Hippocrates, recorded the use of this root for the treatment of skin ulcers. Because the plant contains pyrrolizidine alkaloids (which can cause liver toxicity), it is now almost exclusively used as a cosmetic dye and as a medicinal plant for topical use.
In addition to being antibacterial, it is very effective in improving inflammation, is suitable for sunburn and is able to act as a natural sunscreen. In fact, it is combined with ghee to treat burns and infected wounds.
Cosmetics: It has been used as a colouring agent for lipstick and in powder blusher.
HIBISCUS FLOWER
INCI: Hibiscus Sabdariffa Flower Powder
Hibiscus flower stimulates cell renewal, helps eliminate blemishes and reduces wrinkles caused by the signs of ageing as well as providing other skin benefits.
Its richness in vitamin E, essential fatty acids and natural antioxidants helps to fight against skin ageing and the harmful effects of UV rays. This is why it is added to a wide range of cosmetics such as: facial masks, creams and lotions, serums and soothing after-sun treatments.

BAOBAB FLOUR
INCI: Adansonia Digitata
Contains: triterpenoids, flavonoids and phenolic compounds, sterols and saponins. Vitamins A, B, C and E so that it nourishes the epidermis, hair and nails. It is ideal for the treatment of dry skin, predisposed to the formation of wrinkles.
Thanks to its polyunsaturated fatty acids, it ensures optimal hydration and tissue protection. Its vitamin components and organic acids slow down skin ageing, keeping the skin elastic and glowing.
Its properties allow the skin to regenerate quickly; it also acts as a natural antibacterial, cleanses deeply and leaves a feeling of freshness, delaying skin ageing.

BREWER’S YEAST EXTRACT POWDER
INCI: Yeast Saccharomyces cereviciae Extract
The most important cosmetic properties of brewer’s yeast are to promote the production of collagen, elastin, to rebuild the extracellular matrix and to be refreshing to the skin. Its good results in post-solar products are particularly striking, which has generated innovative combinations for a new class of cosmetics with anti-inflammatory and rehydrating action on damaged and water-deficient skin.
It can be considered a unique internal moisturiser, swelling the skin surface by increasing hydration and incorporating nascent proteins into the skin cells to help the skin oxygenate and appear more luminous.
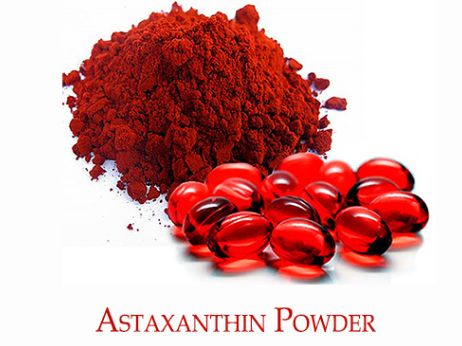
ASTAXANTHIN EXTRACT
INCI: ASTAXANTHIN
Astaxanthin is a natural antioxidant derived from microalgae. It supports joint, skin and eye health and provides a wide range of health benefits.
A study on the role of astaxanthin in UV-induced skin damage in healthy people suggested that it offered some sun protection. Skin is damaged by daily exposure to the sun, so the skin-protective effects of astaxanthin may be particularly important.
In addition, several data show that astaxanthin has important nutraceutical applications and health benefits, especially in healthy ageing processes as it prevents oxidative stress.
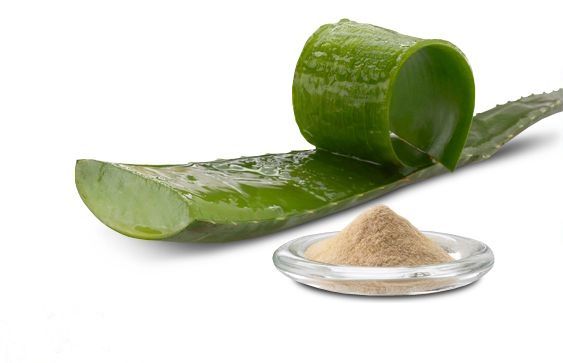
ALOE VERA POWDER
INCI: ALOE BARBADENSIS
Aloe vera powder is made from dried aloe vera leaves ground to a powder consistency. It can be used in many ways in different products and offers multiple benefits to the body due to its high content of antioxidants and vitamin C, which strengthen the immune system by repairing and soothing the digestive tract.
For the skin: Aloe vera powder heals the skin and improves its elasticity. It has moisturising and soothing properties that relieve scars and marks, as well as minor burns, eczema, psoriasis and acne.
It is anti-inflammatory and increases collagen production in the skin, as well as acting as an antiseptic to help reduce any pain, swelling or itching related to mosquito bites, sunburn or allergic reactions.
As mentioned above, this balm is particularly suitable for treating atopic skin and skin affected by dermatitis or eczema with itching, as oatmeal has an anti-inflammatory effect, soothing itching and softening irritation.
It would be very interesting to use a calendula oil as a base oil for this balm, for example. By adding the ground oatmeal to it, we would enrich our balm even more, giving it very good properties for treating this type of sensitive skin.
In any case, with this type of skin we must avoid, above all, creams loaded with preservatives and synthetic active ingredients, even if they are homemade, as they have an irritating effect on this type of skin.
As well as minimising the use of essential oils (just a couple of drops, or none at all) and avoiding chemical fragrances as much as possible.
Below we describe the properties of some of the essential oils most suitable for the treatment of atopic skin and skin affected by dermatitis. These include blue chamomile and Roman chamomile, which are anti-inflammatory, sandalwood, which is a regulator, geranium, which is regenerative, rosewood, carrot seed extract and, above all, patchouli to treat itching.

Ingredients for about 100 grams of product:
About 70 ml of calendula oil, if available, or almond oil.
About 10 grams of oatmeal* powder, and
About 15 grams of beeswax.
Optionally, a few drops, no more than 5, of carrot seed EO or chamomile. Both have very good properties for treating the most delicate skins.
As this balm does not contain water, it does not require the addition of preservatives. Only, if we want to extend its life by preventing rancidity, we can add a few drops of vitamin E.
*Some people go to the trouble of buying colloidal oatmeal to incorporate into creams and balms like this one. We have found that you get much the same result by grinding the oat flakes from the supermarket in a coffee grinder to a fine powder that dissolves easily in the oil since, after all, what we are doing is sort of macerating the oats in the oil as if they were a hot oleate. Finally, the properties of the powdered oatmeal will pass into our oil and thus into our balm.

PROCEDURE:
Place a heat-resistant container in a bain-marie and start by melting the beeswax.
When it is completely melted, add the calendula oil or, in its place, the almond oil and, finally, the oat powder, stirring constantly until everything is perfectly integrated.
Remove from the heat and, if we have decided to do so, this would be the moment to add the drops of EO, as they are thermolabile substances.
As you can see, with balms and ointments based on oil and wax, the proportion used is more or less 90% oil to 10% beeswax. The percentages, as you will understand, can be flexible depending on how hard we want our balm to be. If we like it to have a softer consistency, then, for example, instead of 15 grams of wax for 70 grams of oil, we will add only 10 grams of wax.
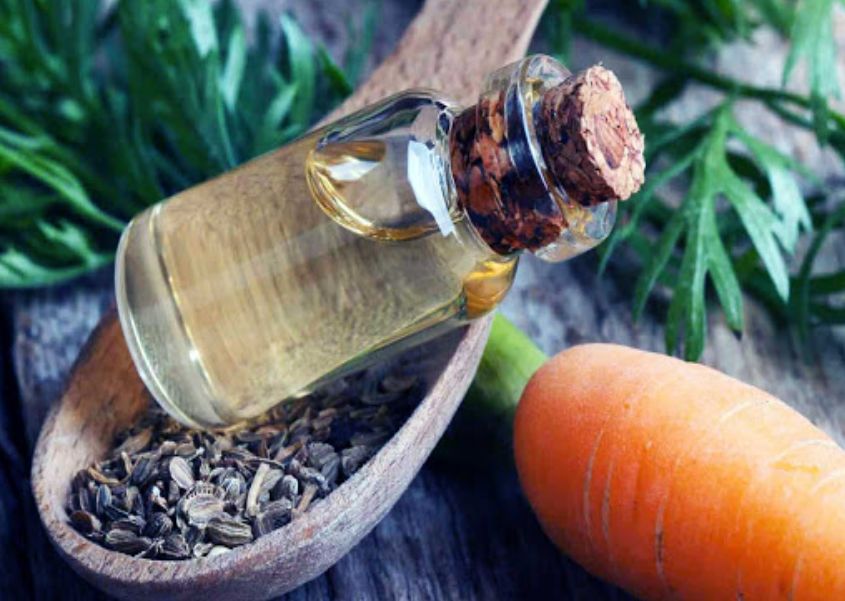
Carrot seed essential oil: This oil is moisturising, anti-inflammatory, antifungal, and sunscreen. It also adds a mild and special aroma to the recipe.
Blue chamomile essential oil: Blue chamomile oil owes its blue colour to the chamazulenic acid contained in this essential oil. Chamazulenic acid is anti-inflammatory and promotes skin healing. This oil can therefore be used diluted in a carrier oil to disinfect wounds.

*With essential oils, less is more, as a few drops can add good properties to our balm, while too much can cause irritation with daily use. We should also bear in mind that this is a balm for sensitive skin, which often cannot even tolerate essential oils topically.
BLUE CHAMOMILE ESSENTIAL OIL: Blue chamomile essential oil, which is the one we have chosen, is specially selected for the treatment of atopic skin.
ROMAN CAMOMILE ESSENTIAL OIL: But, it would be equally possible to use Roman chamomile EO, which also has anti-inflammatory and analgesic properties. It is also used topically to treat allergies, skin irritations, etc. ….
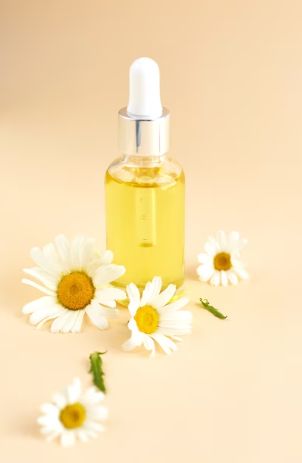
CAMOMILE OIL EXTRACT: In this case, we are not talking about an essential oil, but a macerate of chamomile flowers in virgin sunflower oil.
INCI: Helianthus Annuus Seed Oil, Chamomilla Recutita Flower Extract.
The difference is that this oily extract could be incorporated in larger quantities in our recipes for sensitive skin as it lacks the highly biocidal capabilities of all essential oils.
In this way, just as we would do by adding a marigold oil, we would be using the softening, protective and regenerating qualities of chamomile or marigold to treat this type of skin without the disadvantages of the biocidal effect that these same plants would have if we used them in the form of essential oil.

PATCHOULI ESSENTIAL OIL:
Thanks to the potent analgesic, anti-inflammatory and pain-relieving properties of its bioactive component, patchoulen, this oil is widely used to relieve pain and inflammation in cases of arthritis and joint pain. As a natural vasodilator, it is also used to treat painful muscle spasms, muscle pain, arthritic conditions and other inflammatory conditions.
And it is because of these same analgesic and anti-inflammatory properties that it is so effective in treating atopic skin with pruritus.
Patchouli essential oil is renowned for its use in skin cell regeneration. Endowed with countless active ingredients and antibacterial properties, it facilitates wound healing and effectively reduces wrinkles, scars, blemishes and other signs of ageing. This aromatic oil also plays a key role in the fight against bacteria and germs that ultimately cause pimples, acne and other skin infections, giving us radiant, impurity-free skin.
ROSEWOOD ESSENTIAL OIL
Rosewood Essential Oil (Aniba rosaeodora) is obtained by steam distilling the wood of a tree. It is noted for its skin regenerating and mind calming properties.
It is analgesic, antidepressant and stimulant, antiseptic, tonic and aphrodisiac. Therefore, it is also soothing for this type of skin.

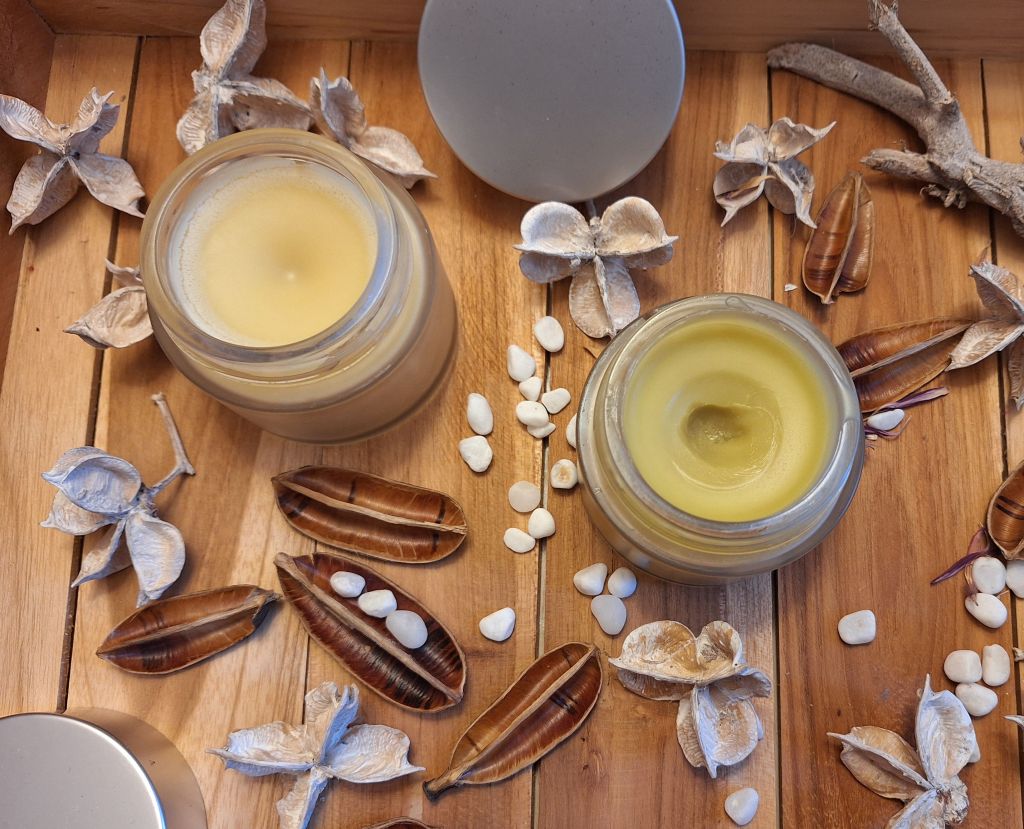
This balm, like all the balms we show you in this article, could also be used on atopic and sensitive skin. However, it is more suitable for all skin types that we want to purify and moisturise on a daily basis.
Ingredients for about 100 grams of product:
About 70 ml of cold-pressed virgin olive oil.
About 10 grams of powdered aloe vera*, and
About 15 grams of beeswax.
Optionally, a few drops of antioxidant to extend its shelf life, no more than 10 drops of critical CO2 rosemary extract.
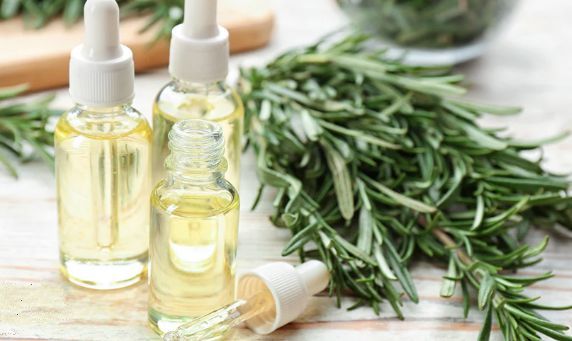
Rosemary extract CO2 critical: CO2 critical extracts are not exactly the same as essential oils. The technology with which they are obtained is far more sophisticated and a much better result is achieved with them. Thus, this type of extract optimally preserves the original aroma and properties of the plant from which it is extracted.
In the case of rosemary, this extract has antioxidant properties as well as antimicrobial properties. This is why we can use it instead of vitamin E to prevent rancidity in our aloe vera balm.
Rosemary EO is particularly beneficial for those suffering from conditions such as rosacea or dermatitis, helping to reduce associated inflammation and discomfort.
As the balm also contains no water, it does not require the addition of preservatives.
PROCEDURE:
Place a heat-resistant container in a bain-marie and start by melting the beeswax.
When it is completely melted, add the olive oil and, finally, the aloe vera powder, stirring constantly until everything is perfectly integrated.
Remove from the heat and, if we have decided to do so, this is the moment to add the droplets of rosemary extract CO2, which is a thermolabile substance.
Do you want your clothes, in addition to washing them in the most environmentally friendly way possible, to be white, stain-free and smelling clean?
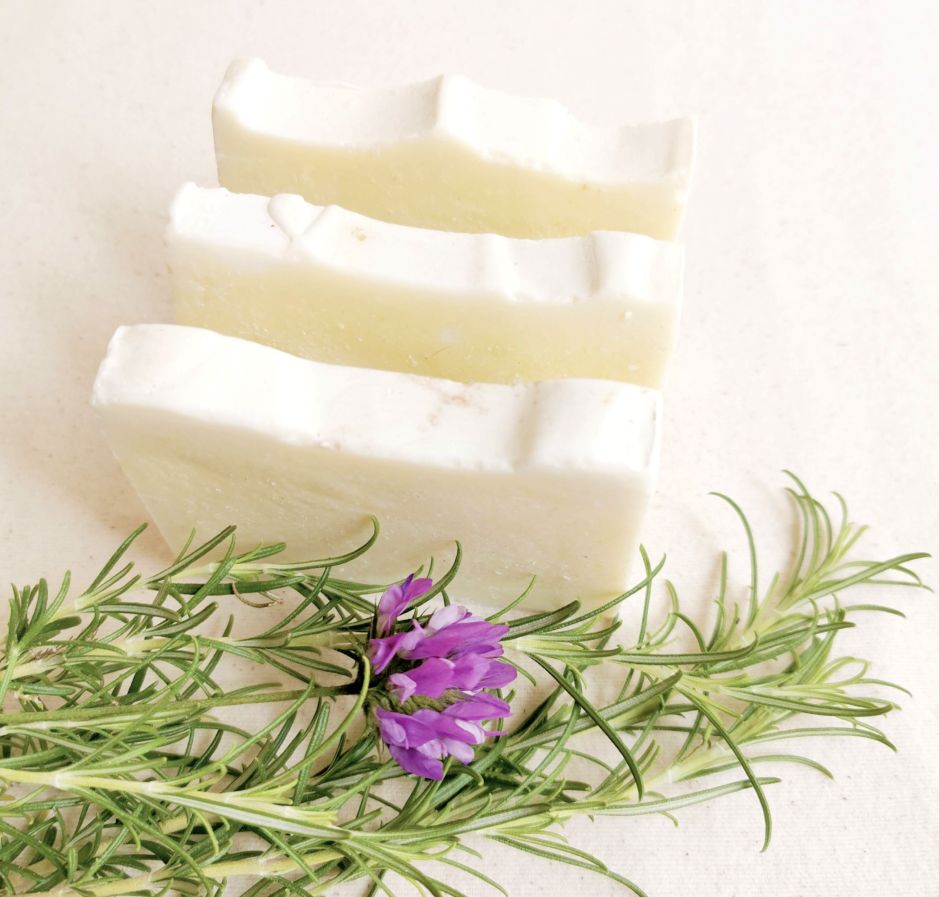
Do you want a very stable recipe to prepare a cold saponified laundry soap? With this recipe you will be left with a beautiful white soap that will leave your clothes perfect.
| MARSEILLE SOAP FOR THE LAUNDRY | |
| Palm shortening | 750 grs |
| Coconut oil | 200 grs |
| Borax powder | 110 grs |
| Caustic soda | 140 grams |
| Water | 328 grams |
| TOTAL: | 1518 grs of soap |
*Palm fat is often found in some supermarkets for use in frying and is often called hydrogenated vegetable palm fat.
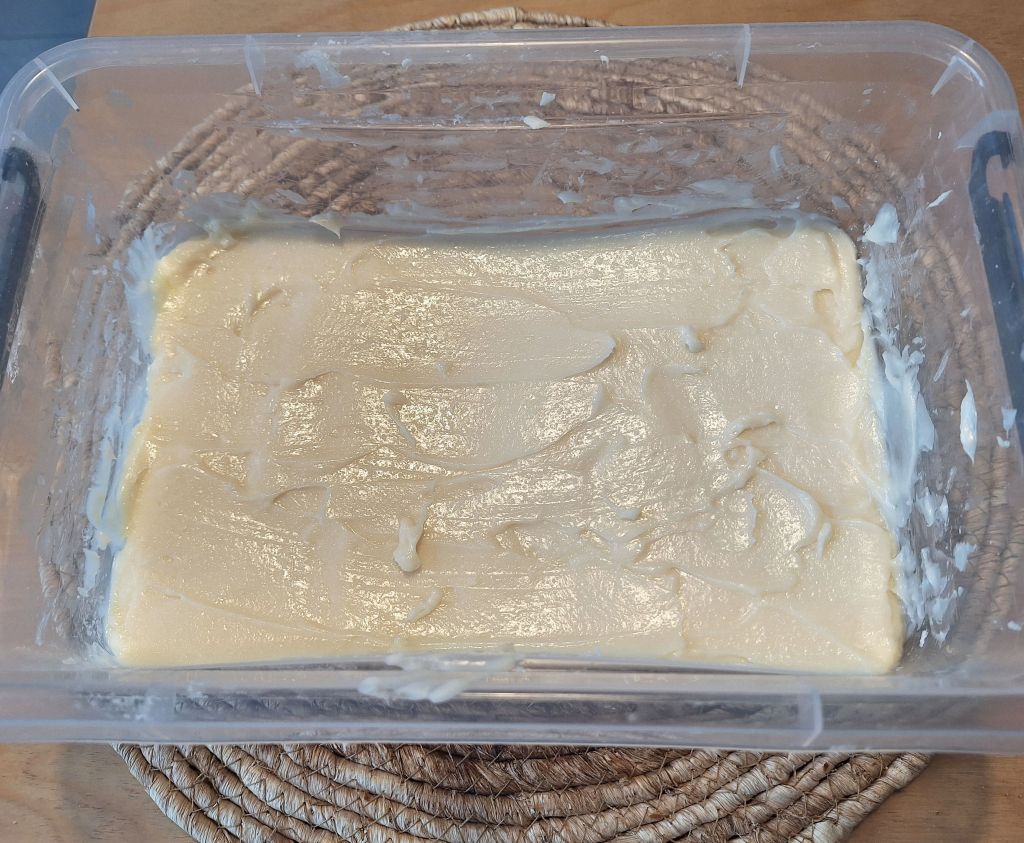
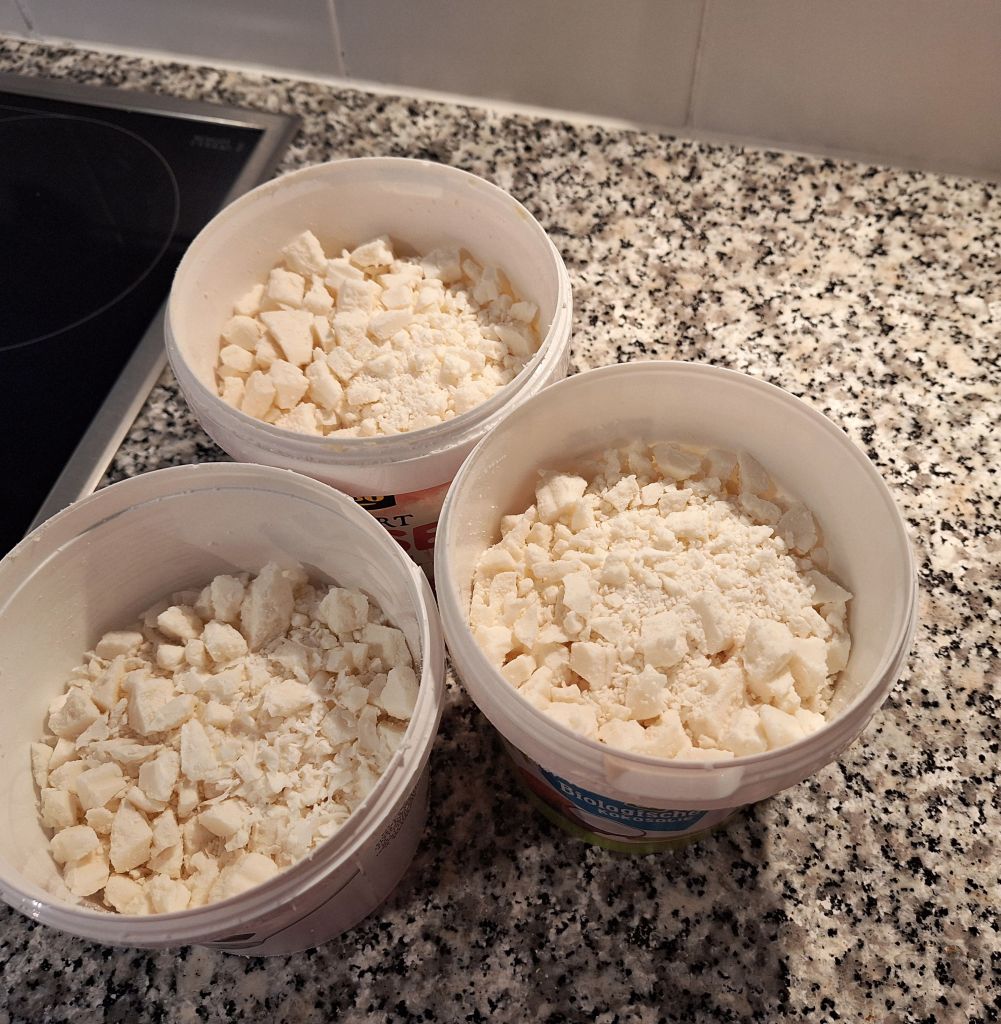
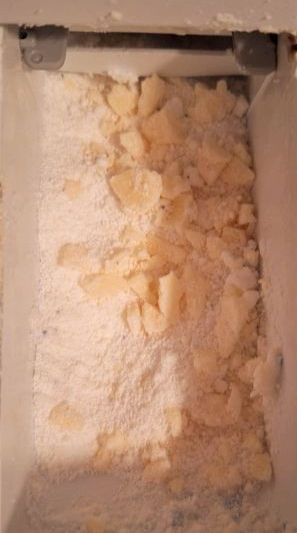
With this amount of Marseille soap that we have prepared in the recipe, when we reduce it to flakes, we will obtain several containers (jars) of approximately 1 liter capacity, to use for months in the weekly laundry.
And with these soap flakes, and a few additives detailed below, your laundry will be unbeatably clean.
When doing the laundry, if you use this Marseille soap, or any other cold saponified soap based on natural oils and fats, you can organize the drawer of your washing machine in this way:
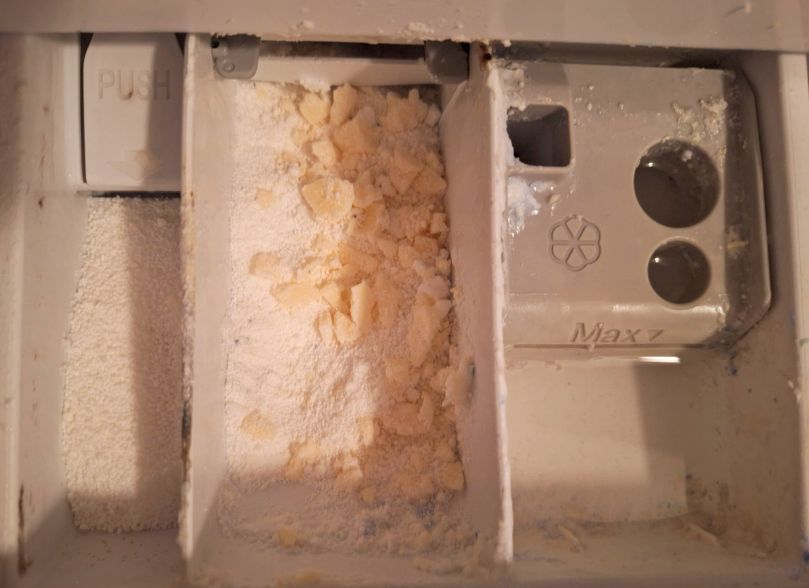
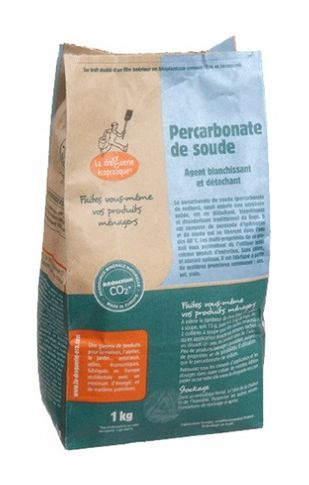
1.- A small box in which oxygen is introduced to whiten the laundry and remove blood stains, etc… If you use oxygen, it is quite ecological and biodegradable. In any case case, you can always use an even more environmentally friendly bleaching solution that is already on sale in many supermarkets, sodium percarbonate, which performs the same functions while being even more biodegradable and cheaper.😊
2.- In the center drawer, more spacious, we can add a phosphate-free and ecological detergent powder and, mixed with it, our Marseille soap flakes, which we will have obtained after grating the cold saponified soap. In this way, our laundry, especially cotton and natural fibers, will be much better.
And in the third drawer, where the softener is usually added, it is possible to replace the commercial softener with white cleaning vinegar, which leaves a totally neutral aroma in the laundry, and also takes care of the machine. Thus, not only do we reduce the limescale in the washing machine, but we also take care of the environment, since natural vinegar is a much less harmful product.
The advantages of this recipe is that this soap remains in perfect condition for months when crushed into flakes, which is not the case with all homemade cold saponified soaps.
Another great advantage is that, immediately after unmolding, it can be easily broken into smaller pieces that also grate very easily to become flakes, which we can then add to an ecological powder detergent with which to wash our clothes, especially white and cotton clothes.
The third major advantage is that, due to the addition of borax, it leaves white and cotton linen particularly well. Much better than soaps made from recycled olive oils that tend to leave a rancid greasy smell if not processed properly. And, all this, while still being a fairly inexpensive recipe.
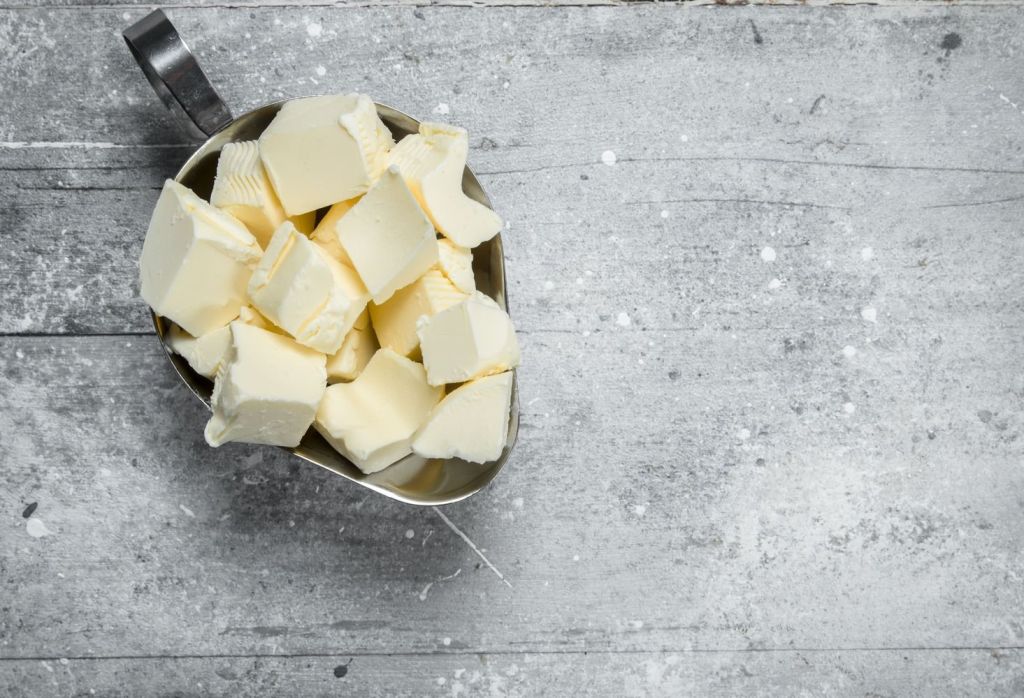
And the only disadvantage is that it is largely made with palm oil, which, as we know, is a monoculture produced in Indonesia and other tropical places for which large tracts of rainforest are cut down. But without this butter, we have found that the soap is not as stable. In fact, this type of oil is widely used industrially because of its high saponification rate, especially in soap making.
There are a number of oils that accelerate the trace and result in harder and more stable soaps. This is the case, for example, with palm oil, castor oil, almond oil or shea butter.
Palm oil (in this case palm shortening) curdles easily and accelerates the trace, so you have to work fast with it or the soap will harden quickly. The same thing happens with castor oil, which is why it results in very hard, stable and creamy-looking soaps with lots of lather.
These characteristics are also present in the bars that include almond oil or shea butter among their ingredients. Shea butter is a solid vegetable shortening that can also be used to make hard soap.
These oils can be combined with others (such as coconut oil, olive kernel oil…), but it is not advisable to use only one of them because the soap will not have the consistency and foam qualities we are looking for.
For example, one of the oils that provide our soap with a high lathering capacity is coconut oil, which is essential oil when making washing soaps.
Palm oil: at least 10% to 30%, depending on how thick we want it.
Castor oil: 10% to 20%.
Coconut oil: 20% to 30%.
Olive oil (pomace oil): 20% to 30%.
*What is clear is that when we try to substitute palm shortening with a cheap and soft oil such as commercial sunflower or corn oil for frying, the soap is not hard and consistent enough and tends to go rancid in a short time. Therefore, it is not interesting for washing, since it takes months from the time we prepare a batch of soap and grind it into flakes until it is fully used.
Another possibility to obtain a more environmentally friendly recipe could be to replace the palm shortening with a mixture of coconut oil and olive kernel oil, which also provides hardness and washability, and also add a few grams of rosin to the recipe.
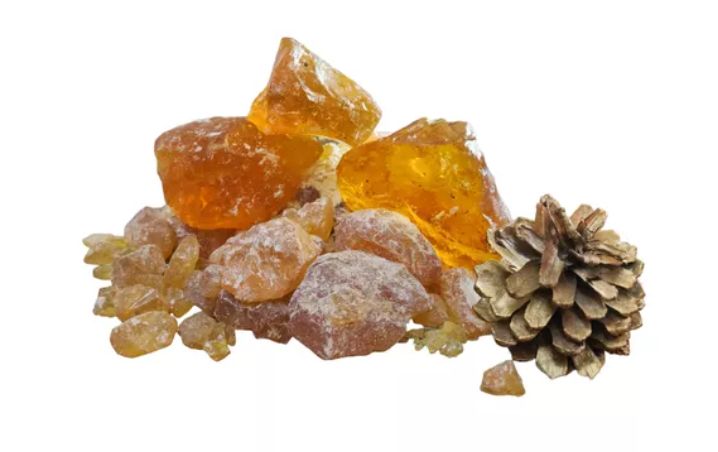
Rosin, also known as pece greca, rosin or Pez de Castilla, is a yellow vegetable resin, a kind of solid, transparent amber crystal obtained from the exudation of growing coniferous type trees.
This “pez”, which was used in the past to waterproof wineskins and wine skins, as well as the hulls of wooden ships to seal them and, even today, in northern Europe, traditional wooden huts, is used today to make high quality industrial and handmade soaps, or even to make ointments and salves to which it provides emollient and preservative properties.

Therefore, we know that rosin is insoluble in water, although it does dissolve in most organic solvents. So it will be important if we are going to prepare some kind of recipe with rosin, that we provide us with the appropriate solvent. The best solvent for pine rosin is alcohol or ethanol. In this way we will avoid possible complications in clothes or other type of utensils because rosin, once dissolved, is extremely sticky.
As we were saying, it is used in the elaboration of natural soaps for laundry since it improves the cleaning properties, favors the saponification of fats and prevents oils from becoming rancid. It is also used as a hardener, helping the soap to take longer to break down with use.
However, if we want to make homemade soap with rosin, it is essential to respect the percentages. At most, the addition of rosin should be 1% of the total amount of oils and butters used. If we exceed this amount, our soap will curdle so quickly that it may not be able to be molded, as rosin greatly accelerates the trace.
Rosin is a resin that is commercialized in small stones of different sizes. When incorporating it into our homemade soap recipe, it is better if we can crush it and pulverize it as much as possible because it will be easier to melt it with the rest of the oils and shortenings. The saponification index of rosin is approximately 123 for caustic soda.
Another option is to use stearic acid to obtain harder soap bars. In this case, the recommended percentage is 5% of total oils and shortenings. Stearic acid should be combined with less saturated oils, such as olive oil (better olive pomace) or coconut oil, otherwise the resulting soap will be too hard and brittle. Its saponification value, when calculating the recipe, is approximately 147 for caustic soda. And it is put into the calculator like any other fat or oil.
Another alternative would be to use animal tallow, which is a fat that also provides great consistency and stability to the soap. But this alternative, as with palm shortening, is not a very environmentally friendly alternative either.
Lye is the name given to the mixture of water and soda (sodium hydroxide). Salt or sugar is added to the lye water and dissolved before the soda is added. The salt adds consistency and hardness to the soap and the sugar adds a little more bubbles.
We haven’t worked on the formulation of this new recipe yet, perhaps because the previous one works so well. Can you readers think of a more environmentally friendly formulation for this laundry soap including olive kernel oil, coconut oil and pine resin?
Let me know in the comments.
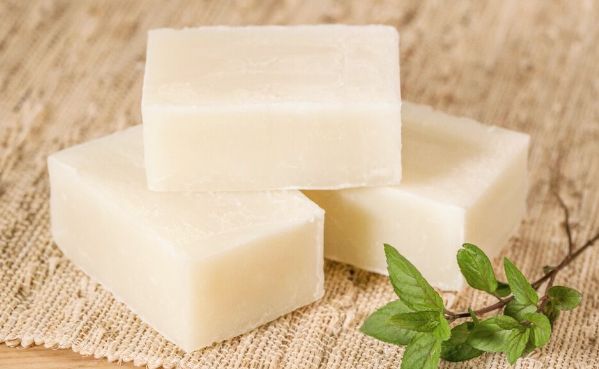
However, we bring you a coconut soap recipe to make organic and biodegradable washing butter that you will love.
This is a recipe for laundry soap based on coconut oil. The reason we wanted to introduce this recipe is because it makes it easier to make the washing butter that we will talk about next.
In general, coconut oil is used to a greater or lesser extent in all cold saponified laundry soap recipes, and this is mainly due to the enormous cleaning capacity that this oil provides and also because it produces more foam than other oils.
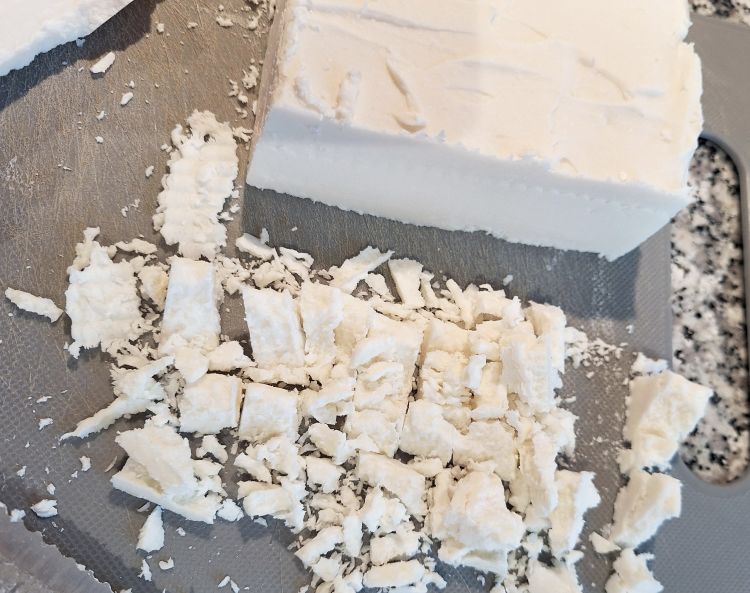
On the other hand, coconut oil soap is one of the easiest soaps to make, mainly because it hardens and sets very quickly. In addition, it is very easy to grate once we have unmolded it, which facilitates its quick incorporation into our washing recipes.

As you can see, this soap is even whiter than the previous palm butter soap.
| COCONUT SOAP FOR LAUNDRY | |
| Coconut oil | 225 grs |
| Caustic soda | 45 grs |
| Water | 75 ml |
| TOTAL: | 350 grs of soap |
This recipe is to prepare 350 grams of coconut soap, exactly enough for a full recipe of washing butter.
It is convenient to remember that the handling of caustic soda requires certain precautions, so do not forget to use eye protection and polypropylene gloves to weigh and mix the water with the caustic soda, which is the mixture known as lye in the soap industry.
5. Add the lye to the melted coconut oil and stir gently with an electric mixer.
6. When the soap starts to thicken, known as “trace,” stop mixing and pour it into a plastic or silicone mold to make it easier to remove later.
7. Let it harden for a few hours or overnight. If you wait longer, it will be harder to grate.
Since this soap hasn’t saponified for long, wear gloves to remove and grate it in case there are leftover active lye traces that could irritate your skin.
Once grated, this soap can be used right away to make the washing butter recipe that follows.
Here is a recipe for a homemade, biodegradable laundry butter made from natural ingredients such as soap, borax and soda.
In principle, the coconut soap recipe we have just described would be the ideal recipe for preparing this butter because we have also calculated the recipe based on the 350 grams of coconut soap we need to make our washing butter.
However, if you have prepared the previous Marseille soap, you can also use 350 grams of it to prepare this washing butter.
| WASHING BUTTER | |
| Coconut soap | 350 grs |
| Borax | 2 cups, about 500 grs |
| Washing soda | 2 cups |
| Water | 3 liters |
1. Bring 3 liters of water to a boil, and remove from heat.
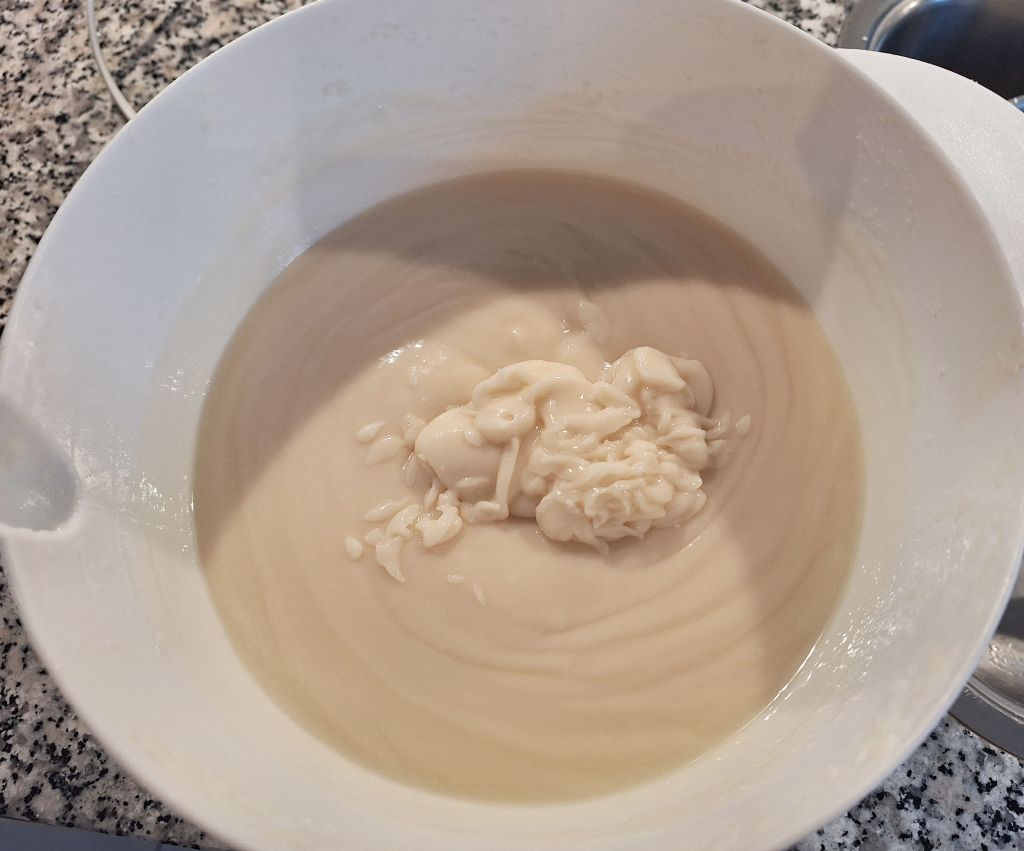
2. Pour the grated soap into the hot water and stir to dissolve completely.
3. Slowly add (avoiding excess foam) the 2 cups of borax and stir until dissolved.
4. Add the 2 cups of washing soda (sodium carbonate, usually called natron or washing soda) and stir to integrate the whole mixture.
*It is important not to confuse the soda we use in this recipe, based on sodium carbonate, with some types of washing soda that are based on calcium carbonate.
5. The grated soap, borax and washing soda now dissolve in the hot water. The step now is to cover the pot with the lid and let the mixture sit at room temperature for about 8 hours (overnight works well) until it cools and settles completely.
If we lift the lid to take a look after a couple of hours, we will see that the liquid in the pot has become almost completely transparent, it almost looks like a pot full of water. However, after the mixture has rested at room temperature for a few hours, a major transformation takes place, the mixture gels.
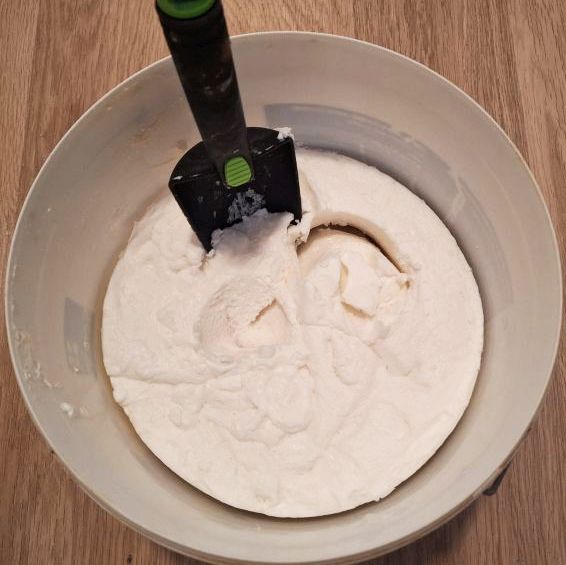
6. When the mixture is completely cold and gelled, we can beat it with an electric mixer so that all the mixture is well integrated, even the remains of borax that may have been more at the bottom.
7. Optionally, now is the time to add some type of aroma to the mixture. We can add some combination of essential oils that we like, or it is also possible to add fragrances. For example, by crushing some of the commercial fragrance bars for the laundry, which in this way will be better integrated into our soap butter base.
8. Now, with the addition of the 3 liters of water, we will have about 3000 grams of soap butter ready to use in our washing machine, even with the most delicate clothes. We will place it in a storage container such as plastic containers or buckets.

We will only need from two to four tablespoons of butter to wash, depending on the size of the load and the soiling of the clothes.
Some people like to add a little white vinegar to the rinse cycle, this not only conditions the clothes, especially natural fibers such as cotton, but also removes any soap residue that may remain and keeps our washing machine in good condition by preventing limescale build-up.
If you have never used white vinegar in the washing machine you might think that the clothes are left with a vinegar scent, but this is not the case at all. Even if we don’t add fragrances to our laundry butters, the result is that the laundry comes out of the washer smelling completely clean.
In addition, if you have this washing butter, you do not need to add much more to your ecological box because the borax and the soda it contains take care of the rest.
Happy eco-washing!

Plastic is a huge environmental problem because, firstly, it is produced mainly from the increasingly scarce raw material of crude oil and; second, it is not biodegradable.
Plastic waste of all kinds, including micro-plastics, reaches the environment and the oceans in quantities that can hardly be estimated and enters the food chain. Small marine organisms such as worms, mussels, small fish, mistake them for food. And this is the reason why they are also present in our blood.

And it is that, until now, wastewater treatment plants have not been able to completely filter the particles, sometimes microscopic, from wastewater. In this way, the microplastics in our household hygiene products pass practically without obstacles into the water, and with the sewage sludge, also into the fields and into the air.
Plastic also remains in the environment for hundreds of years. This is especially a problem in lakes, rivers and seas. There are already incredible amounts of tiny plastic particles floating in them. Highly toxic pollutants, such as pesticides and other environmental toxins, accumulate on plastic particles.
Source: https://www.greenpeople.co.uk/blogs/the-beauty-hub/are-there-microplastics-in-your-cosmetics
The findings of recent years on the issue of microplastics and NGO protests have already made a difference. Many mainstream companies have announced that they will ban plastic particles from their products, including industry giants like Unilever and Procter & Gamble.
Unfortunately, many of these promises are vague and most manufacturers only promise to replace or have replaced very specific (solid) plastics like PE.
Did you know that most commercial shower gels also contain microplastics?
Some of the names hidden among this class of products that are of plastic origin:
Acrylates / C10-30 Alkyl Acrylate Crosspolymer; Ceteareth-12; Ceteareth-20; Carbomer; PEG-7 Glyceryl Cocoate; Styrene / Acrylates Copolymer; Laureth-2, Cyclohexasiloxan; Cyclopentasiloxan; PEG-40 Stearate; Polysorbate 20; PPG-14 Butyl Ether; Dimethicone; Polyacrylamid; Laureth-7; Dimethiconol; PVM / MA Decadiene Crosspolymer; PEG-40 Hydrogenated Castor Oil; Polysorbate 60; Steareth-2; Ceteareth-12; Ceteareth-20; Sodium Polyacrylate; PEG-200 Hydrogenated Glyceryl Palmate; PEG-3 Distearate; PEG-7 Glyceryl Cocoate; Ethylene / Acrylic Acid Copolymer; Polyacrylate-13; Polyisobutene; Polymethyl Methacrylate; Steareth-2; Steareth-21; Polyquaternium-10; Laureth-4; PEG-120 Methyl Glucose Dioleate; Polysorbate 20; PEG-100 Stearate… ..
And the list is so long that it will be enough for us to stick with some expressive and easy-to-remember names that appear everywhere such as dimethicone, copolymer, carbomer, cetearates, polyethylenes, polypropylenes and acrylates in their different variants.
Try to look only at the latter and you will see that they appear on almost all the labels of the hygiene and cosmetic products that we use regularly.
In fact, it is estimated that some of the following hygiene products: deodorant, shampoo, conditioner, shower gel, lipstick, hair dye, shaving cream, sunscreen, insect repellent, anti-wrinkle cream, moisturizers, hair spray hair, face masks, baby care products, eye shadows, mascara, etc. they contain plastic polymers, in some cases, in a percentage higher than 90% of the content.
Source: United Nations Environment Organization.
That is why we have decided to propose a totally biodegradable natural liquid soap recipe.
“Soap is an ancient cleaning agent whose main ingredients come from plant material that, after saponification by means of an alkali, mainly sodium hydroxide (soda) or potassium hydroxide (potash), generate a 100% biodegradable soap salt with excellent cleaning properties. of clothes. Depending on the alkali used, solid soap forms can be obtained (by using caustic soda) or liquid soap forms (by using caustic potash). “
Source: https://www.bioecoactual.com/2018/05/21/jabon-o-detergente/
“Despite what many people may think, the fact of using soda or potash in the composition of a soap does not make it dangerous or “unnatural”, quite the opposite. It is an indispensable compound in traditional soap without which no soap would be produced in any way. Vegetable fatty acids and alkali are completely transformed and are no longer present in the final result to give rise to the salt of vegetable fatty acids (soap) together with vegetable glycerin which has a great moisturizing power that prevents the degradation of the fabrics, among others. However, conventional detergent is made up of compounds of petrochemical origin that generate a greater environmental footprint on ecosystems”.
–Use natural cosmetics. Manufacturers of natural cosmetics do not use synthetic polymers in their products, so microplastics are not a problem in this case. At present, there is an increasing offer of organic natural cosmetics that you can also find on many online pages.
–Make our own hygiene products, which is the alternative to our blog.
–Avoid synthetic fibers, as they not only prevent us from perspiring correctly, which in many cases causes problems of dermatitis and itching due to the inability of the excretory system of our skin, sweat, to eliminate toxins. But they also use micro plastics in their manufacture that also go to wastewater. And it is that what hurts us is the same that hurts our planet. Although it may seem like a bombastic and presumptuous phrase, as Pocahontas sang, “We are all united in the great chain of life.”
-And, without a doubt, always use ecological and fabric bags when we go to the supermarket.
BOOKS TO FIND OUT MORE about the toxins in our hygiene products. We recommend these two books on natural cosmetics:
Toxic Beauty: How Cosmetics and Personal-Care Products Endanger Your Health… and What You Can Do About It.
Less Toxic Living: How to Reduce Your Everyday Exposure to Toxic Chemicals—An Introduction For Families. Also in kindle version.
And from our blog we want to collaborate in this task by showing you a way to make your home hygiene products.
For this reason, in this post, we are going to make homemade potassium soap paste. With this paste, making liquid soaps and shower gels is very easy.
This soap is made using a hot process, the ideal is to have an electric pot to make it, but it is also possible to do it with a conventional pot.
To make this soap we will use potash instead of soda. At the beginning, we will proceed in the same way as with cold saponification.
That is, once we reach the trace (the mixture thickens achieving a texture similar to that of custard), instead of moulding it, we will heat it until it becomes saponified (it is the reaction from fats, alkali and water resulting in soap).
As with cold saponified soap, it is necessary to take into account basic safety rules, such as: mixing potash with water in a ventilated place and wearing gloves and protective goggles to avoid possible splashes that could burn us. Also use stainless steel, glass, plastic or wooden utensils that do not react with potash, as it happens with other metals.
490 g olive oil
140 g castor oil
70 g coconut oil
In total, 700 grams of fat that we will mix with a 1% greased envelope because, unlike with cold saponified soaps, a very low greased envelope will prevent unsaponified fat from remaining and will make our liquid gel look better and more quality.
597 g of distilled water, or, at least boiled, this is important if we want to obtain transparency. If we do not care that our gel is misty, we can simply add normal water. We recommend distilled water because then the soap is clear and very beautiful.
149 g of caustic potash (be careful, it is not the same as caustic soda to make solid bar soaps). In fact, the method with potash is not the same either, because what we will do is cook the soap “hot method” and we will obtain a soap paste.
The procedure is not as complicated as some say. It is advisable to do it in an electric pot to keep the temperature constant, but if you do not have an electric pot, as we do not, it will be enough for you to use a large pot and try to maintain a constant medium heat without the temperature rising excessively.
After weighing the butters and melting them previously, we will add the “bleach” (a mixture of water and potash) that we will have prepared separately in a high temperature resistant pyrex glass container. It is also convenient that to stir and mix it we use a wooden spoon because the bleach reacts with metals. In addition, as you already know from bar soaps, these kinds of things must be done in a well-ventilated place so as not to breathe the toxic fumes that are released from the reaction.
WE GO ON …
With the oils already heavy and melted in our pot, we can start adding the bleach without stopping stirring with the wooden spoon.
Now we are going to start cooking our mixture, and this requires, as we already said, a constant medium heat and not stop beating. We will have to use the electric mixer often, every 5 or 10 minutes, while the cooking process lasts, which will take us (with this formulation) between 20 and 30 minutes.
There are formulations that need an hour to cook, but it is not the one we have chosen here to begin with. This is a very easy formulation with very good results. You will see.
The cooking process will be over when we see that our mixture begins to thicken and turns into a paste similar to mashed potatoes or applesauce. At that time, we can turn off the fire without stopping to stir our pasta.
Now our pasta is ready to move on to the next phase: making gels and liquid soaps with all kinds of uses. From shower gels, hand soaps, ecological pesticides for our garden, etc. which, in case you didn’t know, are also prepared with potassium soap.
Don’t miss our next post in which we will show you how to prepare a homemade shower gel from the potassium soap paste that we have just cooked!
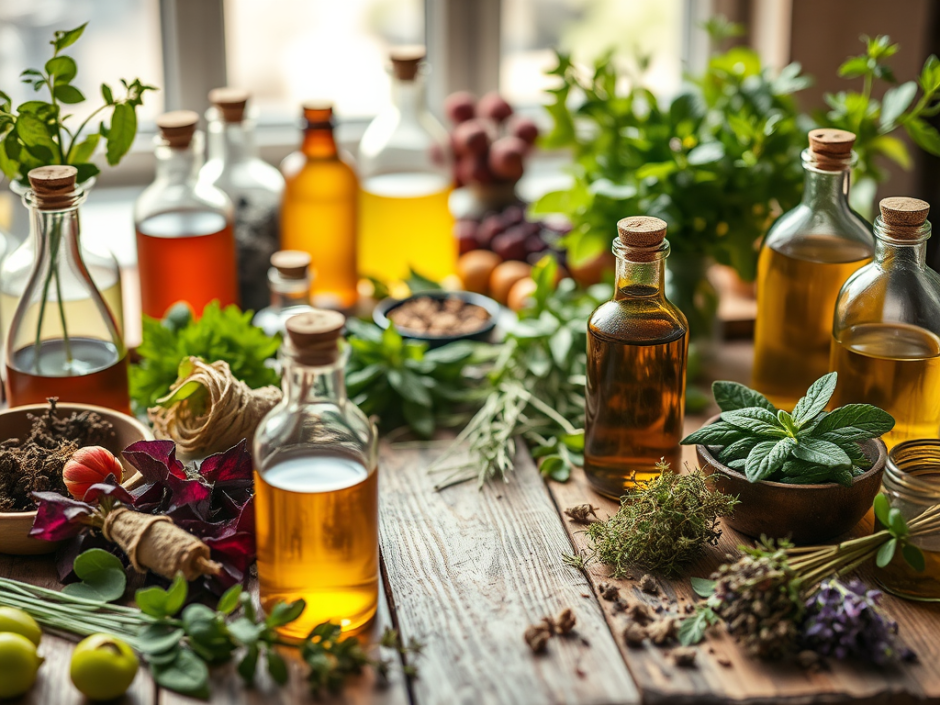
Ayurvedic medicine gives priority to natural foods that are fundamentally nourishing for the body, mind and soul. In addition to healthy skin, Ayurvedic diets have been proven to lower cholesterol levels, reduce the risk of cancer, protect against diabetes, promote weight loss and promote a calming effect on the mind, thus reducing anxiety.
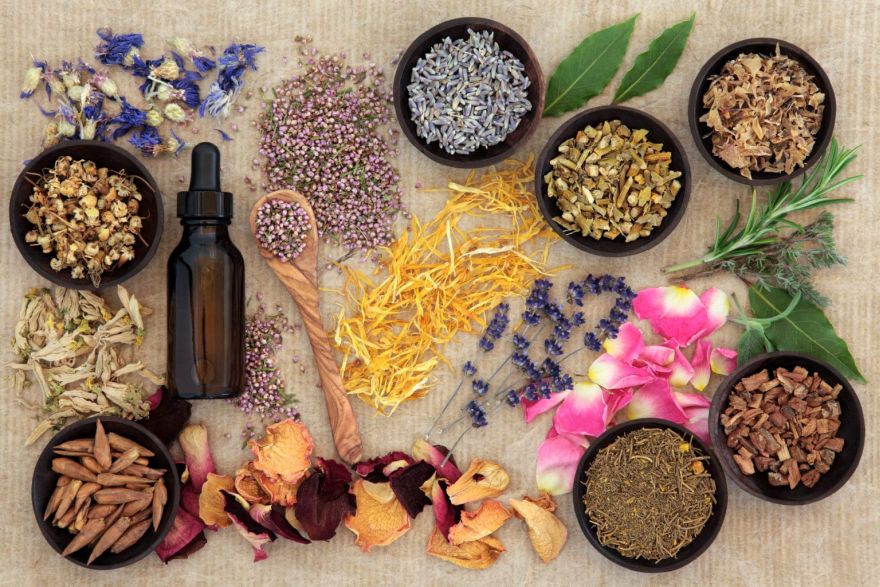
Beauty is not only superficial. Any suffering our body undergoes is reflected in its outward appearance. Therefore, the use of Ayurvedic lifestyle practices is essential to sustainably maintain a healthy and glowing skin.
Ayurveda advises very natural products based on virgin oils and herbal extracts to take care of our skin, and that is why in these articles of our blog we try to find recipes and ways to create a natural cosmetic adapted to our modern life.
In this post, in particular, we want to explain how we can process the plants in our garden to make all kinds of extracts from them, such as tinctures, oleomacerates and hydroglycerine extracts.
First of all, it needs to absorb the nutrients it needs to stay in balance and that, as with almost everything else, according to Ayurvedic medicine and naturopathy, starts with a healthy diet.
Stress, lack of sleep, poor hydration and inactivity are detrimental to health and therefore to the skin. With its holistic approach, Ayurveda recommends stress management, simple physical activity, regular meditation, sufficient water and sleep to complement and enhance the effects of other Ayurvedic beauty rituals we may follow. In addition, these practices balance the body’s hormone levels, calm the mind and even boost immunity.

In addition to a healthy diet and lifestyle, it is equally necessary to follow healthy daily hygiene rituals; because certain practices, even if we follow the perfect diet for our body, can clearly worsen the condition of our skin.
1.- Limit daily showers to 5 or 10 minutes. If we shower daily, it is better to use a salt stone to wash ourselves. Soap should only be left for when we come back from the gym.
2.- Use mild soaps, detergents and cosmetics. Glycerine soaps in bars are highly recommended, as well as cold saponified soaps with a high rate of overgreasing, of course.
If you do not know how to make them and need to buy a commercial soap, try to avoid gels that do not respect the skin’s microbiota. New generation shower gels, such as Sanex shower gels, are already designed to respect the skin’s bacterial flora.
3.- The same applies to commercial creams. There are already creams on the market such as those from Dr. Organic that have probiotics added to respect the skin’s microbiome. Specifically, in this Dr. Organic cream we were telling you about, you can see in its composition the addition of active ferments (*LACTOBACILLUS FERMENT LYSATE, LACTOBACILLUS FERMENT, KEY ACTIVE: Probiotic).
Without a doubt, these new generation creams are much more tolerable for all skin types, especially the most sensitive or problematic ones.
4.- Use a humidifier during the winter when the heating is on to prevent the room from drying out.
5.- Drink more water throughout the day, always without forcing ourselves because this also has negative consequences. A good tip is to drink herbal teas or juices that we like (some people add small pieces of lime, fruit or cinnamon to water to make it more palatable), because this way we end up drinking fluids without forcing ourselves and causing an electrolyte imbalance in our body.
If our skin is still dry and flaky, it is a good idea to apply a moisturising cream or a moisturising mask. Before buying any skin care product, it is a good idea to know your skin type in order to adapt the product, whether it is commercial or homemade. Homemade cosmetics are the best, as you know 😊
In any case, you should avoid products that can clog your pores and cause acne, as the products you will then have to use to treat it can sometimes dry out your skin even more.
Basically, very few natural ingredients are needed to keep our skin hydrated and nourished. If you make natural cosmetics, make them minimalist. Why? What does your skin need on a cosmetic level to stay hydrated: fats, butters, oils, herbal extracts containing nutrients, vitamins, and little else. And natural vegetable oils and fats, as well as herbal extracts, already contain all those vitamins and antioxidants the skin needs, the fresher they are, the less preservatives and synthetic ingredients they contain.
There is no need to add silk proteins, urea, allantoin, hydrolysed marine collagen, hydrolysed elastin, vegetable squalene, essential oils in quantities of 1 gram, trehalose, chamomile oil or borage Bio, which cost a fortune, etc, etc, etc … Oh, and let’s not forget the addition of 1 gram of organic preservative, always, but at the same time synthetic.
All you are doing is adding to the coffers of the suppliers of cosmetic raw materials without achieving what you intended from the beginning, which is to learn how to take care of your skin independently and without depending on dozens of synthetically processed commercial products.
That’s like going to the supermarket and, instead of buying the vegetable ingredients to prepare a natural soup yourself, i.e. (celery, potatoes, leek, etc.), you are advised that you have to buy these bouillon cubes to enrich your soup with vitamins, that you have to add glutamate to give it a more intense flavour, or this or that flavouring to make it more appetising.
Doesn’t it seem absurd if someone suggests something like that when you go to buy the ingredients to prepare your own natural soup? Well, that’s what natural cosmetics suppliers do with the recipes for creams and other products that they propose on their websites and blogs.
For that, you can buy a commercial cream such as Dr. Organic, or Dr. Hauschka’s Rose Cream, which will be cheaper, don’t you think?
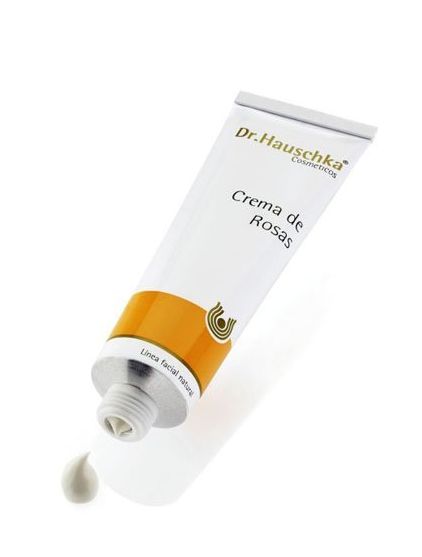
*Dr. Hauschka’s Rose Cream: This cream, although it does not contain probiotics like Dr. Organic’s previous one, has a simpler and more natural composition of ingredients than many of the recipes advocated by home cosmetics blogs. That’s why it feels so good on the skin!
Cold-pressed vegetable oils, beeswax (the best known emulsifier), natural fats and butters, herbal extracts, tinctures and vegetable oils, which we can also prepare ourselves with dried plants from our garden.
Now, that’s environmentally friendly!
And we can even add orange or oat powder extracts to our recipes, which are very easy to obtain from orange peels or oat flakes from the supermarket.
And what do you need for this, almost nothing, dry your plants, and then grind them with a coffee grinder to incorporate them in the form of a powdered extract into your preparations. The same goes for oat flakes, or orange or lemon peels, once they have been dried.
And, if you want to prepare an oleate, the same dried plants are left to macerate in oil. And if what you want is a tincture or a hydroglycerinated extract, then in alcohol and vegetable glycerine.
In any case, and this is the golden rule, the best and most effective treatment is to try to ingest the nutrients and vitamins the skin needs by following the healthy diet that best suits our metabolism and rhythm of life. Don’t you think this is much more logical than trying to deliver those vitamins topically with the addition of preservatives and other ingredients synthesised in a laboratory?
Moisturising or hydrating products are based on vegetable glycerin derived from saponified vegetable fats, which draws water from the air and deeper layers of the skin into the stratum corneum to provide hydration.
Occlusives, such as beeswax, soybean oil and lanolin, form a barrier that prevents water from evaporating. It is possible to make vegetable lanolin, to add to our cosmetic preparations, with shea butter and rosin. This recipe is still pending.
Emollients such as coconut oil, shea butter and colloidal oatmeal make the skin soft.
Regenerators, which are a combination of hydration and regeneration, are mainly based on natural or powdered aloe vera.
Hydration goes beneath the skin barrier. It infuses water into the cells to “replenish” them, and this is perfectly possible with all-natural products such as Ayurvedic masks and creams. And it is not only possible, but also very interesting when you consider that at least 60% of the substances that come into contact with the skin end up in the body. Some of the toxic compounds are eliminated via the liver and kidneys, but others accumulate in organs and tissues and can cause long-term hormonal disorders and various diseases.
This is why Ayurveda always advises not to put anything on our skin that is not edible at the same time.
There are various types of extracts, such as tinctures, where we use ethanol (organic alcohol) or vodka as solvents; or hydroglycerinated extracts, where we use water and vegetable glycerine as solvents; or hydroalcoglycerinated extracts, which use water, ethanol and glycerine, and which are more complete. And, of course, oleomacerates, in which we extract the fat-soluble components of plants. We are going to talk about all of them and how to process them below.
Because, you should know that we prefer to use oleomacerate extracts in ointments and hydroglyceric extracts in tonics and shampoos. In creams, both types can be added.
An OLEADO is the result of macerating a medicinal or aromatic plant rich in fat-soluble components in a vegetable oil. It can also be called OLEOMACERATE. Thus, the vegetable oil dissolves the fat-soluble ingredients of the plant and the properties of the plant are transferred to the oil. Different types of oil are often used, such as olive, sunflower or coconut oil, the important thing is that they are cold-pressed virgin oils.
In the case of oleomacerates, the compounds to be extracted are those that are soluble and related to fats. By macerating the plant in the oil, we are therefore extracting the fat-soluble compounds from the plant so that we can easily introduce them into our preparations or use them directly on the skin or hair. In this way, we can easily and effectively take advantage of the active principles of the plants and benefit from their properties.
Some oleomacerates widely used in natural cosmetics are: calendula oil, rosemary oil, arnica oil, hypericum oil or chamomile oil, for example …
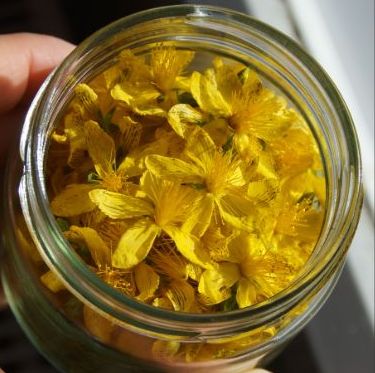
We often have plants in the garden, or even in pots, that we do not know that if we dry them, they can be very useful for making many types of extracts which, depending on the solvent we use, will become oleomacerates, tinctures or hydroglycerine extracts.
If anyone wonders why it is interesting to prepare oleomacerates, when we have essential oils, which are much more potent; it is important to know that not all components of a plant enter into the steam distillation of essential oils. Only the smallest molecules are extracted by this method, so the full essence of the plant is never captured. In this sense, if you can buy a C02 extract from a plant, know that it is much more complete because its distillation process is simply better and more capable of extracting the distilled essence of the plant.
In the case of oleomacerates, the maceration process captures the heavier and larger molecules. Other extraction techniques capture different chemical substances, as mentioned in the case of critical C02 extracts.
Thus, for example, when making a lavender-based cream, the therapeutic effect can be enhanced by also including macerated lavender oil and even fluid extracts or hydrosols.
Another advantage of macerated oils is that they add properties to our recipes in a gentler way than essential oils. Essential oils sometimes cause rashes on sensitive skin and irritation with daily use, even on normal skin.
We may also have access to a plant that does not have a corresponding essential oil, such as lilac or elderflower, for example, or we may want to use a plant whose essential oil is very expensive, such as jasmine or rose, for example. Through maceration, we can access the healing fat-soluble chemical compounds of these plants and use them in our skin care.
As we said before, we often have plants in the garden that we don’t know that if we dry them they can be very useful. This is the case of the humble marigolds. I am sure that many of us have them in the garden without knowing it. However, marigold or immortelle flowers have a great therapeutic value if we pick them and dry them.
The marigold is a plant with great therapeutic potential for the skin. It regenerates, combats possible germs and fights inflammation. It is a restorative par excellence for irritated, itchy skin, eczema, chilblains caused by the cold, etc.
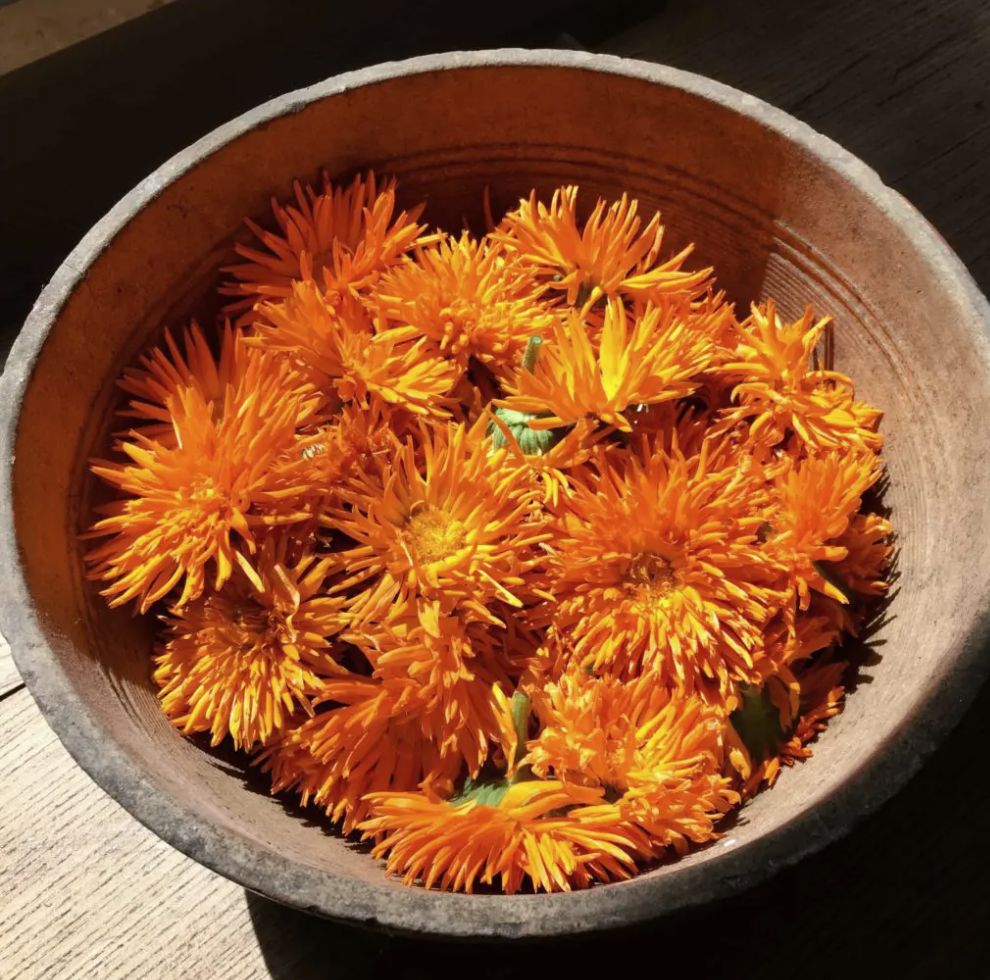
Another use of calendula oil is to treat earaches. We put 2 to 3 drops in the ear and hold a bag or warm cloth over it. However, if the symptoms persist or if there is an infection, it is best to consult a doctor.
By infusing the flowers in oil, we can extract many of these properties and incorporate them into easy-to-use products such as: recipes for balms, lip balms, soaps, creams and lotions.
That is why we are going to explain below the two known methods to prepare an oleate, that is, to infuse or macerate a vegetable oil with the properties of an herb or plant. In this case, we are going to explain how to prepare a marigold oil macerate, although it would be perfectly possible with any other dried plant or flower.
For this we will need dried marigold flowers. Fresh herbs can also be used to prepare the infused oils, but this is not a good idea because the water content of fresh flowers and herbs tends to create mould and spoil the oils.
Simply spread the previously harvested flowers on a paper towel in a dry place or in the sun and turn them daily for one or two weeks until they are completely dry.
When they are dry, fill a glass jar 1/3 full with your dried flowers and fill it with an oil that does not rancid easily. The best oils are olive and coconut, because they do not go rancid as quickly as sunflower or soybean oil. It is also possible with jojoba oil, which does not rancid easily, although it is more expensive. Or almond oil. If you live in an area where it is cold in winter and coconut oil solidifies, you can mix it with another oil to keep it liquid.
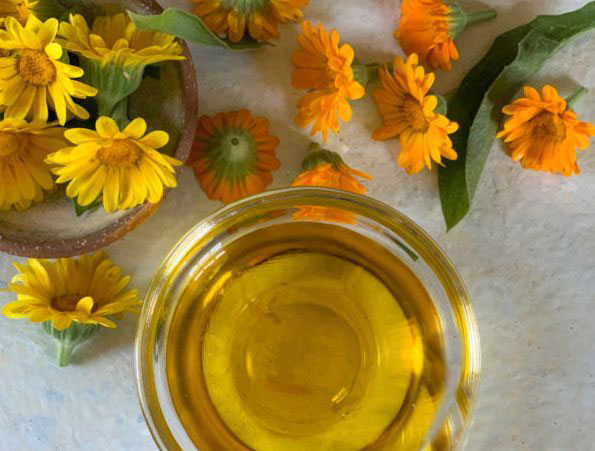
After maceration, strain it and add 0.2% vitamin E as an antioxidant. This will extend the shelf life to a year or more. In this way you will have a pure marigold extract.
As the “natural freak” website says: “Jojoba and coconut oils are also often used or added, while sweet almond oil is better suited to smaller batches as it rancidifies faster than the other oils”
Cover the jar tightly and store in a cool, dark place for a minimum of four weeks (40 days is ideal). Shake it periodically. There are even “schools” that say that you should give it the light of the sun and the moon, because of the energy issue. However, don’t worry if you don’t, the result will also be acceptable.
After 40 days, strain the flowers and our macerated oil is ready. To strain the herbs, you can use a cotton filter or a fine cloth, or even a paper coffee filter. In some cases, you will have to repeat the operation so that the oil is free of residues.
The oil, now infused, should be kept in a jar, preferably a dark glass jar so that it has a longer shelf life. Store the bottle in a dry, dark place, protected from heat sources. If we think that our oil may go rancid, we can add a little wheat germ oil or a few drops of vitamin E to prevent oxidation and rancidity.
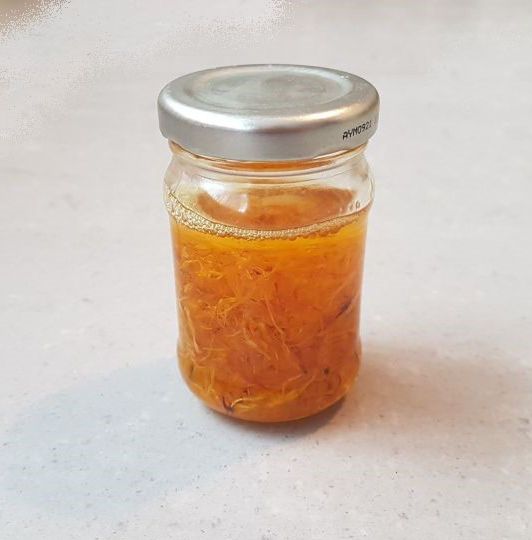
As we said, to prepare a homemade oleado, it is enough to leave the dried plant to macerate in oil for a few days.
The second method of infusion is a hot infusion method, which has been detailed for centuries in traditional herbal remedy manuals such as “Maria Treben’s Cures”.

This form of hot maceration is the most suitable for harder parts of the plant, such as the roots. The temperature should never exceed 40 ºC and, logically, we will need a container resistant to the temperature, such as a pyrex, etc.
Put the flask with the herbs in a bain-marie for 2 hours on a low heat. The time is relative, some people leave it for less time and with a little more temperature, it also depends on the hardness of the roots of the plant, etc. …
Tinctures consist of macerating a plant in ethanol (organic alcohol, or even vodka) to extract its active principles. Although they are widely used in natural medicine, as they can be directly ingested to take advantage of their medicinal properties, they can also be used in natural cosmetics to enrich our treatment creams. For example, comfrey tincture can be used to make an ointment with healing and soothing properties to treat haemorrhoids. However, oleates are much more commonly used because of their ease of incorporation into our oily preparations.
When preparing a tincture, we must use an organic alcohol (ethanol) with the appropriate alcohol content. For example, when we say that an alcohol is 96º, what we mean is that, out of every 100 grams of alcohol, 96 grams are alcohol and 4 grams are water.
The alcohol content to be used and the maceration time depend on the type of plant. In general terms, we can be guided by the following data:
1.-Flowers, leaves and delicate parts of a dried plant: use alcohol of about 70º, and leave them to macerate for 48 hours to a week.
2.-The hard stems, bark and roots need 80º alcohol and are left to macerate for 2-3 weeks.
3.-The resins, which are even harder, will need alcohol with a minimum alcohol content of 90º and we will leave them to macerate for 8-10 days.
This table explains the amount of water that needs to be added to 96° alcohol to dilute it:
| I want 100 gr alcohol of | Grams I need of 96º alcohol | Grams I need of water |
| 70º | 73,5 | 26,5 |
| 80º | 84 | 16 |
| 90º | 94,5 | 5,5 |
IMPORTANT: Never use normal pharmacy alcohol to make tinctures for internal use, as it contains toxic additives. In the case of external or topical use, for example to rub rosemary alcohol on the legs, we can use pharmacy alcohol without any problem, and for this, the table above will be very useful.
In general terms, to make the tinctures we will use ground dried plants, which will allow us to reduce their volume considerably so that we can cover them well with the alcohol.
The usual plant/alcohol ratio according to traditional pharmacopoeia is 1:5, what does this mean? It means that for each part of plant we put 5 parts of alcohol (of the grade that suits each plant).
For example: Suppose we want to make a rosemary tincture. To do this, we weigh 20 g (one part) of ground rosemary and add 100 g (5 parts) of 70º alcohol, which is suitable for leaves and stems. If we do not have 70º alcohol, we prepare it with 73.5 g of 96º alcohol and 26.5 g of distilled or mineral water, as indicated in the table.
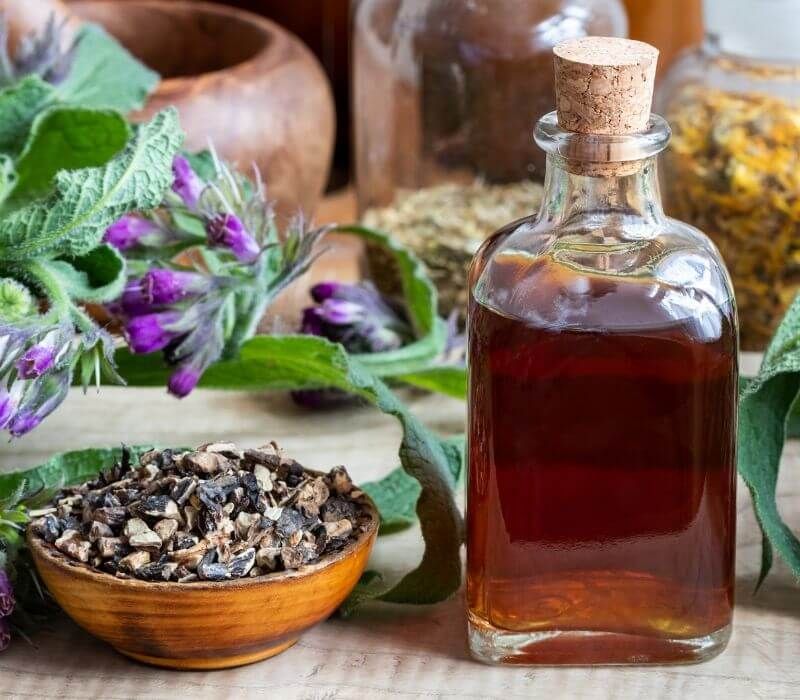
PREPARATION: Start by weighing the dried plant to be used and placing it in a clean, sterilised glass bottle that closes tightly.
Weigh the alcohol of the recommended strength according to the part of the plant to be used and add it to the bottle. The plant must be well covered.
Close the bottle tightly and keep it away from light and heat for the time necessary for maceration. Try to shake it at least once a day.
Once the maceration time has elapsed, it is filtered through a cloth strainer, or gauze, or paper filter. It is very important that it is well filtered and that no plant remains so that it does not become mouldy and spoil the preparation.
Finally, store the tincture in a dark glass container protected from light and heat, well labelled and with the date of preparation.
*Many people simply use raw vodka to make herbal tinctures and, we have to say, it works very well too. So if you are not making a commercial tincture, but for your own and your family’s use, know that vodka is also a great option.
Even Maria Treben’s famous Swedish herbs* are often macerated in brandy or eau-de-vie. *Maria Treben’s Swedish Herbs are a mixture of 11 medicinal plants, including bitter and digestive plants.
CONSERVATION: Tinctures do not need a preservative because of their high alcohol content. If they are well made and well filtered, they can be perfectly preserved for 3 to 5 years.
TIPS: When incorporating them into our cosmetic preparations, remember that they contain alcohol and therefore dry out the skin. We should also ensure that our tincture does not exceed 5% of the total formula for body use and 2% for facial use, always avoiding the eye contour area. Nor should they be applied to dry or chapped skin, which is better suited to other types of extracts.
Extracts can be prepared from glycerine in a variety of ways. The two most common types of extracts are HG (containing water and glycerine) and HAG (containing water, glycerine and alcohol).
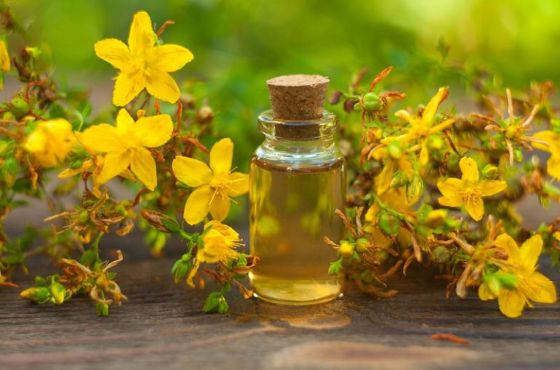
HYDROGLYCERIN OR HG
For this type of maceration we will use a mixture of distilled water and liquid glycerine as a solvent. Depending on the plant used, the plant/solvent proportions, the water/glycerine proportions and the maceration times may vary.
Hydro-glycerine macerates are very good to add to our face creams. They are added in the aqueous phase, instead of glycerine. To make these macerates, we will normally use 70% vegetable glycerine and 30% water. This is known as the 30:70 ratio.
Quantities to be used:
As in the case of tinctures, we will use ground dried plants to reduce their volume and to be able to cover them well. Normally, we will use a glass container in which we will put our dried plant (more or less up to 1/3 of the container) and cover the rest with the solvent (glycerine – distilled water) in a ratio of 30:70, as we said, i.e. 30 grams of water for 70 grams of glycerine.
Example of mallow HG 30:70
We weigh 20 g of dried and ground malva sylvestris and pour it into a glass bottle. We prepare our solvent in a ratio of 30 % water and 70 % glycerine. To fill the glass bottle, at least three times as much solvent as dried plant should be added. That is, a plant/solvent ratio of 1:3.
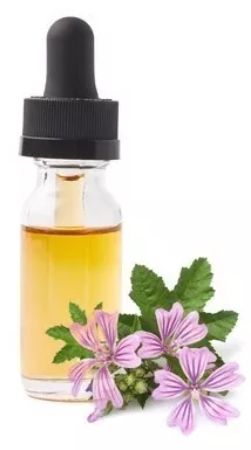
As we had 20 grams of dried mallow flowers, we will add a minimum of 60 grams of solvent (20 grams x 3 parts = 60 grams). Of these 60 grams, 30% will be water and 70% glycerine. According to the rule of three, we will need approximately 18 grams of water and 42 grams of glycerine.
Now we pour the solvent into the bottle, stir well and close it. Store the bottle in a place away from light and heat. The maceration time will be between 8 and 20 days. During this time, shake the bottle from time to time. After the maceration time, filter the macerate through a coffee filter or a very tightly woven cotton cloth so that no traces of the marigold remain.
Our HG should preferably be packaged in a dark bottle, protected from light and heat, with its production date and name. This preparation does not require a preservative, just be careful to put it in the fridge in summer. With this precaution, you can keep it from one year to the next.
Also if you make it in a 50:50 ratio, i.e. half water, half glycerine. However, if we incorporate it immediately into one of our preparations, we will avoid all this. That is why it is better to prepare only a certain amount of product, the amount you are going to use soon.
HYDROALKYLGLYCERINATE OR HAG
Now we are going to prepare extracts with a mixture of water, ethanol and glycerine. With this type of macerates we will be able to extract more active principles than with only glycerine and water. The plant/solvent ratio will also be 1:3 in most cases.
As we said, these types of extracts are preferably added to our facial tonics, serums, masks and facial creams. To do this, add 1% to 5% to these types of preparations.
And we will add up to 15% by weight of our product for preparations such as creams or body washes, as well as hair treatment shampoos.
Example of the amount of solvent for 25 g of plant according to the table above:
21 grams of 96º pharmacy alcohol
29 g water
25 g glycerine
In total, the 75 grams of solvent we have to add to our 25 grams of plant, according to the 1:3 rule
A simpler way to prepare our HAG is to use vodka (40 proof alcohol). In this case, the solvent mixture will consist of 2 parts vodka and 1 part glycerine.
Example of the amount of solvent for 25 g of plant:
50 g vodka
25 g glycerine.
And, of course, you don’t need to add water, so the preparation keeps even better.
The steps to follow to elaborate the HAG are the same as for the hydroglycerine, the only difference is that in this case the maceration time is 8 to 10 days, also trying to shake it several times a day. The HAGs can be incorporated into our cosmetic preparations without any problem, in a proportion of up to 15% for body preparations and between 1-5% for facial preparations.
Mallow has hydrophilic compounds, so it is best to make a hydro-glycerine extract with water and glycerine to get the most active ingredients out of this soft, protective flower.
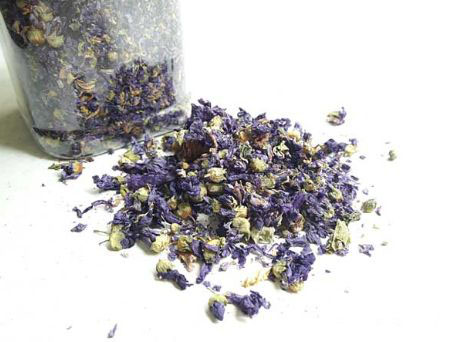
Ingredients:
10 g dried mallow flowers in a small glass container (to which we add 30 g of solvent)
9 g distilled water
21 g vegetable glycerine
PROCEDURE:
Crush the flowers well and add the water and glycerine solution. Leave to macerate for 2 weeks, protected from light and heat and shaking from time to time. Then filter and store in the refrigerator.
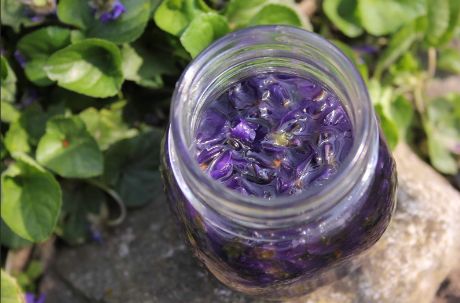
Mallow Flower Extract is recognised for its moisturising, soothing, emollient and natural collagen-activating properties, as well as its ability to regulate trans-epidermal water loss in the skin. This is due to the mucilage content of its flowers. It also has a healing and anti-inflammatory action.
Mallow is also used in products to treat tired legs due to its content of venoactive flavonoids, i.e. being able to decrease the permeability of blood capillaries and increase their resistance.
It is also used in eye drops to decongest inflamed eyes, as it tones up the microcirculation in the eye.
The best-known benefit of cucumbers is their soothing, calming effects. People often use cucumber extract for the skin to soothe morning puffiness or any irritation. This is partially due to cucumbers’ powerful hydration content. But cucumbers also contain Vitamin K, A, and C, which not only act as antioxidants but also have anti-inflammatory and moisturizing effects on the skin. Cucumber extract skin benefits also include reducing dark circles and slightly smoothing out wrinkles.
Recently, researchers found that cucumber fruit extract contains rutin and ascorbic acid oxidase, both free radical scavengers that can help protect against skin damage.

The plant/solvent ratio shall be 1:2, i.e. two parts solvent to one part plant.
And the ratio of water, glycerine, alcohol shall be 30:40:30.
In this case, as we have used 15 grams of fresh crushed cucumber, we will add the quantities, according to the proportion 30:40:30, in which we include a proportion of double the solvent than the crushed cucumber, because 9+12+9 is equivalent to 30 grams of solvent, which is double the plant we had, in this case, double the crushed cucumber.
9 grams of distilled water, which is 30% of the total 30 grams of solvent.
12 grams of vegetable glycerine, which is 40% of 30 grams.
9 grams of alcohol, which is 30% of 30 grams.
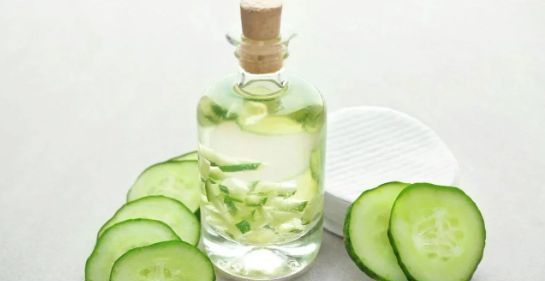
PROCEDURE:
After cutting the cucumber into very small pieces, about half a centimetre in size, i.e. almost crushed, place it in a wide-mouthed glass container with an airtight lid.
Add the solvent of water, glycerine and alcohol and leave it covered for a week or so.
Filter it through a dense cotton cloth.
After 8 to 10 days, our macerate will be ready to be incorporated into our cosmetic preparations. We will keep it in the refrigerator while we are not going to use it, although thanks to the mixture of glycerine and alcohol, it does not require the addition of synthetic preservatives.
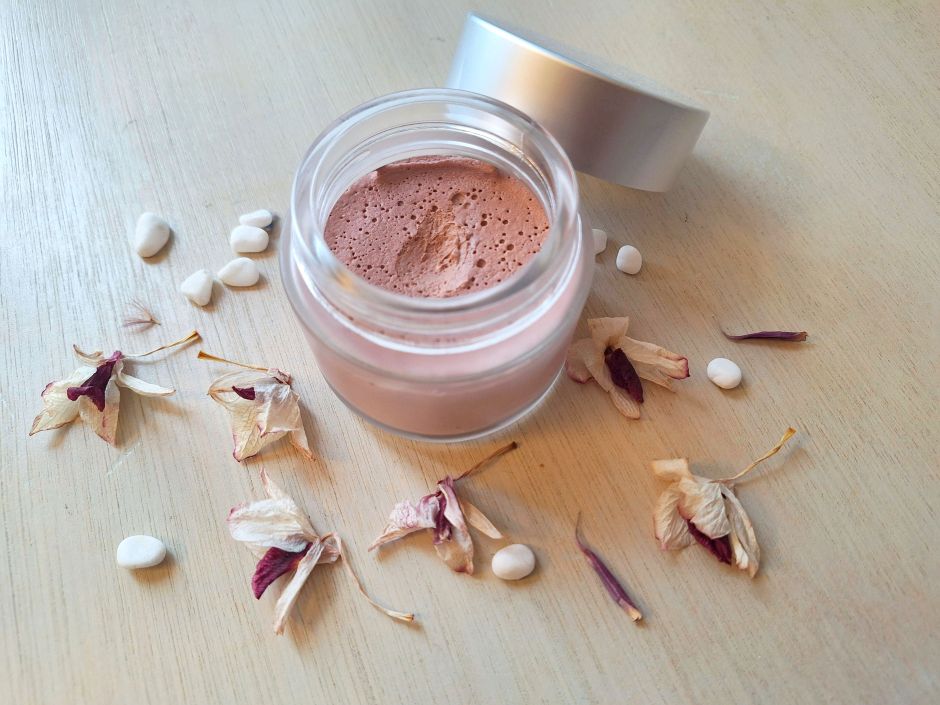
Are you worried about the problem of synthetic preservatives in your homemade preparations, but fear that if you leave them out of the refrigerator they will spoil in a short time?
Believe it or not, we have a natural solution for this that won’t leave your complexion looking stiff and won’t cause irritation or dermatitis.
And it’s super cheap too. Forget about buying preservatives other than simple Leucidal, which is the only commercial preservative that is natural enough not to cause any problems, and which you will need to add to this moisturizing colour cream. Otherwise, all you need is mineral water, optionally dried herbs, and a small packet of calcium hydroxide.
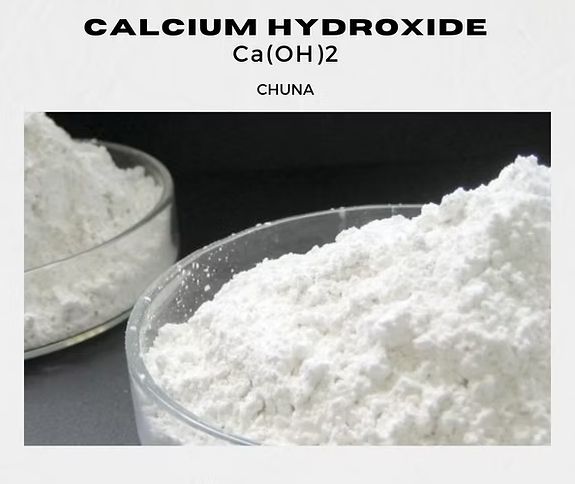
https://www.healthline.com/health/calcium-hydroxide
If you read the linked article, you will see that calcium hydroxide is so safe that it has been widely used in the food industry and traditionally in food preparation since time immemorial, for example in Central America, where calcium hydroxide has been used for thousands of years to process maize.

We had set out to make a tinted moisturiser with a sun protection factor for daily use and we needed a preservative that wouldn’t give us any problems.
And as we had already seen that creams with lime water in the aqueous phase are like good wine, which over time ferments and improves instead of spoiling, we decided to prepare an herbal infusion to which we would later add the lime. It is possible to do this with just mineral water, as you know, but with herbs it has a better aroma.
So we start by making an infusion of dried lavender to which, after cooling, we add a teaspoon of food-grade calcium hydroxide.
The ratio is about 5 grams of calcium hydroxide per half litre of demineralised water, or in this case cold herbal tea.
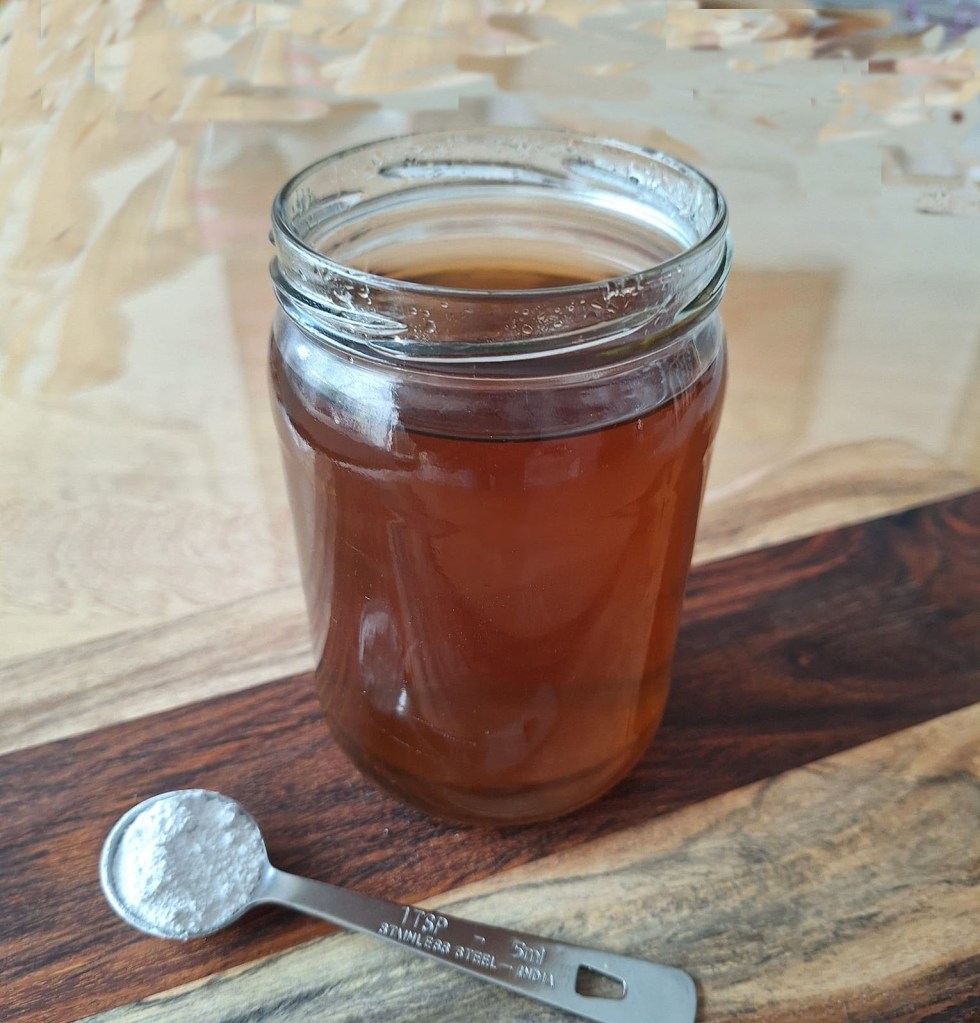
After filtering the lavender water, we add a few drops of lavender essential oil to enhance its aroma.
After an hour’s rest, during which the lime remained at the bottom of the container, we used a coffee filter to filter the lime from our infusion and thus obtain our lavender water with the properties of the dead lime.
As we said, the recipe below is, as we like in this blog, a minimalist and simple recipe to make a colour cream with sun protection factor.
INGREDIENTS to make about 100 ml of cream:
About 20 grams of quality cold pressed oil, such as sesame oil, grape seed oil, etc …
About 5 grams of oat powder, which, in addition to providing properties, will fluff up the final result, as creams with zinc oxide tend to become caked.
About 70 grams of our aromatic lavender water
8 grams of emulsan, a new ecological emulsifier that is very natural.
8 g zinc oxide
For pigment, we used 5 DASH teaspoons of light brown oxide and one DASH teaspoon of pink oxide, the DASH measure is also known as PINCH.

And finally, 15 to 20 drops of plain Leucidal*.
*This is a precaution because when the lime water, in a recipe like this one, is completely absorbed and fully integrated into the emulsion, it can happen that our cream, with use, when we run our fingers over it, becomes contaminated. It is also possible to use a small plastic spatula to avoid this problem.
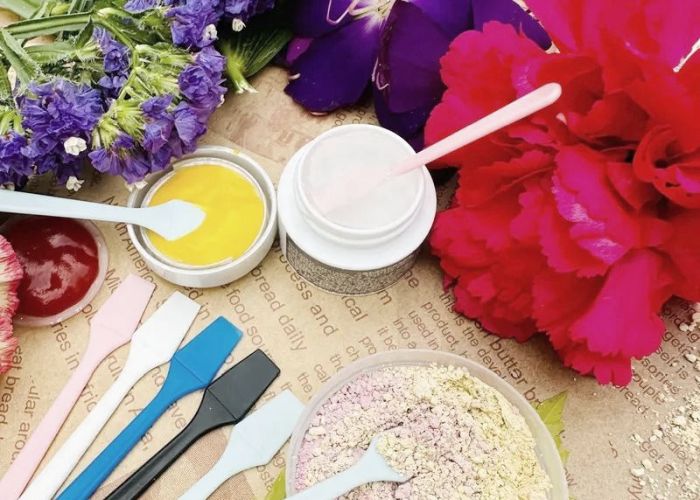
In any case, if our cream is emulsified with beeswax, as is the case with the calcareous bio-liniment, and the water is out of phase, this problem does not occur. We have more than proved this.
This is a picture of our BIO-LINIMENT, after months of frequent use, as it is a product that we highly recommend, especially for the most sensitive and dry skins.

We remind you of the recipe of the BIO-LINIMENT calcareous
To prepare about 200 ml of this liniment, we will need:
100 ml of lime water
100 ml olive oil
And about 4 grams of beeswax
And you don’t need to add anything else at all to get a very moisturising and natural face and body balm that will never give you any problems.
*Just remember not to leave the calcium hydroxide in the distilled water for more than an hour so that the water does not take on too much aroma and your liniment smells good.
Weigh the ingredients.
In a heat-resistant container, such as a pyrex, etc., place the emulsifying wax (Emulsan), the 20 grams of grape seed oil, the 8 grams of zinc oxide and the 5 grams of oat powder in a bain-marie, in that order, adding each component once the previous one is dissolved and integrated into the mixture.
In another container, we will warm our aromatic lavender water.
When both phases are hot, add the aqueous phase, i.e. the lavender water, to the oily phase, whisking vigorously so that everything is integrated. It is advisable to use a small cosmetic mixer, such as a coffee skimmer, etc…
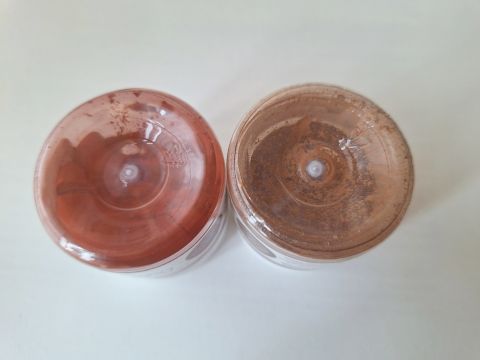
Finally, add the pigments, stirring well and checking each time on the back of your hand to see if the colour you obtain matches your skin tone.
And, if we have so decided, 15-20 drops of simple Leucidal, which is the INCI: Leuconostoc/Radish Root Ferment. It is the most skin-friendly, effective and ecological preservative that we know of.
And this was the result.
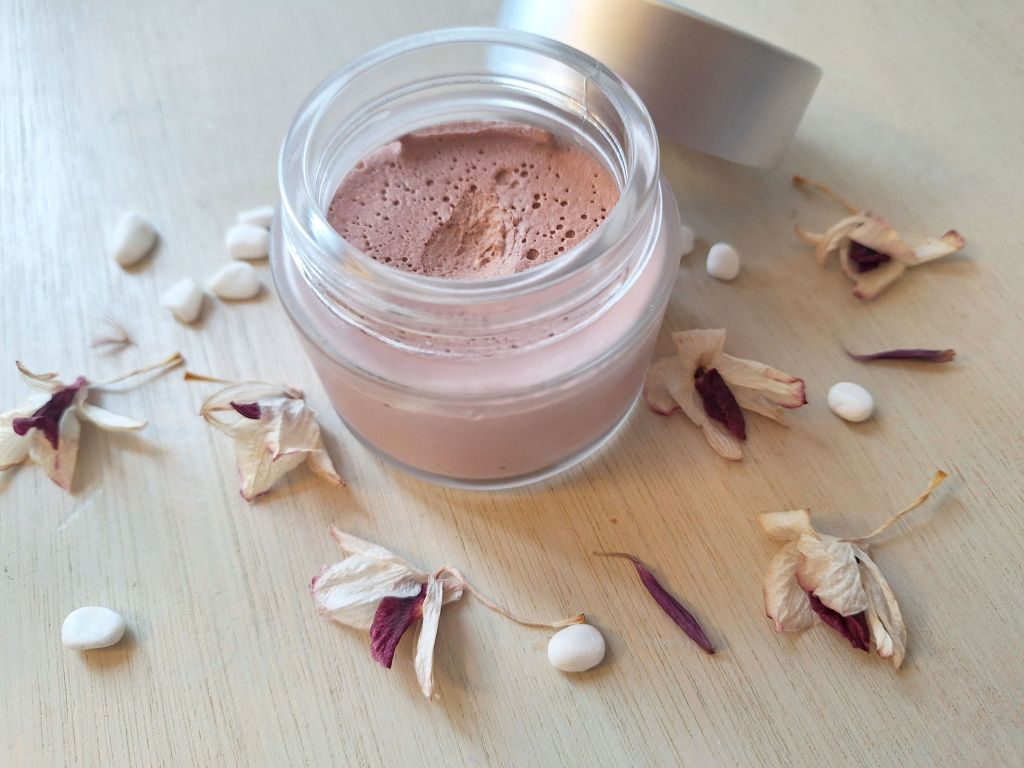
A tinted cream with a sun protection factor adapted for daily use to prevent facial skin blemishes.
We have prepared our moisturising colour cream without adding essential oils, just a few drops of lavender water, before preparing our cream, to give it a little more aroma and properties.
But if you want to add essential oils, it is advisable to take into account the advice of the experts:
According to the blog of the French Institution Robert Tisserand:
“But if you are going to use essential oils orally following the recommendations you saw on social networks, with a 99% probability I assure you that those recommendations will not be correct. If you don’t believe me, let’s take a look at a few:
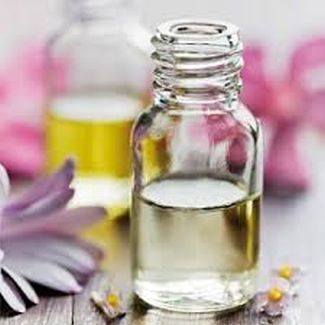
What Robert Tisserand is saying is that essential oils, like any other chemical substance, whether of natural origin or not, whether intended for medicinal use or not, produce their effects when administered.
Tisserand, in his blog, would ratify the maxim of Paracelsus, the great physician of antiquity: “Everything is poison and nothing is without poison; only the dose makes a thing not poison”.
Paracelsus (1493-1541) was one of the many physicians who used distillation to separate essential oils from plants. It was he who coined the famous phrase “Everything is poison and nothing is without poison; only the dose makes a thing not poison”, meaning that a substance containing toxic properties can only cause harm if it is present in a sufficiently high concentration. In other words, any chemical – even water – can be toxic if the body ingests or absorbs too much of it.
And we could continue with the same recommendations taken from the blogs of some influencers who offer recipes for natural cosmetics in which large doses of essential oils abound in products designed to be absorbed by our skin and which, if we follow them to the letter, are potentially very irritating. Such as, for example, those recipes with doses of essential oils and synthetic preservatives of one gram, etc. …
Antonia Jover, who also quotes Tisserand in her blog on scientific aromatherapy, discusses the proper use of essential oils which, as we have commented on other occasions, are a medicine and not a cosmetic product, and should therefore be used as such.
https://aromaterapiafamiliar.wordpress.com/category/aromaterapia-cientifica/
In this blog you can find extensive information of great value on essential oils and their uses in the field of health, which is not the same field as that of natural cosmetics, which is why the doses must be different. Cosmetics, as we always say, are not a medicine, unless we design them for that purpose, for example, balms, treatment shampoos, etc…
On the other hand, if you look at the composition of new-generation commercial natural creams, when essential oils are used, they appear at the end of the INCI because they are used in very small doses and with the precaution of not overloading the recipe with other potentially irritating elements, such as synthetic preservatives. In addition, in this recipe, lactobacillus ferments have been added to improve the overall tolerance of the product.
All these improvements make today’s synthetic creams much more tolerable than the old recipes were. For example, WELLEDA is also making use of such recipes with very low doses of essential oils and without the addition of extra synthetic preservatives to improve tolerability.
The INCI listed below is for a new serum from the Purèz brand, which is advertised, however, from 40 euros: Phytotherapy Revitalizing Face & Eye Serum/Cream BIO € 41,28 – € 82,60 Excl. BTW
Ingrediënten
Algae extract*, Dicaprylyl Carbonate, Aqua (Water), Ricinus communis* (Castor oil), Hyaluronic acid, Hydrolyzed Oat Protein, Glyceryl oleate, Cetearyl alcohol, Glyceryl stearate (Olive Oil*), Silica, CI77019 , Lactobacillus Ferment, Tocopherol (Natural Vitamin E*). Contains the essential oils of Citrus sinensis* (Sweet Orange), Pelargonium graveolens* (Rose Geranium), Rosa damascena* (Rose) Immortelle* (Helichrysum italicum).
*** In certified natural cosmetics – such as Purèz – the term perfume means ‘mixture of various natural essential oils’. In conventional cosmetics, the same term means “any possible mixture of fragrances, including chemicals and/or synthetic and even toxic fragrances”.
Such a composition would be comparable to the composition of Dr. Hauschka’s ROSE CREAM, which is included below:
Rose Cream, INCI: Aqua, Arachis Hypogaea Oil, Cera Alba, Althaea Officinalis Root Extract, Rosa Damascena Flower Water, Hypericum Perforatum Flower/Leaf/Stem Extract, Butyrospermum Parkii Butter, Sorbitan Olivate, Persea Gratissima Oil, Polyglyceryl-3 Polyricinoleate, Parfum*, Citronellol*, Geraniol*, Linalool*, Limonene*, Citral*, Farnesol*, Benzyl Alcohol*, Eugenol*, Rosa Damascena Flower Extract, Rosa Canina Fruit Extract, Copernicia Cerifera Cera, Zinc Sulfate, Lecithin, Rosa Damascena Flower Wax

In this image it is clear that the ingredients are natural, only a couple of strange names are emulsifiers, such as Sorbitol Olivate, which is also usually part of OLIVEM 1000, or Polyglyceryl-3 Polyricinoleate.
The following composition of the otherwise very popular OLAY REGENERIST cream shows a considerable difference in its composition:
INGREDIENTS: Water, Glycerin, Isohexadecane, Niacinamide*, Distarch Phosphate, Isopropyl Isostearate, Dimethicone, Panthenol**, Palmitoyl Pentapeptide-4***, Sodium Hyaluronate, Caprylic/Capric Triglyceride, Ethylhexylglycerin, Hydroxyacetophenone, Dimethiconol, Cetearyl Glucoside, Cetearyl Alcohol, Stearic Acid, Palmitic Acid, Stearyl Alcohol, Cetyl Alcohol, Behenyl Alcohol, Disodium EDTA, Sodium Acrylates Copolymer, PEG-100 Stearate, Titanium Dioxide, Mica, Phenoxyethanol, Fragrance, *Vitamin B3, **Pro-Vitamin B5, ***Peptide
Because, what is the point of making homemade natural cosmetics if not to create our own products for everyday use, adapted to our skin type, ecological, cheap, and that do not give us problems in frequent use because they only contain ingredients of vegetable origin and natural emulsifiers?
We also wanted to contribute a recipe for solid make-up, which we think is a great idea because, as it is solid, it does not require packaging or a water phase, which is the one that always causes conservation problems, given that water is the one that corrupts in the composition of any product that we are going to make by hand.
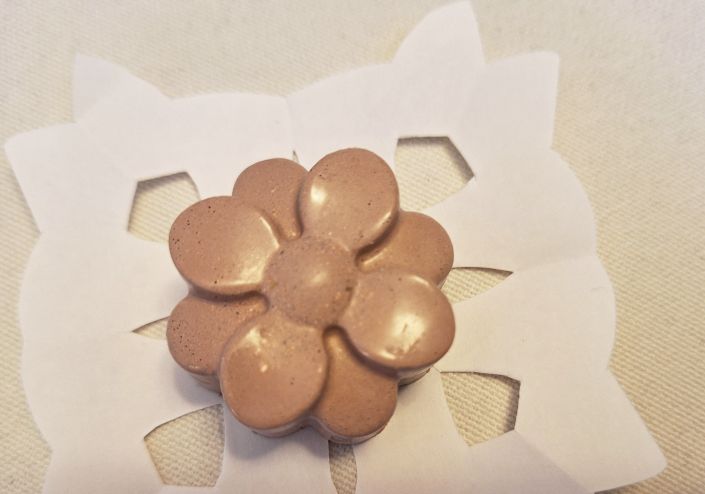
We have solved this, to a large extent, with our idea of using lime water in our compositions with aqueous phase, as it prevents the recipes from becoming corrupted. However, whenever we can prepare a recipe without using an aqueous phase, all the better, because we avoid the problem from the start.
In this case, we only need to add a little vitamin E, which will act as an antioxidant to extend the durability of the fats we use in our composition and prevent them from going rancid.
As we said, as it is a solid make-up base, it does not require preservatives😊.
And its second great advantage is that it already contains mineral sunscreen filters (zinc oxide), which means that it is no longer necessary to use other day creams with protection factors.

INGREDIENTS:
Beeswax, 10 g
Shea butter, 20 grs.
Zinc oxide, 15 g
Cosmetic grade iron oxide pigment, usually a ratio of 4 teaspoons Pinch brown oxide to 1 teaspoon pink oxide, and always testing and adapting to your natural skin tone.
And a few drops of vitamin E
PROCEDURE:
First, put the beeswax, shea butter and zinc oxide in a heat-resistant container, in this order. Place this container in a bain-marie until everything is melted and liquid.
When the base ingredients are melted, turn down the heat and it is time to add the pigments while whisking with a mini electric mixer so that the pigments are well integrated.
Now that we have our pigment well integrated, you will see that the mixture has risen in colour, remove from the heat and add the vitamin E (not before because the vitamin is thermosensitive).
Now we can pour our mixture into a silicone mould, and wait until it cools and solidifies before unmoulding.
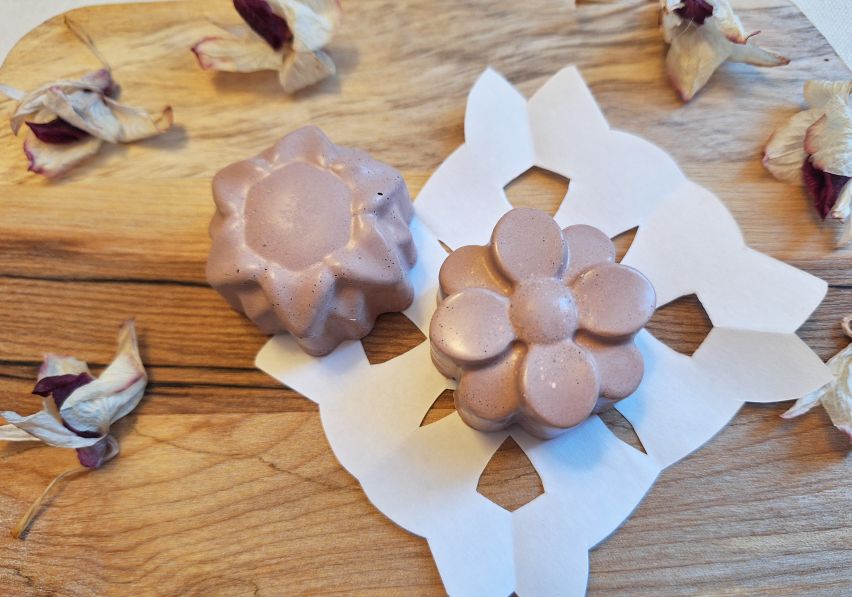
It’s that simple and, with this mixture, you get a spectacular foundation that covers all the imperfections of the face, even dark circles under the eyes. As it is super-covering, we advise you to use it sparingly.
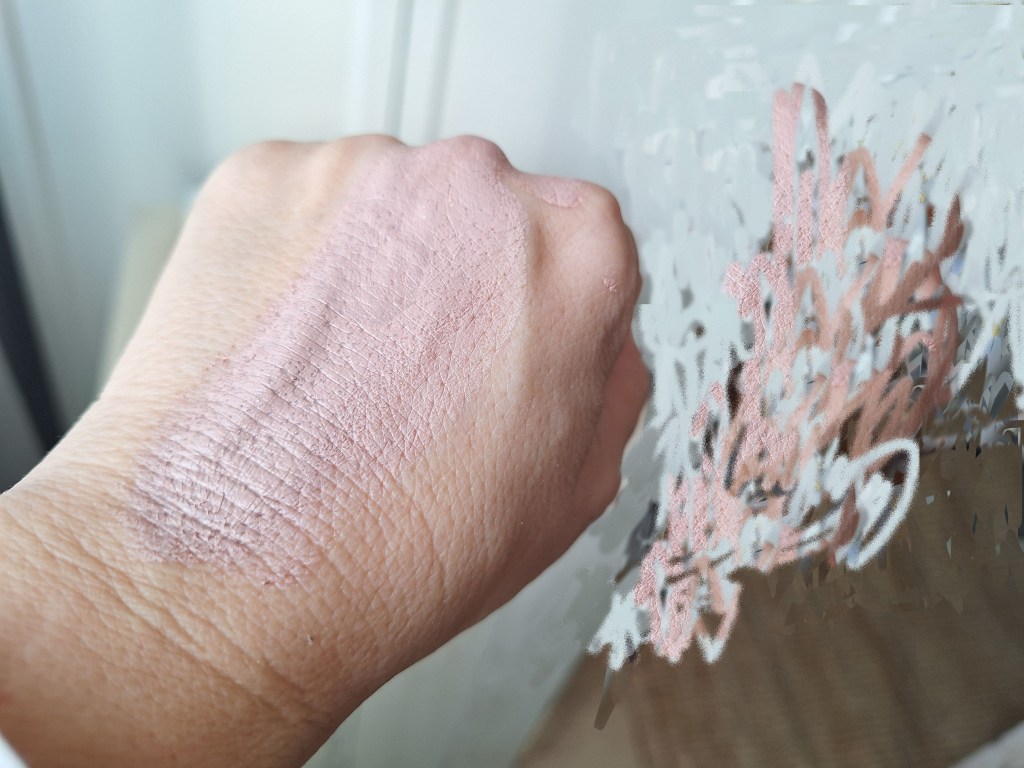
We like to use it on holidays, and the previous, gentler one, can be used every day as it is also photoprotective!
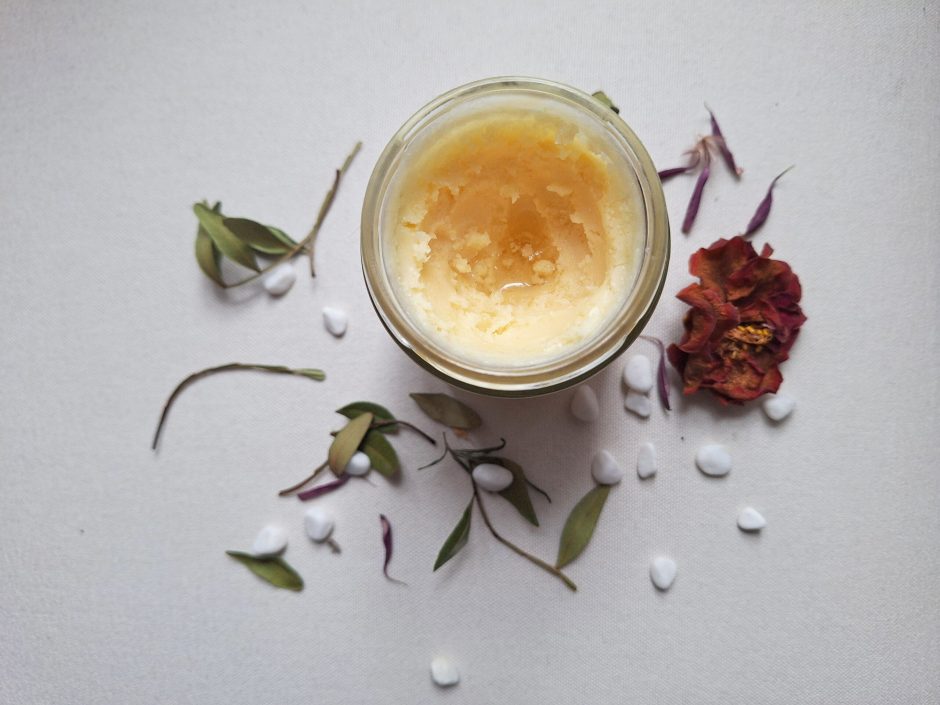
In a previous article we introduced the benefits of the bio lime liniment to treat babies’ bottoms and also as a body lotion in general, as it is a super greasy cream that absorbs very well and moisturises deeply.
In this article we would like to talk about a number of natural ingredients that are essential for natural health and for our homemade cosmetic preparations.

What do all these natural components have in common?
Not only are they all natural, unmanufactured ingredients with multiple properties for the care of our skin, but also, due to their intrinsic properties, they favour the final preservation of our homemade cosmetic products without the need to add synthetic preservatives.
Lime water, as explained in this previous article, is formed from slaked lime, or calcium hydroxide.
Lime is obtained from limestone rock extracted in quarries, which is transported to a factory where it is crushed and screened for subsequent calcination in kilns at a temperature of 900ºC. In this chemical reaction, CO2 is released and lime oxides remain. It is then cooled, stored and we have quicklime (lime oxide). This “quicklime” is then subjected to a hydration process, with the addition of water, to obtain hydrated lime powder, “slaked lime”, or calcium hydroxide.
For its cosmetic application, we add water to it again to form lime water.
WE REMIND YOU FROM OUR PREVIOUS ENTRY, FOR THIS, WE WILL NEED:
Half a litre of demineralised water and
About 5 grams of calcium hydroxide.
*If you do not have demineralised water, you can boil drinking water and let it cool.
INSTRUCTIONS:
Add a spoonful of 5 grams of calcium hydroxide (slaked lime) to the demineralised water, stirring well. After a short time you will see that the lime will sink to the bottom of the bottle.
Let it stand for an hour and then transfer the mixture with a funnel and a paper filter into a glass container.
This lime water can be stored for several months in a cool place. A part of it (100 ml) will be used to prepare our homemade liniment.
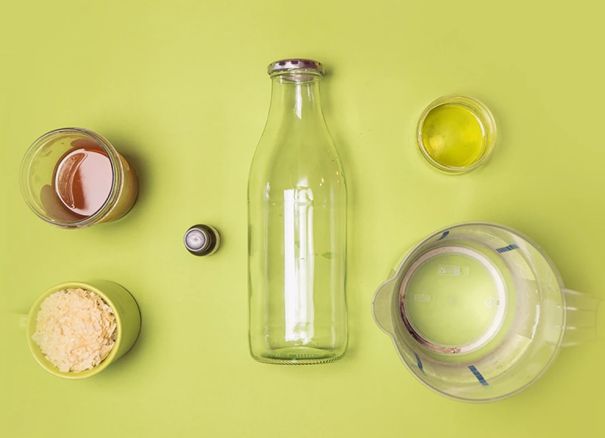
INGREDIENTS:
100 ml lime water
100 ml olive oil, lightly ozonised oil, or whatever oil you have available.
And about 5 grams of beeswax.
Procedure for preparing liniment:
Melt the beeswax in the olive oil in a bain-marie.
Remove from the heat and add the lime water, stirring constantly with an electric whisk. Leave to cool and then we can use our homemade liniment.
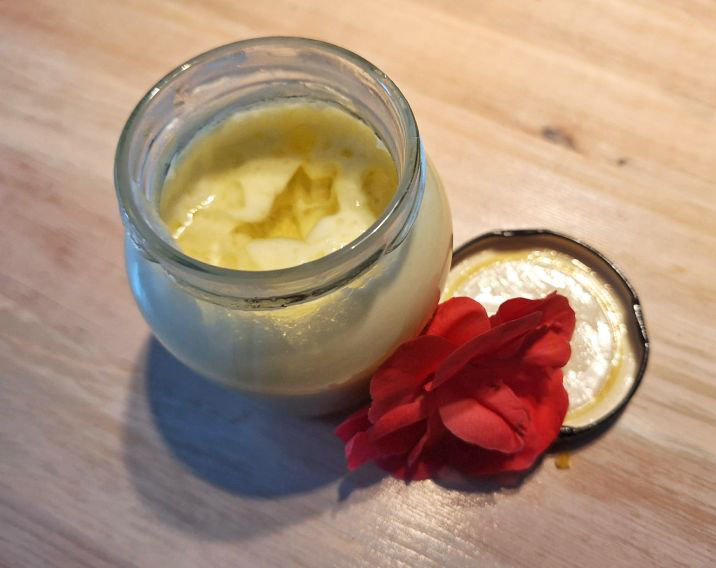
The web is full of blogs and recipes about natural homemade cosmetics that have very little to do with artisanal or sustainable cosmetics.
Mainly because the recipes they offer us are full of redundant or unnecessary, but expensive ingredients (here the suppliers of raw materials for natural cosmetics profit), synthetic preservatives (one gram or more is added per recipe) or, on the other hand, the miraculous essential oils.
And according to Ayurveda, Hippocrates’ maxim “let your food be your medicine” should also apply to the products we use to care for our skin and which, according to this age-old medical tradition, should also be food grade.
Your skin does not need medicines or essential oils, but nutrients, i.e. fats, oils and hydrolats, with a high capacity of absorption by our skin, and a high level of bioavailability.
We use essential oils* more with the idea of perfuming our preparations, always more advisable than a synthetic perfume for the properties they provide, and in minimal doses. In any case, essential oils are a medicine with enormous antibiotic potential.
If we decide to use them, a few drops will suffice, as they have a high biocidal capacity and no one wants to take antibiotics as a preventive measure any more, as in the past. Not to mention the fact that they need to be used with great caution in young children or pregnant women.
As an alternative, we have the hydrolats, obtained in a similar way, but much milder and much more suitable for our daily cosmetic products.
And, furthermore, if it is a totally natural product, (as one of the great advantages of making homemade natural cosmetics is that we do not need to add legally established preservatives to it in order to market it), we do not need to add any type of aroma to it. It will probably smell like food, which is a wonderful smell because it is the smell of the nutrients our skin needs.
The following recipe, for example, smells of natural aloe.
COCONUT OIL AND CURED ALOE GEL CREAM
Prior to making this recipe, you will need to cure the natural aloe gel obtained from an aloe stalk.
As you know, it is enough to soak the stalk overnight for a few hours to release a yellowish toxin that can be irritating. The next morning, cut the sides of the stalk with a knife and split it down the middle. This will make it easier to extract the gel from each half of the stalk with a teaspoon.

With some of these elements mentioned in the title of our article, such as lime water, we have created our own natural aloe vera gel (as it does not contain added silicones or synthetic preservatives, like commercial aloe gels) for personal use.
It is possible to use it, as in this case, as an ingredient to prepare another recipe, or also, in general, as a lotion after intensive sun exposure, or even as a gel for the treatment of skin acne, etc…
Ingredients:
3 parts natural aloe vera gel
1 part lightly ozonised vegetable oil
1 part lime water and, optionally, with the addition of 0.1 g of borax per 10 ml of water.
-A small teaspoon of honey if you are going to use it as an aftersun, given the reinforcing effect of honey in treating sunburn.
If you are not going to use it as a post-sun treatment lotion, our advice is to thicken it a little with natural vegetable glycerine, which will also add emolliency to the final result.
However, there are also other natural thickeners that you can use, for example:
1.- Xanthan gum, in a percentage of 1% of the total amount of gel you have.
2.- Sodium alginate, also used as a thickener in sauces and gelling agent in modern cuisine, in a percentage of 2-5%.
3.- Silica powder, or silicic acid, suitable for gelling both water and oil, as well as other types of liquids. In cosmetics, it is commonly used to make toothpaste, powder make-up and it is particularly suitable for oily skin as it increases the absorption capacity. It is used in a proportion of 5-10 %.
If you prepare this cream, you will find that the aloe it contains keeps all its properties intact for months, just like the rest of the cream. Just keep it in a glass jar at room temperature and away from heat sources.
Ingredients:
45 gr coconut oil
15 grams of beeswax
80 grams of aloe gel cured in lime water, with the addition of 1 gram of borax, as we are going to emulsify it with natural beeswax.
25 grams of lightly ozonised olive oil
*Just to remember that the addition of borax to our aloe gel, together with the lime water, although decidedly convenient in order to keep our gel in good condition, does not have the same emulsifying effect that is produced with beeswax without the addition of borax.
As we mentioned in our post on the calcareous bio-liniment, to emulsify a cream with an aqueous phase using beeswax, we will need to add one gram of borax for every 15 grams of beeswax.
However, in our case, we will observe that there is always a little residual water that is not emulsified because the synergy of lime water, borax and beeswax does not allow it.
It remains for a future article to check whether this same effect occurs using a different emulsifier, such as lanette wax, olivem 1000, or Emulsan …
PROCEDURE:
In a heat-resistant container, place the beeswax in a bain-marie until completely melted, and add the coconut oil and ozonised olive oil.
Next, add the 80 grams of aloe gel cured in lime water and borax and start to whisk the mixture.
Remove from the heat and pack. It’s as simple as that.
USES: You will find that this cream is almost an ointment with multiple uses that can be used daily without any contraindications.

WHAT IS THE BIOAVAILABILITY OF AN INGREDIENT?
In the context of nutrients and other dietary ingredients, bioavailability is similar to the absorption of the ingredient. You will find extensive information on this subject at this link.
https://bpspubs.onlinelibrary.wiley.com/doi/10.1111/j.1365-2125.2012.04425.x
Today, consumers of natural medicine are increasingly demanding the bioavailability of a product, which, in medical terms, refers to the ability of a drug or other substance to be absorbed and used by the body.
However, many of these consumers continue to consume commercial cosmetics and creams that, at the very least, leave the skin feeling “crusty”, if not irritated or reddened.
This often happens with the daily use (I want to clarify daily use because sometimes you try a cream one day and it seems to work well, but when you start using it daily then problems start to arise) of creams with a high load of synthetic ingredients whose bioavailability and therefore absorption level is low. What the skin cannot process, it expels in one way or another, as Hippocrates and Ayurvedic medicine explained thousands of years ago.
In addition, the use of toxic household cleaning products in our everyday environment, which are also likely to be inhaled, is also a major source of discomfort for people with asthma or allergies.
The success of the traditional calcareous bio-food based on lime water, beeswax and oil is undoubtedly due to the high bioavailability (and thus absorption and integration capacity) that results from the fusion of these three natural elements.
THE BIOAVAILABILITY OF MAGNESIUM OIL SPRAYS
As we mentioned, it often happens that a product gives us problems when we apply it because its composition uses elements and ingredients of synthetic or plastic origin, which are the ones that our organism and our skin rejects to a greater extent because it does not recognise them.
This is the case, for example, with magnesium sprays prepared from the magnesium chloride flakes that are sold for this purpose and which are obtained by chemical processes, as you know.
What is magnesium chloride and why is it so important?
Magnesium chloride, formula MgCl2, is an ionic mineral compound based on negatively charged chlorine and positively charged magnesium. Magnesium chloride can be extracted from brine or seawater and is a great source of magnesium.
As we said, it is found in unrefined salt and in various foods, and is very necessary for health as it is an essential mineral for the proper nutrition of our body. According to one study, it is estimated to be involved in 300 biochemical reactions. It regulates muscle and nerve function, supports immune system function, maintains heart rhythm and helps bones remain strong. It also helps to balance blood glucose and the production of energy and protein.
And although the magnesium chloride sold to us to make homemade magnesium oil is obtained, in principle, from seawater, it involves an electrolysis process known as the Dow process in which magnesium chloride is regenerated from magnesium hydroxide using hydrochloric acid: Mg(OH) 2(s) + 2 HCl(aq) → MgCl 2(aq) + 2 H 2O(l); or also from magnesium carbonate by a similar reaction.
On the other hand, if we use Nigari* salt, which is used not only as a coagulant in soya milk to make tofu in Japan, but also in the preparation of commercial breast milk formulas, we see that this salt is obtained completely naturally from the evaporation of seawater. It is therefore an all-natural magnesium chloride, so it is not fully refined (it contains up to 5% magnesium sulphate and various minerals).
*Nigari salt is a versatile product that can be used for a variety of purposes. It can be used as a food supplement, as a flavouring in food, as a bath salt, as a cleanser and as a medicine. It is also a good source of iodine, which is important for thyroid function.
The use of magnesium spray became extremely popular when it was realised that a large part of the population was deficient in this essential mineral element and that the use of a spray was more convenient and appropriate than taking supplements that did not always feel good.
However, if you have tried it, the commercial spray doesn’t feel good either and is itchy and sometimes tingling.
These sprays are prepared with magnesium chloride flakes, as follows, according to the “Mejor con salud” website: https://mejorconsalud.as.com/prepara-casa-propio-aceite-magnesio/
Ingredients:
½ cup magnesium chloride flakes.
½ cup water (125 ml).
A spray bottle for storing the mixture.
Try now to prepare the same magnesium oil spray, but using Nigari salt.
It is recommended to dilute one part Nigari salt to about 10 parts water for topical application to the skin.
Pack it, if possible, in a glass spray bottle and you can apply it at your discretion. You will see the difference.
You can even include this water base enriched with magnesium to prepare other types of products in contact with the skin such as deodorants, mosquito sprays, etc. …. without any problem and with the benefits of enriching your DIY product with natural magnesium.
WHY WERE CISTERNS COVERED WITH SLAKED LIME IN THE PAST?
The cistern was traditionally a reservoir for the collection and storage of rainwater. Cisterns take their meaning from the Spanish Arabic “algúbb”, which in turn comes from a classical Arabic term meaning cistern or well. It is a large reservoir that is generally located underground and its main function is to collect and conserve rainwater. Traditionally, these cisterns were made using construction materials that prevented water contamination. For this reason, its interior had to be well waterproofed and without cracks, to avoid water leaks.
The walls were plastered with a mortar of sand, lime and water and then painted with slaked lime. This ensured that the walls of the cistern were highly breathable and insulated against damp, as well as preventing mould and bacteria.
Although cisterns originated in Arabia, the Greeks and Romans also made good use of this invention. These Mediterranean peoples covered the internal walls of the cistern, in addition to this mortar of sand, lime and water, with red clay, iron oxide and mastic resin, a shrub that is common in Mediterranean areas and whose disinfectant properties are widely known in the field of natural medicine.
The combination of all these elements prevented leaks and water from rotting inside. This invention, as we said, was used for centuries to collect rainwater and then use it for domestic use, even to provide drinking water for animals or even humans.
Several decades ago in rural areas there were few households that did not have this receptacle to store water and save it for times of need.
https://materialesmodernos.com/construccion-de-un-aljibe-con-acabado-de-mortero-de-cal
Today, on small islands that do not have rivers or other sources of fresh water, rainwater is still collected and used for all kinds of purposes, thanks to the lining of the cistern walls with this purifying water.

This is why lime has traditionally been used extensively:
-It was used as a caustic and disinfectant to prevent insects from climbing fruit trees by applying lime to the trunk with a brush. It was also used to cauterise wounds on trees after pruning.
– As mortar or plaster, used in the construction of popular buildings, taking advantage of the quality of lime to acquire great hardness on contact with air. The slaked lime powder is mixed with sand and water to make mortar. The lime used in the mortar recovers CO2 from the atmosphere, recovering its original hardness and returning the water it took in during the slaking process.
– Production of mural paintings using the fresco technique. The process is the same, the layer of fine mortar is applied and while it is still soft, the fresco is made. The hard limestone layer, with the paint inside, makes the fresco highly resistant to external agents and the passage of time.
– For plastering, as in fresco, slaked lime mixed with fine sand is used to plaster buildings and give them a more aesthetic appearance and great protection against the weather elements, as this lime slurry, once dry, becomes a waterproof layer.
– In addition to the aesthetic factor, the whitening of walls also took into account their disinfectant power, so much so that on many occasions frescoes in churches were covered with layers of lime to prevent the spread of disease.
– Infection prevention in the case of burial of dead bodies during epidemics.
– Waterproofing of ponds and cisterns.
– Correction of the acidity of some agricultural soils.
What we want to expose in this article is the fact that the pharmaceutical industry, the commercial cosmetics industry and, in general, commercial interests are not always aligned with our interests as consumers.
It is for this reason that today they try to sell us plastic cisterns as a measure for greater environmental sustainability of water resources when, as we have already seen, the Arabs, Greeks and Romans knew perfectly well how to build a cistern so that the water would be kept in the best conditions of healthiness.
https://rotoplascentroamerica.com/que-es-un-aljibe-y-para-que-sirve
It is for the same reason that the use of borax has been demonised, while boron (food grade) is allowed to be sold, as it has been shown to be of interest for the health of bones and teeth, and in the prevention of arthritis and osteoporosis.
In fact, there is already talk that boron is to the parathyroid what iodine is to the thyroid.

The idea that borax is toxic is a myth perpetuated by the medical establishment, and the pharmaceutical industry because of the profit incentive to suppress natural medicines while patenting things that can treat, but not cure, hooking you into the medical and pharmaceutical system with the idea of maximum profits.
Borax is safer in toxicity than salt, and Dr Newnham’s work shows that it can actually cure arthritis and osteoporosis. The problem is that it is very cheap, even commercially available boron supplements are cheap.
Theoretically, you should be able to get it through dietary intake, except that the use of chemical fertilisers inhibits the uptake of boron from the soil by plants. Anyone who says you can get it in food doesn’t understand soil depletion.
According to this researcher, boron deficiency causes the parathyroids to become overactive, releasing too much parathyroid hormone which raises the level of calcium in the blood by releasing calcium from bones and teeth. This leads to osteoarthritis and other forms of arthritis, osteoporosis and tooth decay.
With age, high blood calcium levels lead to calcification of soft tissues, causing muscle contractions and stiffness; calcification of endocrine glands, especially the pineal gland and ovaries; arteriosclerosis, kidney stones and calcification of the kidneys, ultimately leading to kidney failure. Boron deficiency combined with magnesium deficiency appears to be particularly damaging to bones and teeth.
In the past, boron was used as a food preservative in many countries. Today, people have stopped using it for reasons that are unclear, and in the United States and China they prefer to use chlorine and arsenic to preserve vegetables and rice. Both are much less good for health (to put it mildly) than boron.
And it is the same idea that every year old patents for medicines, which in their day fulfilled their functions perfectly, are discarded and replaced by new patents, which are much more expensive because they are new, and which comply with the excuse of being more effective. More effective for what? To treat us chronically for ulcers, cholesterol, sugar or allergies without curing us of anything because now it is said that, as these disorders are chronic, we have to continue taking the pills all our lives.
However, the best cream that can be prepared with an aqueous phase, and to which no preservatives need to be added, is made from the chemical emulsion of boron with beeswax.
Borax is the only natural element that makes it possible to use beeswax, together with water, without it going out of phase, as it produces a chemical emulsion of the beeswax. The small addition of borax therefore allows us to use the most natural emulsifier there is, beeswax, to prepare a particularly moisturising cream for the driest skins.
https://naturamatters.com/2022/06/20/balsamic-resins-in-dermo-cosmetics
This cream, under a similar recipe, was in the Middle Ages a galenic preparation known as Cerate of Galen, the famous physician of antiquity.
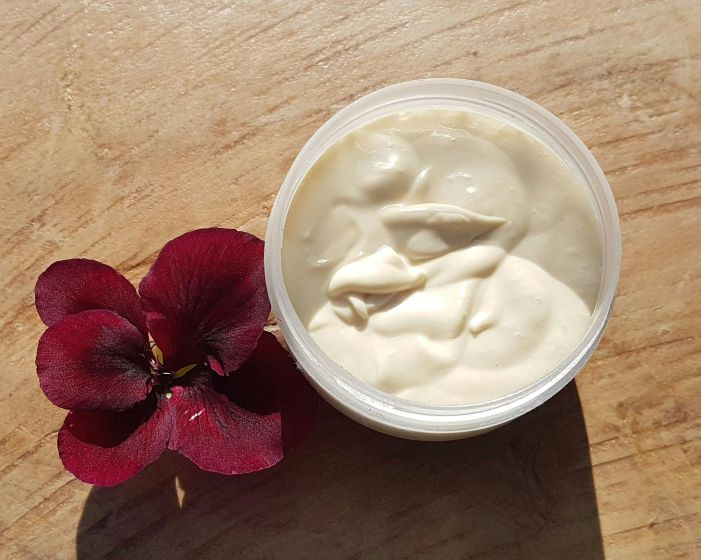
Ingredients:
53.50 g of a quality vegetable oil.
33 g of a hydrolat of your choice, or distilled water.
13 g beeswax.
0.5 g borax* (which acts as an emulsifier as well as a preservative).
Optionally, a few drops of tincture of benzoin, which, in addition to its properties, gives this cream an excellent aroma.
PROCEDURE:
Melt the beeswax and the oil in a bain-marie. At the same time, heat the hydrosol to the same temperature and add the borax. Both phases should be at a maximum of 70 degrees.
When the wax and oil mixture is completely melted, add the water and borax mixture a little at a time, while whisking vigorously.
Finally, pour the cream into a glass container, if possible.
The only preservative, as well as co-emulsifier, in this aqueous phase preparation is borax, so using a glass container will extend its shelf life and keep our cream in better condition.
The other forgotten element of the natural pharmacopoeia is honey. Honey should never be missing in our natural cosmetic preparations.
Honey is a natural preservative, which means it can last a long time without spoiling. In fact, thousands of years old honey has been found in Egyptian tombs that have not lost their properties. The natural acidity and low moisture content of honey keeps it edible for a long time if it is properly sealed. Under the right conditions, even if it crystallises, a jar of honey could technically be edible forever.
Since ancient times, it has been used in many medicinal preparations. Hippocrates already spoke of herbal infusions in honey and vinegar, which he called “oxymeli”. “You will find that the drink called oxymeli is often very useful… because it promotes expectoration and respiratory freedom” (Hippocrates, 400 BC).
Derived from the Greek word oxymeli, which translates as ‘acid and honey’, the use of oxymel has been documented since the time of Hippocrates as a means of using and extracting herbs whose taste is unpleasant (Hippocrates, 400 BC). These herbs are often the more pungent aromatics, such as garlic (Allium sativa) and cayenne (Capsicum annuum), which also play a supportive role for the immune and respiratory systems (Green, 2000).
Both apple cider vinegar and raw honey are common kitchen allies that can be used to soothe the throat, calm a cough or boost the immune system in case of colds and flu. When combined with complementary herbs, oxymels offer potent – and tasty – support in times of illness or compromised immunity.
This is why many traditional oxymel recipes are known:
Ingredients
1 part herbal vinegar
1 part honey with herbal infusion
Instructions: Combine the infused vinegar with the infused honey in a sterilised glass jar. Mix well with a clean, dry spoon until both preparations are completely combined. Label and store in a cool, dry place for 6 months.
Note: Oxymels should be stored in glass jars with plastic lids, as the vinegar in the mixture will corrode metal lids. If plastic lids are not available, a piece of parchment or wax paper can be placed between the jar and the lid.

Ingredients
Dried herb of choice
1 part apple cider vinegar
1 part raw honey
Instructions: In a clean, dry one-litre jar, place enough dried herb to fill ¼ of its capacity.
Cover the herbs with the vinegar and honey until the jar is full or slightly less full (ensuring that the ratio of herbs to vinegar and honey mixture is approximately 1:3).
Stir the mixture with a clean, dry spoon, screw on an airtight plastic lid and shake until well mixed.
Store the jar in a cool, dark place and shake it every two days.
After a few weeks, simply strain the mixture and store it in a glass jar.
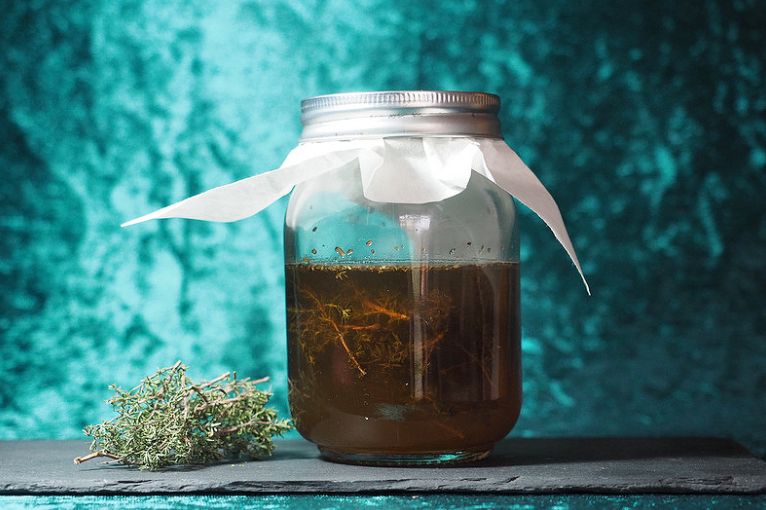
Our daily use vaginal soap preparations based on honey and coconut betaine keep for months and months. Most importantly, they can be used daily without irritation.
https://naturamatters.com/es/2021/02/18/gel-de-higiene-intima-a-base-de-miel
In this previous article we showed you how to prepare a homemade daily intimate cleansing gel based on honey and coconut betaine.
Ingredients:
2 parts raw honey
1 part coconut betaine surfactant.
Optionally, some people add a few tablespoons of vegetable oil, but since oil and honey are immiscible, you will have to shake the mixture each time.
USAGE: A few drops in a tub of hot water will be enough to make you feel clean.
Always bear in mind that, although washing with this gel prevents infections and problems, if you have a recognised vaginal infection, you will need to use biocidal washing gels.
Also, if you have problems with dermatitis or atopic skin, it is important that you do not use aggressive shower gels; therefore, this gel based on honey and coconut betaine can be an excellent alternative for you.
Honey and oil shower gel
As we said, natural honey is immiscible with vegetable oils, so if you decide to add oil to your honey and coconut betaine mixture, you will always have to shake it beforehand.
Personally, I have doubts that the addition of oil will actually be helpful in this mixture, so I simply use the familiar gel recipe with 2 parts honey to 1 part coconut betaine.
A few drops of this gel on the sponge bath will be enough to lather up without any problems, but if you find it sticky, you can adjust the quantities and add more of the surfactant betaine and less of the honey.
And while there are many other natural coconut oil-derived surfactants available today that lather better, coconut betaine is still the mildest and most natural surfactant I know of.
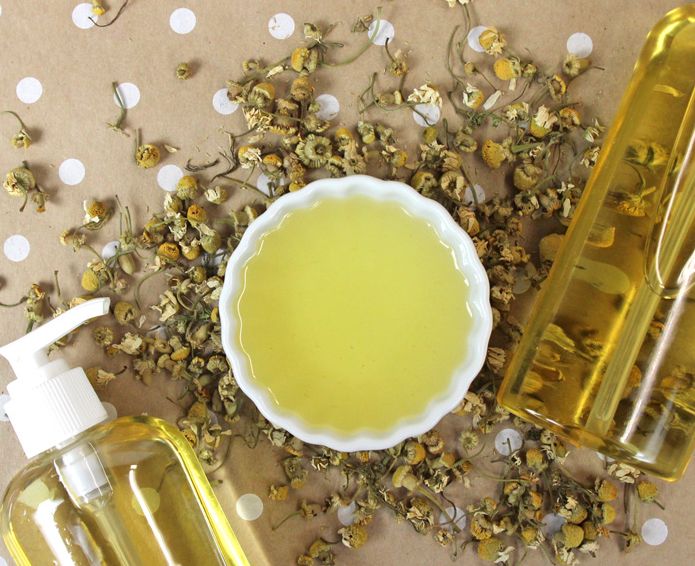
Again, this recipe may not appeal to someone with normal skin, but if you have sensitive or atopic skin, you need to use specially formulated gels and bath oils to avoid destroying your skin’s lipid barrier and exacerbating the problem.
This bath oil has honey in it, because of its enormous skin-loving properties and its probiotic capacity; but, as we said, honey is immiscible with oils. However, there is a little trick to integrate it by using stearic acid and the liquid surfactant betaine. Although, in principle, stearic acid is not an emulsifier, in some cases it can act as one.
Ingredients:
One tablespoon of raw honey (about 15 g)
One teaspoon of stearic acid (about 10 g.)
About 150 ml of a mixture of oils of your choice. Example: 100 ml almond oil, 50 ml macadamia oil…
35 ml of coconut betaine. You can use another surfactant that produces more foam, but it must be liquid to emulsify the mixture of honey and oils.
Optionally, coconut C02 extract for its aroma and properties.
Procedure:
Start by heating the honey, in which we melt the tablespoon of stearic acid.
When everything is dissolved, add the oils and, finally, the coconut betaine, whisking well so that all the elements are integrated.
Optionally, add a few drops of the C02 extract of your choice.
USE: A few drops in the bath or on your bath sponge if you use it in the shower will suffice.
Green, J. (2000). The herbal medicine-maker’s handbook: A home manual. Berkley, CA: Crossing Press.
Hippocrates (400 B.C.E.). On regimen in acute diseases. Retrieved from http://classics.mit.edu/Hippocrates/acutedis.html.

The use of liniments dates back to the time of the Renaissance physician Paracelsus. Liniments became popular in the mid-1800s and early 1900s as “cure-alls”. Although they do not cure everything, today’s liniments are easily made at home with safe ingredients and can be very effective in treating some ailments.
Depending on the ingredients, liniments can be used to: disinfect cuts, minimise the appearance of varicose veins, rubbed on bruises to heal them more quickly, or for what they are best known for: helping to relieve arthritis, aches and pains and associated discomfort.
A liniment is a natural preparation that is less thick than an ointment and is based on oils or balsams and alcohols. It is usually applied externally as a treatment for rheumatism and bruises in combination with massages and frictions.
A wide variety of other uses are possible. In France, for example, a liniment traditionally used to cleanse and protect babies’ skin from nappy rashes has become very popular. It is as easy to prepare as combining olive oil and lime water, sometimes with a little beeswax. And it works very well because the liniment, which has a basic or alkaline pH (the opposite of acidic), when it comes into contact with acidic faeces and urine, neutralises them, thus preventing skin irritation.
Liniment oleo-calcareous is an ancient liquid that was originally intended to combat superficial burns. Little by little, it has been used more and more for babies’ bottoms.
The brand mustela, for example, has a commercial version of this liniment. Of course, it is best to choose one without additives, so if you prepare it yourself, you can be sure of its composition.

The homemade oleo-lime liniment in our recipe is an oily, greenish-yellow mixture made from olive oil (or other vegetable oil) and lime water. The word comes from the Latin “linimentum”, which means “to anoint”, i.e. to rub with an oily substance.
This liniment, among other virtues, is super-fatty and leaves a protective film on baby’s skin, preventing skin irritation caused by wetness or rubbing from nappies. Therefore, there is no need to rinse it on the baby’s bottom, as its basic pH neutralises the acidity of urine. In short, the liniment cleanses the baby’s bottom (thanks to the action of the lime water) while nourishing, moisturising and protecting against future aggressions by leaving a protective film on the skin.
On a general level, as a skin care product, it has a great associated value because, as you know, the level of absorption and hydration of a cream in the skin depends on how natural its components are. This is what happens with this liniment made up of 3 totally natural ingredients: beeswax, oil and lime water. Such a simple product, but which turns out to be enormously emollient due to its great absorption capacity in the skin.
-It can help prevent the appearance of stretch marks, so it should be used on affected areas, especially for expectant mothers during pregnancy.
-It also soothes and softens episiotomy scars and sensitive nipples during the first days of breastfeeding.
It can also be used to treat baby cradle cap or even as a make-up remover as long as we take into account its basic pH and then rinse with water or a hydrosol adapted to our skin type.
-In personal care, if we use a little borax and ozonised oil, as we will see below, it can be very useful in the treatment of sensitive or itchy skin.
In fact, if you are looking for a multi-purpose skin care product, this liniment is what you need to prepare, because despite the mismatch of beeswax and lime water (we are talking about the original recipe) it is preserved for a long time due to the intrinsic antiseptic properties of this combination. As it avoids the use of chemical preservatives, it is an ideal product to spread on the skin of the whole body, and even on the face it is very moisturising.
In addition to being an ideal alternative for changing the baby, we must bear in mind that industrial baby cosmetics still too often contain toxic substances. In addition, sanitary towels generate a considerable amount of waste…
The recipe for this homemade liniment could not be simpler. Simply add 50% lime water and 50% olive oil, which are mixed vigorously in a bottle. The only drawback of this product is that the two phases of the solution tend to separate. You will need to shake the bottle before each use.
If you prefer to avoid this process of shaking the bottle before each use, you can add a cosmetic emulsifier such as lanette wax.
If you use beeswax, which as you know is not suitable for emulsifying oils and liquids, the phases will also end up separating, although, with a little more beeswax, it becomes quite thick and can be used as it is, as the lime water, after mixing, is also healing.

To prepare about 200 ml of this liniment, we will need:
100 ml of lime water
100 ml olive oil
And about 4 grams of beeswax
However, beeswax is the most natural and ecological alternative that also provides emolliency and innumerable properties to the skin, making our liniment, despite the gap, have a smoothness that is not possible to achieve without this addition.
As we said, the dis phase of the water solution is not really a problem since this combination of oil, wax and lime water has a long durability due to the antibacterial properties of lime water (the solution of sodium hydroxide* in water) which prevents our liniment from spoiling quickly.
*Water hydroxide dissolved in water is also known as slaked lime.
Therefore, here is our favourite recipe for preparing our chalky bio-liniment. It would be, like the previous one, with beeswax, but, instead of simple olive oil, we would prepare it with a marigold oil.
To prepare about 200 ml of this liniment, we will need:
100 ml of lime water
100 ml of marigold oil*, macerated for example in virgin sunflower oil.
And, optionally, about 6 grams of beeswax.
I have to add that if we decide to add borax to our liniment, to emulsify the beeswax, it will not emulsify completely because lime water has intrinsic preservative properties, as well as borax, which do not amalgamate well in this type of synergy.
A very different case is when we only use distilled water with borax, oil and beeswax. In this case, and as long as we respect the proportions (one gram of borax for every 15 grams of beeswax), we will obtain a complete emulsion in which there will be no traces of water left without emulsifying because there will be no dis phase.
In this blog we would also like to propose an alternative recipe with a slightly ozonised, edible-grade olive oil, which not only prolongs the shelf life of the recipe, but also provides extra care for babies with nappy rash or, if used for personal care, is particularly suitable for dermatitis with associated itching or pruritus.
Our recipe for about 200 ml of liniment would be:
100 ml of lime water
100 ml lightly ozonised olive oil (food grade)
And about 6 grams of beeswax.
INSTRUCTIONS:
Lime water must first be prepared. Lime water is a calcium hydroxide solution obtained by mixing air lime (slaked lime) and water. It has antiseptic and cleansing properties. It cleanses the skin and balances its pH, which tends to acidify with urine.
Although it is possible to replace olive oil with other vegetable oils, it is not possible to replace lime water.
To do this, we will need:
Half a litre of demineralised water and
About 5 grams of calcium hydroxide.
Preparation lime-water instructions: If you do not have demineralised water, you can boil drinking water and let it cool.
Once cold, you can add the tablespoon of calcium hydroxide, stirring well. After a short time you will see that the lime will sink to the bottom of the bottle.
Let it stand for an hour and then transfer the mixture with a funnel and a paper filter into a glass container. This lime water can be stored for several months in a cool place. A part of it (100 ml) is used to prepare our homemade liniment.

Avoid leaving the lime water in the water for more than an hour because then the water will take on too much of the lime smell, which is not unpleasant, but it is better for our preparation to have a good aroma.
Our lime water is now ready. There may be small, whitish calcium carbonate crystals that form in contact with the carbon dioxide (CO2) in the lime water. They are harmless and do not affect the water quality. If they really bother us, we can always filter the lime water again.
Melt the beeswax in the olive oil in a bain-marie.
Remove from the heat and add the lime water, stirring constantly with an electric whisk. Leave to cool and then we can use our homemade liniment.
As always, it is best to have a glass container with a dispenser to ensure longer shelf life.
APPLICATION: Apply with cotton wool or a washable wipe, and do not rinse, it is not necessary. As a precaution, we always recommend testing the elbow crease before application to check for allergic reactions. Lime water has a high pH. It should therefore not be applied directly to the skin. However, mixed with an emulsified fatty substance, it is harmless.
We have taken as a reference to write this section of homemade liniment base recipe the blog of: “thenerdyfarmwife.com”.
Unlike herbal oil macerates (known as oleates or oleates), traditional liniments, in the American herbalist tradition, are made with water-based ingredients that evaporate quickly from the skin.
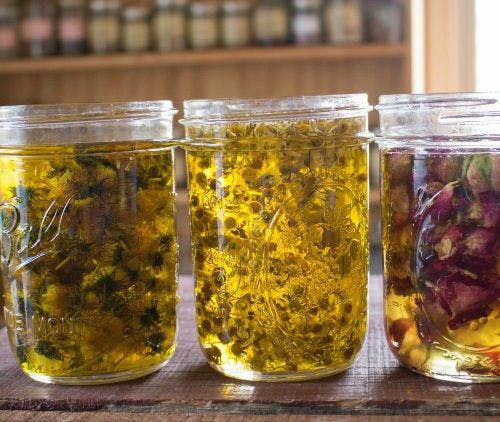
According to the Central European herbalist tradition, as we will see below, herbal oils and tinctures infused in equal parts in alcohol are used. And, optionally, essential oils are added.
We have included a list of the most suitable substances as “vehicles” for the preparation of our homemade liniments.
Witch Hazel Decoction: Calms and soothes redness and inflammation, helps reduce swelling, useful for bruises, insect bites, sunburn, varicose veins; the disadvantage is that witch hazel extracts herbs somewhat less effectively than stronger alcohol preparations; witch hazel is a good balancer that softens the drying effect of vodka/alcohol.
Vodka, whisky or high proof rum: Extracts most herbs very effectively, especially the resins; the drawback is that pure vodka/liquor dries out the skin; using a large proportion of witch hazel decoction (50 to 60%) combined with alcohol can give us the best of both ingredients.
Ethanol: Also known as ethyl alcohol or grain alcohol, ethanol is a clear, colourless liquid that serves as the main ingredient in alcoholic beverages such as beer, wine or brandy. It is a renewable product of organic origin. Because it can be easily dissolved in water and other organic compounds, ethanol is also an ingredient in a variety of products, including as a fuel substitute, hence it is also called burn alcohol. But be careful, because not all burning alcohols are natural like ethanol.
Isopropyl alcohol (rubbing alcohol): This is a classic liniment base, fast-acting and very effective, but also the least natural option on the list. In this case, many herbalists skip the “only natural ingredients” rules and use isopropyl alcohol for liniments because of its high level of efficacy. While it is not a natural option, as it volatilises quickly, it is hardly absorbed by our skin, making it an ideal vehicle for the herbal active ingredients that we actually absorb.
However, it is best to avoid using this alcohol, or even vodka, if you are sensitive to them. The safest bet in that case is apple cider vinegar or apple cider vinegar.
Apple cider vinegar: Liniments can be made with vinegar if alcohol is to be avoided; the main drawback is the strong vinegar smell, but this can be softened by diluting it with witch hazel.
Vegetable glycerine: Vegetable glycerine can also be added to some of the mixtures to soften them. If we feel that our homemade liniment dries out the skin too much, we can add a few drops of glycerine. Too much glycerine will make the texture too sticky, so it is best to try a few drops and add more, gradually, if necessary.
It is possible to mix and match ingredients; for example, it is possible to use half witch hazel and half vinegar. Or 75% witch hazel and 25% organic alcohol.
When preparing our liniments, as with almost any other homemade preparation, it is best to use dried herbs that will provide a longer shelf life for our ointments and liniments.
Many of the herbs listed below are warming, which means they stimulate circulation and reduce stiffness.
Cooling herbs can be useful when there is redness and swelling and we are looking for a cooling/warming effect.
Antimicrobial or antiseptic herbs are used in some liniment recipes to heal cuts and sores. The resins should be crushed or pulverised and are best extracted with some form of alcohol.

Arnica (Arnica montana) for bruises, swelling, pain, arthritis, aches, pains, do not use arnica on broken skin or cuts.
Juniper berries (Juniperus communis) to warm, stimulates circulation
Wild bergamot (Monarda fistulosa, M. spp.) Anti-inflammatory, antimicrobial, helps rheumatic joints
Calendula (Calendula officinalis) antimicrobial, repairs damaged skin, for varicose veins
Cayenne (Capsicum annuum) reduces the sensation of pain, gives warmth, use very little to avoid burning the skin.
Comfrey (Symphytum officinale) for bruises, sprains, relieves pain, useful for bone injuries, do not use on open wounds.
Willow bark (Salix alba) anti-inflammatory, rich in the analgesic salicin (a compound similar to aspirin), for persons over 16 years of age, not suitable for pregnant women, nursing mothers, consult a doctor if taking anticoagulants.
St. John’s wort (Hypericum perforatum) especially useful for nerve pains, varicose veins, swelling
Helichrysum flowers (Helichrysum italicum) for pain, bruises, sprains and varicose veins.
Ginger (Zingiber officinale), warming, increases circulation
Lavender (Lavandula angustifolia) leaves and flowers, refreshing, for all skin types.
Chamomile (Matricaria chamomilla) reduces inflammation, soothes irritated skin
Peppermint (Mentha x piperita) refreshing, pain relieving (although the herb is very mild, the menthol crystals will be much stronger)
Yarrow (Achillea millefolium) anti-inflammatory, helps with cramps, pain, varicose veins and irritated skin
Meadowsweet (Filipendula ulmaria) rich in pain-relieving salicylic acid; avoid or seek medical advice in advance if allergic to aspirin
Rosemary (Rosmarinus officinalis) stimulates circulation, helps with sore joints
Marshmallow root (Althaea officinalis) very soothing, refreshing
Valerian root (Valeriana officinalis) can be used externally as a mild relaxant and for sore muscles.
Goldenseal (Hydrastis canadensis) potent antiseptic, use small amounts (1/4 tsp at a time), slow-growing endangered woodland herb, use Oregon grape (Berberis nervosa) as a substitute if necessary.
Goldenrod (Solidago spp) for general aches and pains
Violets (Viola odorata, V. spp.) refreshing, soothing, helpful for lymphatic inflammation.
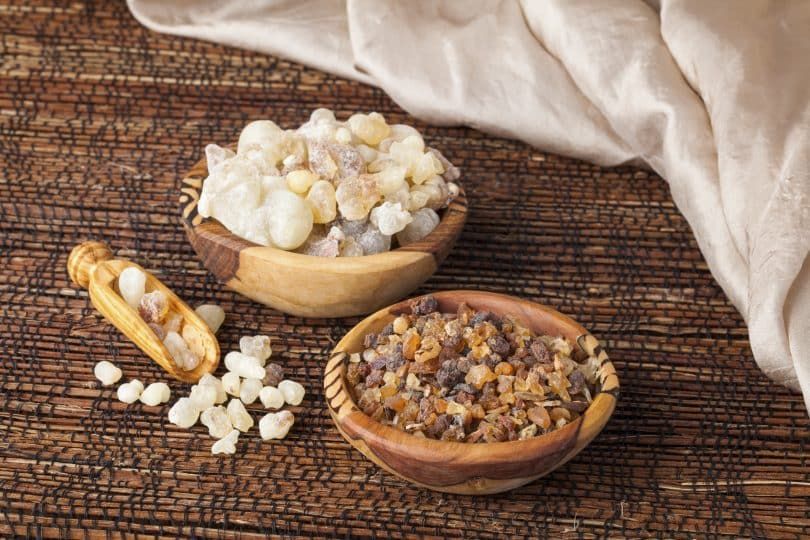
Frankincense resin (Boswellia sacra) anti-inflammatory, relieves pain
Myrrh resin (Commiphora myrrha) anti-inflammatory, antiseptic,…
Pine resin (Pinus strobus, P. spp.), warming, used for arthritis, joint stiffness and rheumatism; pine needles can also be used in infusion.
Dragon’s blood resin (Daemonorops draco, Croton spp., etc.) for wound healing, inflammations and rheumatism
Menthol crystals: Menthol crystals add a cooling and analgesic sensation to homemade liniments.
Menthol crystals are strongly scented solid crystals that have been extracted from the essential oil of peppermint or spearmint. Menthol is a common ingredient in commercial pain preparations because it produces a cooling and analgesic sensation when applied to the skin.
Before adding to the liniment, the crystals should be dissolved in a small glass or glass bowl with a tablespoon of natural alcohol (ethanol) or vodka.
Once stirred and completely melted in the alcohol, we can add the menthol mixture to the finished liniment.
Menthol is used in small quantities, usually between 1 and 2% of the recipe. That is, between 0.6 and 1.2 ml of the mixture is added to the liniment. Higher amounts are usually too strong for sensitive skin.
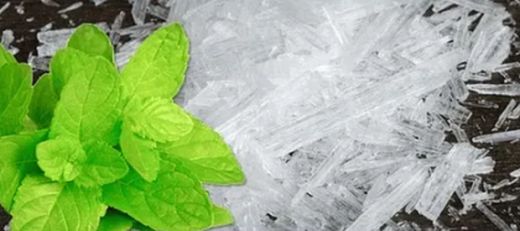
Fill a jar with herbs, preferably dried, to 1/3 or 1/2 of its capacity.
Next, cover the herbs with alcohol, witch hazel and/or vinegar. Whatever combination you prefer, but make sure that the herbs are covered by at least several centimetres of liquid.
Stir well, cover and leave to infuse for 3 to 4 weeks, or even 6 weeks if desired.
Strain and you have your homemade liniment. It is best to label it with the date to avoid confusion.
Caution: If we have used vinegar in our recipe we will make sure that the lid is not made of metal, or the acid will start to form corrosion, which we do not want in our product.
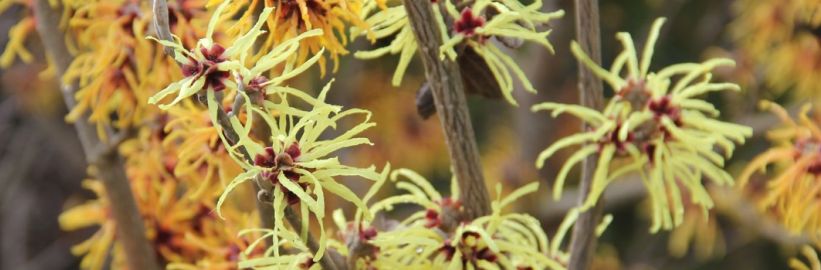
You will need about 20 grams (a couple of tablespoons) of witch hazel bark, but a mixture that includes the bark is better, and about 500 ml of water.
To make the decoction:
In a saucepan, bring the water to the boil with the 2 tablespoons of witch hazel bark. Keep it on a low heat, without boiling, for about 20-30 minutes.
The volume will be reduced by about half, and you will get about one cup of witch hazel extract, after filtering (paper filter) the remains of the plant.
While simmering, our house will smell a bit like a hospital. The aroma is not unpleasant, but it smells strongly antiseptic, like an operating theatre after sterilisation.
The witch hazel water is now ready for use. As it is not preserved with alcohol, it will spoil quickly. It should therefore be kept in the refrigerator and used within a week.
However, if we want our extract to remain stable, it is possible to add alcohol to it. In this case, instead of calling it witch hazel water, we will call it stable witch hazel extract.
How to prepare a long-lasting witch hazel extract.
If we want to make a stable witch hazel extract, we need to add an alcohol of organic origin. Vodka, whisky or high-proof rum work well (isopropyl alcohol also works, but then it is not suitable for internal use).
For good preservation, the mixture needs the addition of at least 20% alcohol. Some sources suggest 25% to make the extract really stable.
In this case, assuming that we have about 250 ml of witch hazel water left after the decoction, we will need to add about 60-65 ml of vodka.

Well, we have found some interesting recipes in the alternative natural literature that have probably become famous for their effectiveness.
Available in Rosemary Gladstar’s book “Medicinal Herbs: A Beginners Guide”, this very old and effective recipe was first published by the famous herbalist Dr. Jethro Kloss in his classic book “Back to Eden” in 1939. Kloss’ liniment is very useful for relieving occasional muscle aches and pains. Instead of goldenseal, chaparral or Oregon grape root can also be substituted.
Ingredients:
Approx. 20 g of organically grown echinacea powder
about 20 g goldenseal powder (chaparral or Oregon grape root can be substituted)
about 20 grams of powdered myrrh resin
about 5 g cayenne pepper powder
Half a litre (500ml) rubbing alcohol.

INSTRUCTIONS:
Place the powder in a jar and cover it with rubbing alcohol (food alcohol can be used, but rubbing alcohol seems to work best), leaving a good 2 inches above the herbs.
Cover with an airtight lid and leave to stand for 4 weeks.
Strain it and re-bottle it and label it “For external use only” and you are ready to use it.
How to use: Remember that it is best to rub gently into the skin and allow it to evaporate. Always be careful not to rub too hard or vigorously, as this may cause irritation.
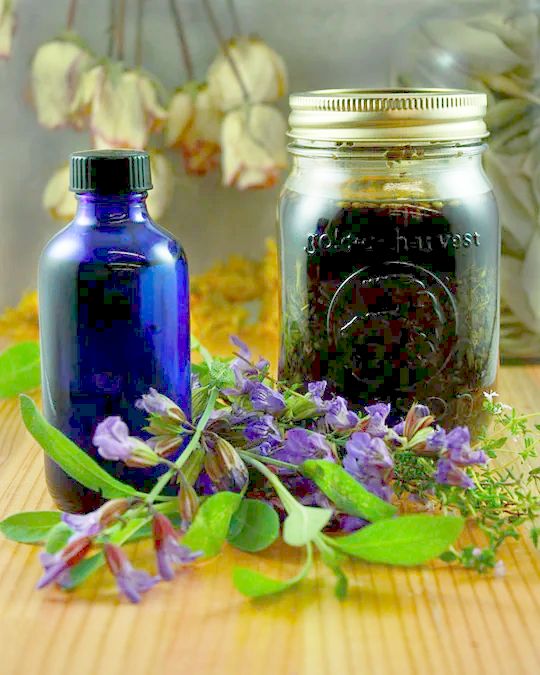
To prepare it, you will need:
20 grams of dried arnica flowers, can be replaced by goldenrod
1/3 cup vodka or ethanol
1/2 cup witch hazel water, or enough to fill the jar
Half a teaspoon of menthol crystals, dissolved in 1 tablespoon of vodka or ethanol.
PROCEDURE:
Place the herbs in the jar and cover them with the vodka or alcohol. Stir well and fill the jar to the bottom with witch hazel, leaving a space of a few centimetres at the top to allow the herbs to expand.
Cover and leave to infuse for 3-4 weeks, stirring frequently.
After the infusion time has elapsed, strain it through a paper filter into a clean jar.
In a small bowl, dissolve the menthol crystals in 1 tablespoon of vodka or alcohol until completely melted.
Add the menthol-alcohol mixture to the strained liniment and stir well.
USE: Test the finished liniment on the inside of the arm to prevent possible allergic reactions before spreading it on sore areas of the body. Menthol can sometimes cause slight irritation. This liniment should therefore never be applied to wounded or irritated skin. The sore areas are usually rubbed a couple of times a day to relieve the pain.
Author: Agatha Noveille from the website https://scratchmommy.com/what-are-herbal-liniments-and-a-soothing-muscle-liniment-recipe/
Ingredients:
Witch hazel extract. If possible with the following percentages: 86% witch hazel extract and 14% organic alcohol or ethanol.
Dried herbs of your choice, such as: arnica, comfrey, goldenrod, mugwort, and/or St. John’s wort. Peppermint leaf is also great for cooling, and calendula is always a wonderful addition to liniments.
INSTRUCTIONS:
Fill a clean glass jar halfway with the herb or herbs of your choice and add enough witch hazel extract to completely cover the herbs, with alcohol about an inch or two above them.
Let the liniment infuse for at least two weeks (4-8 is optimal) in a cool, dark place. Every day or two, check the liniment and add more witch hazel if the herbs have absorbed it.
After the desired infusion time has elapsed, strain the liniment and pack it in a small spray bottle for easy application.
Notes: A good idea is to take note of the herbs we have used and the proportions. This way, we can prepare more easily when we find a mixture that works really well.
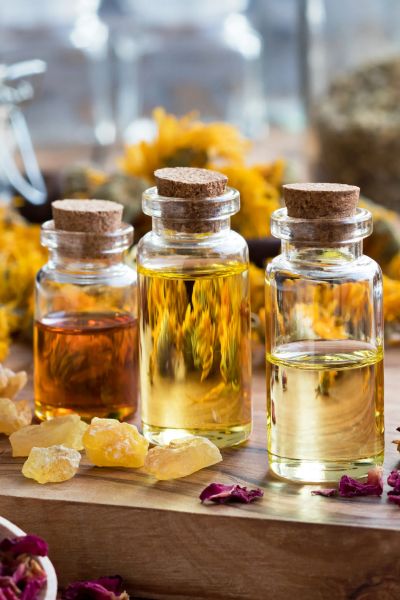
We will need:
1 part yarrow
1 part marigold flowers
1 part St. John’s wort (fresh is ideal, but dried can be used)
1 part willow bark, optional.
1/4 part cayenne pepper or ginger pepper
PROCEDURE:
Put roughly equal amounts of yarrow, calendula and St. John’s wort in a glass jar and then add a smaller amount of cayenne pepper or ginger.
If willow bark is available, it would also be interesting to add some willow bark for its salicylic acid content.
As you know, it is usually better to use dried herbs in our cosmetic products and preparations because this avoids moulds. However, with hypericum we can make an exception if we have it fresh because it provides better properties.
Pour “stable witch hazel water” (i.e. one part alcohol) over the herbs until covered and leave to infuse for 2 to 3 weeks. Strain and re-bottle, this time in a permanent glass container.
USE: Apply it a couple of times a day to activate circulation and prevent tired legs, as well as muscular pains, strains and stiffness.
If it is to treat varicose veins, it should always be rubbed in the direction of the heart to help tighten and tone varicose veins and improve blood flow.

As we mentioned earlier, in Europe, we have traditionally used tinctures and macerated oils (oleates) in the preparation of our homemade herbal liniments. We have taken this last section from the blog of naturopath Fátima Solé.
Our preparations have also been traditionally used to relieve all kinds of pain and discomfort, such as muscular pain, menstrual pain, arthritis, lumbago, sciatica, tendinitis…
They are also applied in the form of external frictions as they are absorbed quickly, like Anglo-Saxon liniments, facilitating the action of their components.
The plants used are usually more closely connected to our European and Mediterranean environment, and include dried plants such as rosemary, hypericum, as well as the exotic ginger, cayenne, arnica, comfrey root, juniper berries and marigold. A “hot” spice such as cayenne, ginger or cinnamon is also often included in the preparation to enhance its action.
And in the preparation, the alcohol macerate and the oil macerate are mixed in equal parts. In other words, for one part tincture, one part oil.
They can be simple macerates of a single plant, such as rosemary alcohol and arnica oil; or macerates composed of several plants, for example, mixing cayenne tincture and rosemary tincture together with hypericum oil and arnica oil. The important thing is that at the end half of the preparation is alcohol and half is oil.
These preparations are also left to infuse in closed, dark glass containers away from heat sources for a few weeks before they can be used.
Optionally, essential oils can be added, but in this case we must be more careful when using our liniment on children or pregnant women because they may find it excessively aggressive. In any case, in order for the addition of essential oils to be effective, only use 100% pure essential oils, preferably organic and extracted by steam distillation, always avoiding dermocaustic EOs such as cinnamon, oregano, savory, some species of thyme and eucalyptus, etc., and they should always be added with caution and in very low doses.
Among the essential oils that can be used in our homemade liniments, we have those of : clove, cinnamon, mint, rosemary, eucalyptus, lavender, basil, tarragon, helichrysum, pine, balsam fir, laurel, wintergreen, katafray…
USE: Shake the liniment well before use. Apply with a gentle massage, never on areas where the skin is irritated or there are wounds. Temporary reddening of the skin may occur, this is normal due to the action of the ingredients. Special care should be taken with liniments containing cayenne or strong essential oils such as cinnamon, and do not touch the eyes after handling.
Nature’s Medicine Chest, Reader’s Digest, 1997.
Aromatherapy, The Art of Healing with Essential Oils, Dominique Baudoux, Editions Amyris, 2008.
Dermatological diseases are now one of the main reasons for consultation in primary care, which is indicative of the prevalence of these conditions among the population in developed countries.
Some of the most common skin diseases are:
Acne: A common disease that causes pimples.
Psoriasis: This condition causes itchy or painful patches of red, inflamed skin with silvery scales.
Dermatitis: also called eczema, encompasses several different types of skin rash. Most types cause dry, itchy skin.
Anything that inflames, clogs, or irritates the skin can cause symptoms such as redness, swelling, burning or itching.
https://www.ncbi.nlm.nih.gov/pmc/articles/PMC3535073/
Our skin is a kind of ecosystem made up of living biological and physical components that occupy diverse habitats. Disturbances in the balance on either side of the equation can lead to skin disorders or infections. In the past, poor hygiene has led to a number of skin diseases such as leprosy, smallpox, plague, and even today in Latin America, Chagas disease. And sometimes still some forms of herpes, pool fungus or molluscs.
Nowadays, however, the equation is shifting more towards excessive hygiene or the use of overly aggressive soaps and cosmetic products that disrupt the natural balance of our skin’s bacterial barrier. This is leading to a completely different type of skin ailments.
Interestingly, the common element in most skin diseases in industrialised countries has to do with the regulation of the skin’s sebum. In the case of acne, there is an overproduction of sebum coupled with poor detoxification by the body or insufficient elimination of toxic waste through the body’s natural pathways. In these cases, the skin would not be adequately fulfilling its function of eliminating waste in the form of salts through sweat or through the sebum secreted by the sweat and sebaceous glands, although deficient elimination through the kidneys (urine) or liver (bile) could also be involved. In the case of dermatitis, the problem of sebum regulation is often rather the opposite, with deficient elimination of toxic substances. And this internal problem of purification and regulation of the skin’s sebum is dramatically aggravated by inflammation, swelling and scaling in the case of psoriasis.
Therefore, to return to the subject at hand, atopic skin or skin affected by eczema generally has a problem of skin sebum regulation combined with deficient internal detoxification.
For this reason, in order to treat them, it is very important to intervene on three different fronts:
If you suffer from dermatitis or, more complicated still, psoriasis, have you thought about the option of stonewashing like jeans?
No, we’re not kidding. We want you to know that recipes for mild soaps and gels may be necessary when we come back from the gym after working up a sweat. But, let’s face it, are we really that dirty when we shower every morning?
Hasn’t it occurred to you that a little hot water and a couple of “hygienic” stones, which I’ll tell you about next, might be enough to keep you clean during a 20-degree spring day?
And, best of all, without the need to use harsh soaps that alter our natural skin barrier and aggravate our dermatitis problems.
Himalayan salt stone: We recommend it especially between the toes to avoid fungal problems and blisters as this salt stone has the ability to purify and harden the skin of the feet. It can also be used on any other area we feel we need to cleanse.
Natural alum stone: It is especially recommended to use it every morning in the shower in the underarm area. If you follow this ritual, you will probably not need any other type of external deodorant, unless you go on a trip to the African savannah and sweat like a bull.

And after your daily shower, there is nothing better than using a moisturising body oil in a spray bottle.
Immediately after getting out of the shower, and before drying off, we apply the oil which, as we are still wet, spreads very easily. In addition, the oils do not need preservatives, just a few drops of vitamin E to prevent them from going rancid. And if we use jojoba oil, not even that, because this oil practically does not go rancid.

Making a homemade after-shower body lotion is much more complicated because, due to the high-water content of a body lotion, it is necessary to use strong preservatives, and this always complicates tolerance in the case of atopic skin.
If you want to make a body lotion, it is advisable to use only hypoallergenic preservatives such as Leucidal, GSE (grapefruit seed extract) or potassium sorbate. There is talk of a new broad-spectrum hypoallergenic preservative, as the ones mentioned above are not as effective as Cosgard, Geogard, Rokonsal, etc., but personally we have not yet tried it.
It would be DERMOSOFT 1388 eco, whose INCI: Glycerine, Aqua, Sodium Levulinate, Sodium Anisate… details a natural origin as the mixture of levulinic acid and anisic acid is obtained by fermentation.
In any case, it is possible to make very good light creams that can be applied indiscriminately all over the body and that can be preserved without the use of extra synthetic preservation agents. This subject will be developed at length in a future article dedicated to recipes for hypoallergenic creams and soaps. In this post we did not want to include them because we considered that we would exceed the normal length of an article in this category. Therefore, we recommend that you read our next article on hypoallergenic recipes for sensitive skin in which we discuss in depth the topic of smart homemade formulations to treat this skin type.
Arguably, today, with the urgency of climate change and the importance of implementing eco-friendly and environmentally sustainable solutions, natural cosmetics is becoming an increasingly desirable trend for a wider audience.

In the case of problem skin, as well as being fashionable, it is an absolute necessity. Atopic skins or skins affected by dermatitis are skins with an internal problem of repairing the natural skin barrier and it is important not only to treat them topically with the appropriate creams and products but also the internal use of supplements that contribute to this repair, which we will discuss in the following section.
As far as topical products are concerned, it is very important that we minimise the use of products containing aggressive preservatives or a large amount of essential oils, whose biocidal capacity should not be disregarded. We should also avoid perfumed cosmetics, i.e. fragrances, or the use of active ingredients of chemical origin. With sensitive skin, we can apply the maxim “the more natural the better” one hundred percent.
Avoiding the use of commercial antiperspirant deodorants is also especially important because these skins have a problem of toxic elimination and if we use a deodorant that prevents the natural perspiration of our skin, we will logically find an aggravation of the problems and, probably, greater skin itching and dryness.
In practical terms, simple creams with butters and oils are particularly favourable as they do not contain preservatives or chemical active ingredients.
A universal recipe that will never give you any problems consists of taking 50 grams of shea butter to which we add a little almond oil (about a third) and working it in a bowl with a wooden spoon until both ingredients amalgamate perfectly and we are left with a light paste that we can apply to the driest areas of our face and body.
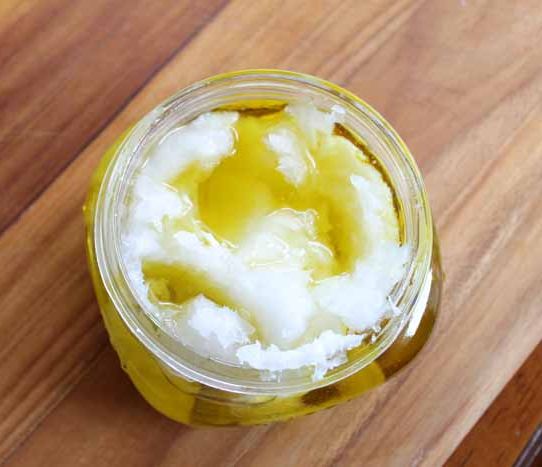
Another idea, perhaps easier to keep out of the fridge, is to melt beeswax and oil and add a little shea butter. In this case, we would take three parts of a cold pressed oil of our choice and a third of the amount of oil in the form of beeswax and shea butter. We would start by melting the wax in a bain-marie, to which we would add the oil and, finally, the third part of shea butter.
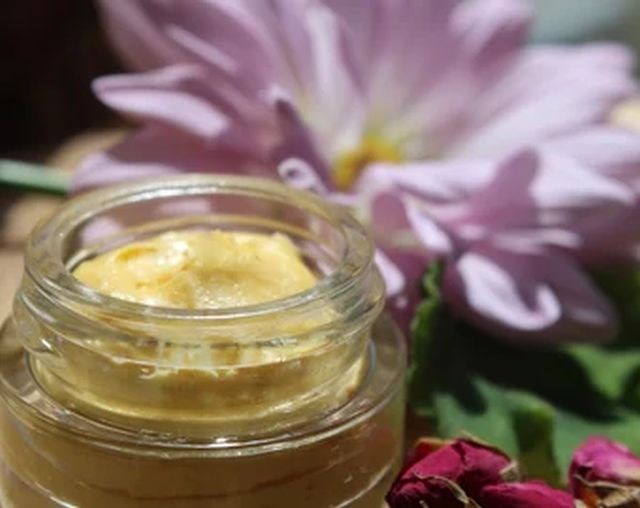
As you will see, shea butter appears in almost every recipe for treating this type of skin, as it is probably the best treatment butter for dry and sensitive skin that we know of.
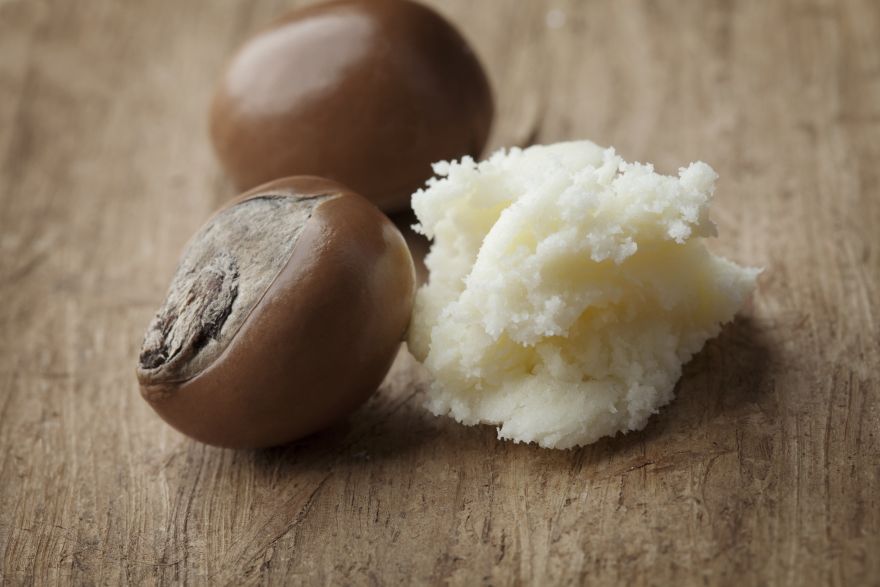
And for body lotion you can use solid cosmetics and make these solid body lotion sticks, which do not need synthetic preservatives and are 100% moisturising.
Ingredients:
For a batch of about 100 grams, we will need:
80 g cocoa butter
20 g cold-pressed sunflower oil (or any other quality oil)
A few drops of vitamin E
And, optionally, if you add a couple of drops of orange EO, they will smell great.
Preparation procedure: Start by melting the cocoa butter in a bain-marie and, when it is melted, add the sunflower oil and integrate it with the butter. Remove from the heat and add the vitamin E and then you can mould it. Remember that you will need silicone moulds to pour the mixture once it has melted.
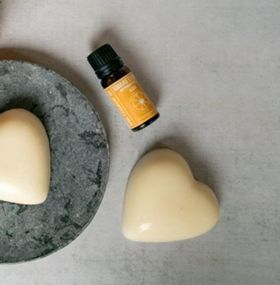
And if we want to make a cream with an aqueous phase, given that they are especially moisturising, we will try to prepare small quantities to avoid the use of preservatives or we will make intelligent cosmetic formulations with minimally aggressive preservatives such as natural Leucidal or Grapefruit Seed Extract. As mentioned above, we will expand on these recipes in our next post on hypoallergenic cosmetic recipes.
If we are going to include an essential oil for treatment, we should always remember to use, preferably, a hydrolat that contains the qualities of this essential oil, but in a milder form.
And only a very small amount of the essential oil (a couple of drops are usually enough) because, as we know, essential oils are highly concentrated, and their rule of use can be summed up as follows: “less is more”.
For example, four drops of EO would be more than enough in a 100-gram cream, and in a 50-gram cream, two drops of essential oil would also be enough. It would be more important, for example, to use a desensitising hydrolat such as German chamomile or a regenerating one such as rose geranium in our preparation. Patchouli, cedar or frankincense may also be of interest depending on the type of eczema and skin type.
Neutral, nourishing oils, such as sweet almond oil, tend to work well for all skin types, especially sensitive or atopic skin. And natural, non-deodorised shea butter is possibly the best treatment butter for these skins.
Apricot kernel oil, jojoba oil, evening primrose oil, borage oil or even coconut oil may also be of interest, as well as, of course, hemp oil. Some people claim that black seed oil (nigella sativa) has worked very well for them in treating this type of problem.
In the case of psoriasis, olive, safflower, tamanu or avocado oils seem to be among the preferred oils.
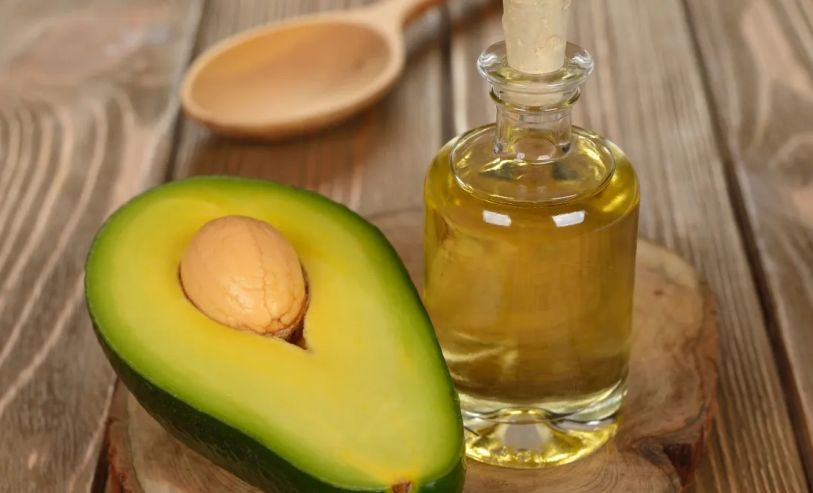
And the additive par excellence for treating this type of skin is cannabidiol for its excellent antioxidant, moisturising and anti-inflammatory benefits. This cannabidiol, extracted from hemp (sometimes grown organically), is suitable for treating dry, oily and problematic skin, as it helps to eliminate skin disorders such as pimples or rashes caused by herpes, repairing and restoring the skin more quickly.
Hemp oil is particularly suitable for oily or acne-prone skin (hemp seed oil is an excellent sebum regulator), according to expert Nuria Tenas Marín, Biotechnological Development Manager at PFC Cosmetics. But it is also recommended for dry and devitalised skin as it strengthens the skin barrier, says the expert:
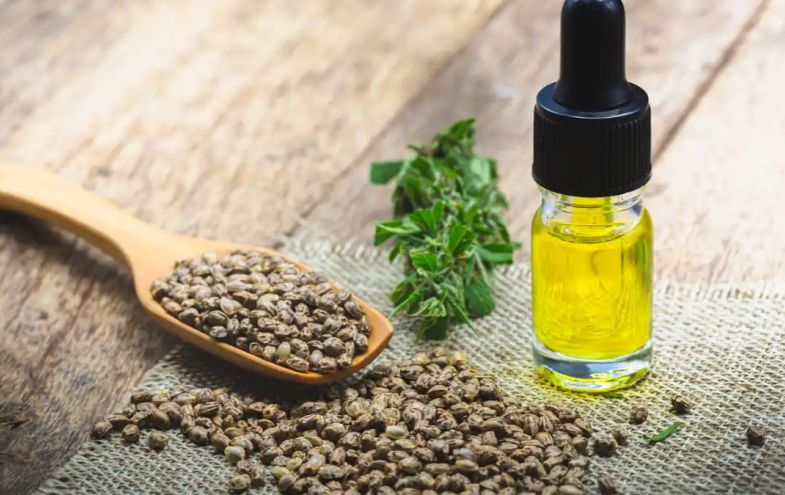
“CBD cosmetics can be suitable for both dry and oily skin, as they contain beneficial properties for both. And in the case of sensitive skin, cosmetics based on cannabis sativa seed extract, being rich in fatty acids (Omega3) and antioxidants such as vitamin E, are able to soothe skin irritations, eczema problems, reduce trans-epidermal water loss, increase hydration and elasticity, and reduce flaking and roughness”.
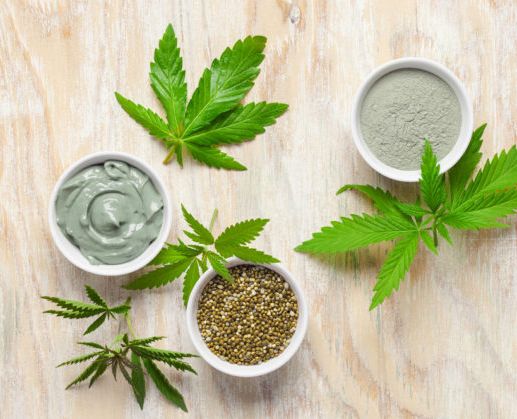
You will tell me that using natural emollient creams and washing with non-aggressive products is enough to keep the problems at bay. But this is not always the case, sometimes the problem can be quite serious. If this is your case, do not hesitate to inform yourself and implement the necessary supplements to improve your quality of life.
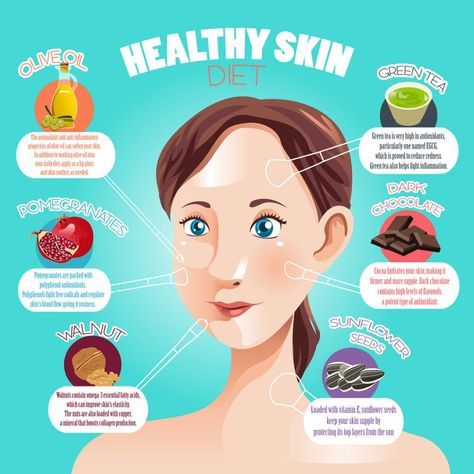
Supplementation begins with eating a diet that is appropriate to our needs. This means that if we have acne, we will avoid saturated fats, and if, on the other hand, as is the subject of this article, our skin is rather dry or sensitive, we will try to provide it with the healthy fats it needs. And, in this sense, when the daily diet is not enough, we can provide ourselves with supplements according to our deficiencies. For example, a very useful supplement for this type of skin is evening primrose and borage capsules which, taken daily, contribute to the internal regulation of our skin’s lipid barrier.
Another problem that dermatitis and atopic skin sufferers often have is the problem of itching and irritation, as this same problem of elimination of toxins and impurities that they suffer from contributes to their hypersensitive reaction to numerous stimuli called allergens. In these cases, we are talking about chronic allergies or an allergic background, as we like to call it, which is the case with eczema, allergic asthma or autoimmune diseases.
These allergens can be anything from plant pollen to pet hair, insect bites, dust or certain types of food. Under normal circumstances, your body would not react to these basically harmless stimuli, but if you have an allergic background, your immune system regards allergens as a threat. The allergic condition revolves around the body’s hypersensitivity to these types of stimuli which, when they occur, trigger the immune system to start acting accordingly and, as a result, the following symptoms may appear: watery eyes, itching, difficulty breathing, skin rashes, sneezing and even nasal congestion…
Conventional treatment of allergy usually consists of antihistamines often combined with corticosteroids. Unfortunately, this type of medication produces high side effects. This explains why science is turning to more natural substances such as cannabidiols (CBD or hemp oil) to treat allergies naturally. The natural support provided by cannabidiol contributes to the quality of life and well-being of people affected by dermatological problems, which is why thousands of patients use various CBD products to support the daily care of their skin conditions.
In addition, internal cannabinoid supplementation has been shown to have not only an anti-allergic effect but also an anti-inflammatory and skin sebum-regulating effect that has alleviated skin problems for many people.
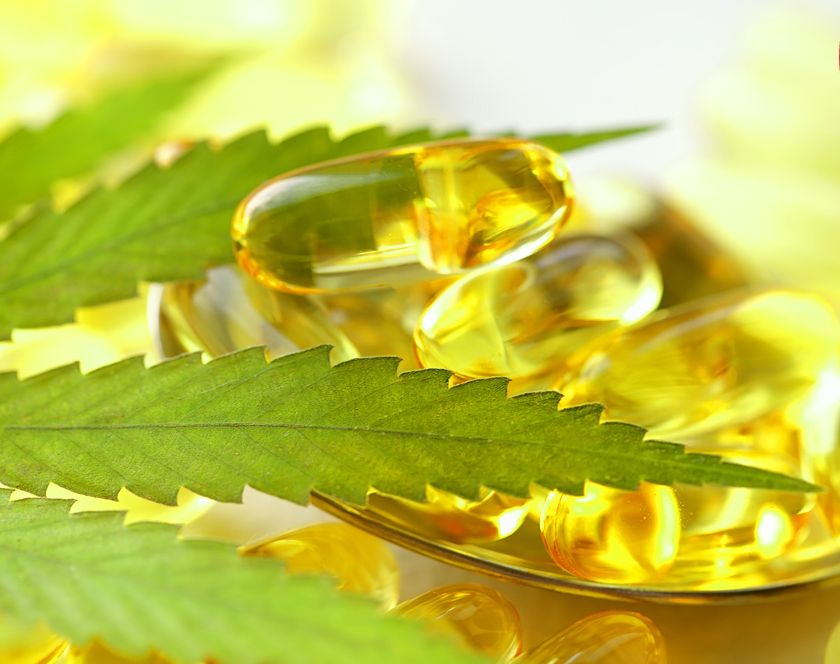
Cannabidiol-based products are offered by a variety of shops and brands. In general, when purchasing a product, it is worth knowing that CBD supplements can be found in the form of the isolated CBD cannabinoid, which tends to be the least interesting; or in the form of full-spectrum CBD, which contains different cannabinoids in small amounts in addition to CBD, making it the most similar type to the cannabis plant. This type of supplement may contain THC, although it will not cause the psychotropic effects of THC (the effect of being high) because it will not exceed 0.3% of the total.
For example: https://nordicoil.es/collections/suplementos-cbd
From the list of supplements offered by this shop, we have found the supplementation of CBD oil, together with a small part of melatonin to improve night-time sleep, to be particularly effective. This type of drops, or suckable tablets, are available in different formats and brands.
Simply put, the use of a lightly ozonated (edible grade) hemp oil has enormous benefits in treating atopic skin and psoriasis.
Healtline reviews the best supplements: https://www.healthline.com/health/best-cbd-capsule
Personally, I also find the daily use of evening primrose and borage capsules, as well as drinking oat milk, which contains mucilage that is very valuable in preventing skin irritation and inflammation, very interesting for the regulation of fatty acids and sebum in the skin. Colloidal oatmeal, apart from being a very interesting complement to our topical creams and masks, in its vegetable milk form, also has a very favourable internal emollient effect on the intestinal mucosa.
Healthline. September 2020. Full-Spectrum vs. Broad-Spectrum CBD: Which One Is Right for You? https://www.healthline.com/health/full-spectrum-vs-broad-spectrum-cbd
MedlinePlus. December 2020. Skin diseases. https://medlineplus.gov/spanish/skinconditions.html
National Library of Medicine. 2006. Cannabinoids inhibit human keratinocyte proliferation through a non-CB1/CB2 mechanism and have a potential therapeutic value in the treatment of psoriasis https://pubmed.ncbi.nlm.nih.gov/17157480/
Canna Foundation. Cannabinoids and Inflammatory Skin Diseases. Eduardo Muñoz, PhD in Medicine and Surgery, Professor of Immunology at the Department of Cell Biology, Physiology and Immunology of the University of Cordoba https://www.fundacion-canna.es/cannabinoides-y-enfermedades-inflamatorias-de-la-piel
We hope this article has been of interest to you.
